MEMS Teardown And Macroscopic Models

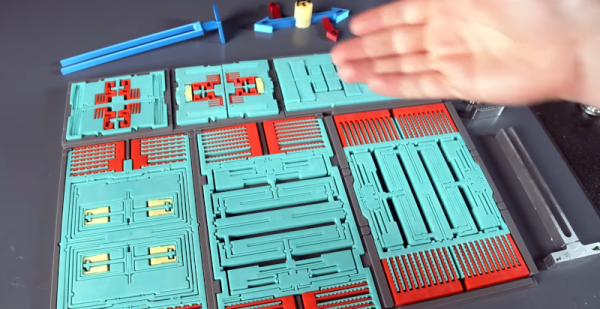
There is a bit of a paradox when it comes to miniaturization. When electronics replaced mechanical devices, it was often the case that the electronic version was smaller. When transistors and, later, ICs, came around, things got smaller still. However, as things shrink to microscopic scales, transistors don’t work well, and you often find — full circle — mechanical devices. [Breaking Taps] has an investigation of a MEMS chip. MEMS is short for Micro Electromechanical Systems, which operate in a decidedly mechanical way. You can see the video, which has some gorgeous electron microscopy, below. The best part, though, is the 3D-printed macroscale mechanisms that let you see how the pieces work.

Decapsulating the MPU-6050 was challenging. We usually mill a cavity on the top of an IC and use fuming nitric on a hot plate (under a fume hood) to remove the remaining epoxy. However, the construction of these chips has two pieces of silicon sandwiched together, so you need to fully expose the die to split them apart, so our usual method might not work so well. Splitting them open, though, damaged parts of the chip, so the video shows a composite of several devices.

Continue reading “MEMS Teardown And Macroscopic Models”

Accessible Arduino Mouse Helps

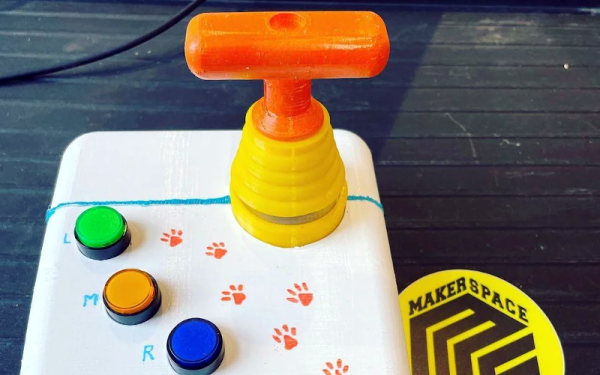
We enjoy access to cheap stuff because of the mass market for things like mice, keyboards, and cell phones. But if you need a device that doesn’t have mass appeal, you will have to pay a lot more if you can find it at all. However, with modern techniques like 3D printing and Arduino-like microcontrollers being cheap and simple to use, you now have the option to build that special one-of-a-kind device. Case in point: [Davy’s] mouse for people who have brain or nervous system disorders. This particular device is helping a 6-year-old who can’t manipulate a normal mouse.

The device uses an Arduino Pro and an MPU-6050 accelerometer and gyroscope. The original design uses machined aluminum, but 3D printing should work, too. There’s something wrong with the link to the design files in the post, but it is easy to find the correct link.

Continue reading “Accessible Arduino Mouse Helps”

Quit Hunching Over Your Screen With A Little Robotic Help

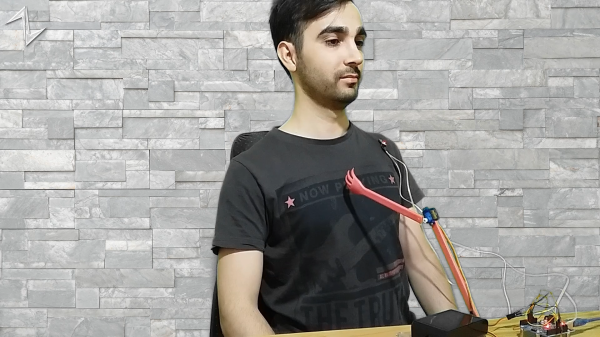
[Norbert Zare] has identified a problem many of us suffer from – chronically bad posture. Its very common to see computer users hunched forwards over a screen, which eventually will lead to back problems. He mentions that most posture correction devices are pretty boring, so the obvious solution to [Norbert] was to build a simple robot to give you a friendly nudge into the correct position.

This simple Arduino-based build uses the ubiquitous MPU-6050 which provides 3-axis acceleration and 3-axis gyro data all processed on-chip, so it can measure where you’re going, which way you are orientated and how fast you are rotating. This is communicated via the I2C bus, so hooking into an Arduino or Raspberry Pi is a simple affair. There are plenty of Open Source libraries to work with this very common device, which helps reduce the learning curve for those unfamiliar with programming a fairly complex device.

At the moment, he is mounting the sensor on his body, and hard-wiring it, so there’s already some scope for improvement there. The operating premise is simple, if the body angle is more than 55 degrees off vertical, move the servos and shove the body back in to the correct position.

The project GitHub has the code needed, and the project page over on Hackaday.io shows the wiring diagram.

We have seen quite a few projects on this subject over the years, like this one that sends you mobile notifications, an ultrasonic rangefinder-based device, and one that even uses a webcam to keep an eye on you. This one has the silliness-factor, and we like that round these parts. Keep an eye on [Norbert] we’re sure there more good stuff to come!

Continue reading “Quit Hunching Over Your Screen With A Little Robotic Help”

Self Balancing Robot Needs A Little Work

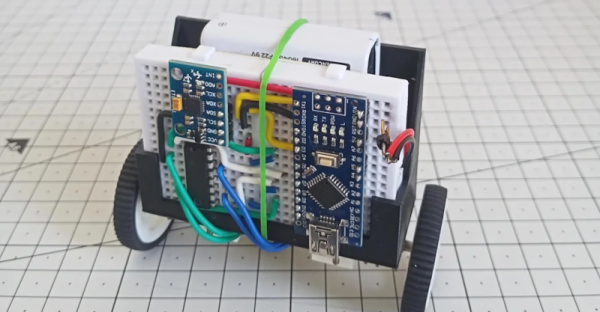
A self-balancing robot isn’t a new idea, but we liked the aesthetics of [Maker ATOM’s] build. The use of a breadboard and a printed bracket looks good, as you can see in the video, below.

Like most first-time projects, though, there were some lessons learned. The power supply needs a little work and the range of balance compliance didn’t meet expectations. But those problems are soluble and, as usual, you often learn more from working through issues like these.

Continue reading “Self Balancing Robot Needs A Little Work”

The Swiss Army Knife Of Bench Tools

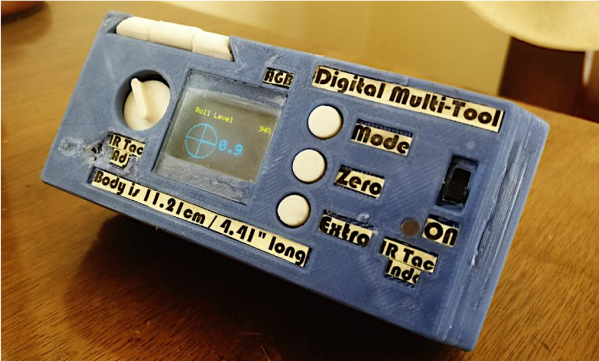
[splat238] had a ton of spare sensors laying around that he had either bought for a separate project or on an impulse buy, so he knew he had to do something with them. He decided to build his own digital multi-tool focusing on sensors that would be particularly useful in a workshop setting. Coincidentally, he was inspired by a previous hack that we covered a while back.

He’s equipped his device with a bubble level, tachometer, IR thermometer, protractor, laser pointer, and many, many more features that would make great additions to any hacker’s workspace. There’s a good summary of each sensor, making his Instructable somewhat of a quick guide to common sensing modalities for hardware designers. The tachometer, thermometer, laser pointer, and a few other capabilities are notable upgrades from the project we highlighted previously. We also appreciate the bigger display, allowing for more detailed user feedback particularly in using the compass and bullseye digital level among other features.

The number of components in [splat238’s] build is too extensive to detail one-by-one in this article, so please see his Instructable linked above for all the details. [splat238] made his own PCB for mounting each sensor and did a good job making the design modular so you wouldn’t need to add certain components if you don’t need them. Most of the components take some through-hole soldering with only a handful of 0805 resistors required otherwise. The housing was designed such that the user can handle the tool with one hand and can switch between each function with a push of a button.

Finally, the device is powered using a rechargeable lithium-polymer battery making it very reusable. And, if there weren’t enough features already, the battery can be charged via USB or through two solar panels mounted into the housing unit. Okay, solar charging might be a case of featuritis, but still a cool build either way.

Check out some other handy DIY tools on Hackaday.

Continue reading “The Swiss Army Knife Of Bench Tools”

Travel Globe Spins You Around Memory Lane

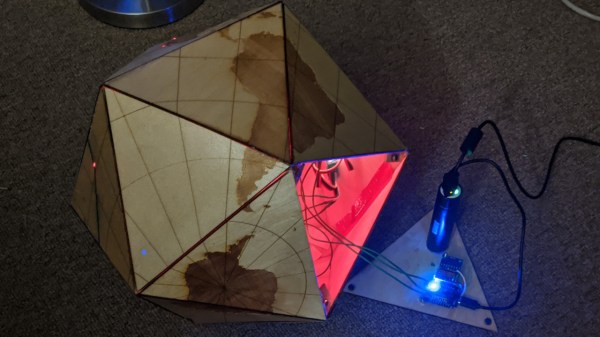
We all have our own preferences when it comes to travel souvenirs — that little something that brings back the memories and feelings of a past holiday every time we look at it, whether it’s the cliché fridge magnet, some local speciality, or just the collection of photos we took. But then there are those journeys that can’t be summarized into a single item and may require a bit more creativity. For [Jonathan], it was last year’s trip around the world that took him and [Maria] to locations all over Europe, Asia, and Oceania, and he found a great way to remember it: an interactive, laser-cut travel globe displaying all the places they went to.

Building a sphere is of course a bit tricky with a laser cutter, so [Jonathan] went for the icosahedron shaped Dymaxion map projection (think of a large d20 dice) and burnt the world onto it. Inside the globe is an ESP8266, an MPU-6050 IMU, and a bunch of LEDs to light up the travel locations using the WLED library. Taking the data from the IMU, he customized the WLED library to determine which way the globe is positioned, and highlights the top-facing location in a different color.

While that would already make a nice souvenir on its own, [Jonathan] didn’t stop here. Using Google’s My Maps service, which lets you create custom maps with own points of interest and have for example photos attached to them, the ESP8266 hosts the travel map also as a web page. Feeding the IMU data to the JavaScript code that’s handling the map API, the globe itself now doubles as an input device to control the virtual map. So whenever the globe is physically rotated to highlight a certain location, the web page’s map is focused to that same location and shows randomly the pictures they have taken there. Check out the video below to see it all in action.

This is a great way to reminisce about a memorable journey even years down the road, and while it may not be flexible to extend, it seems like the kind of trip that deserves a standalone device anyway. Plus, the Dymaxion map is definitely an interesting projection — so here’a a foldable one, just because. And If you like tracking things on a globe, here’s one that shows the location of the ISS.

Continue reading “Travel Globe Spins You Around Memory Lane”

Stecchino Game Is All About Balancing A Big Toothpick

Stecchino demo by the creator

Self-described “Inventor Dad” [pepelepoisson]’s project is called Stecchino (English translation link here) and it’s an Arduino-based physical balancing game that aims to be intuitive to use and play for all ages. Using the Stecchino (‘toothpick’ in Italian) consists of balancing the device on your hand and trying to keep it upright for as long as possible. The LED strip fills up as time passes, and it keeps records of high scores. It was specifically designed to be instantly understood and simple to use by people of all ages, and we think it has succeeded in this brilliantly.

To sense orientation and movement, Stecchino uses an MPU-6050 gyro and accelerometer board. An RGB LED strip gives feedback, and it includes a small li-po cell and charger board for easy recharging via USB. The enclosure is made from a few layers of laser-cut and laser-engraved material that also holds the components in place. The WS2828B WS2812B LED strip used is technically a 5 V unit, but [pepelepoisson] found that feeding them direct from the 3.7 V cell works just fine; it’s not until the cell drops to about three volts that things start to glitch out. All source code and design files are on GitHub.

Games are great, and the wonderful options available to people today allow for all kinds of interesting experimentation like a blind version of tag, or putting new twists on old classics like testing speed instead of strength.