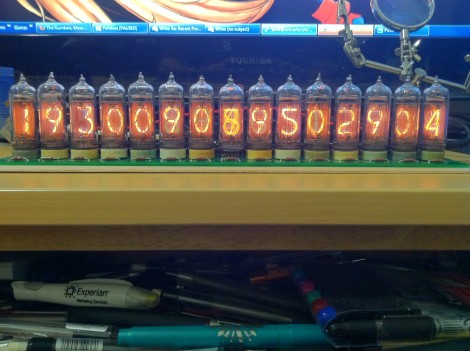
15-digit Nixie Clock Contains Mostly Non-useful Information

[Jarek Lupinski] is at it again, this time building a clock using 15 Nixie tubes. Just look at the time…. wait, how do you read this now? It’s not seconds since the epoch, but an homage to a very expensive New York City art piece. [Jarek] took his inspiration from the Metronome art installation in Union Square.

We hadn’t heard of it before and were shocked to learn that this art was commissioned at $4.2 million. It belches steam and confuses passersby with its cryptic fifteen digits. It seems that the eight digits on the left mark the current time – two digits for hours, two for minutes, two for seconds, and the final digit for hundreths of a second. The seven remaining digits count down the time left in the day. So when you watch it, you see the significant digits of the display increasing, and the insignificant half decreasing.

The Nixie version rests snuggly on a 15″x4″ PCB. We’re sure it doesn’t number in the millions, but that couldn’t have been cheap to have manufactured. Each tube has its own driver chip, removing the need for multiplexing. An ATmega168 controls the clock (along with some shift registers to expand the I/O count), reading time from a DS1307 RTC chip. It looks fancy, but where’s the belching smoke on this version?

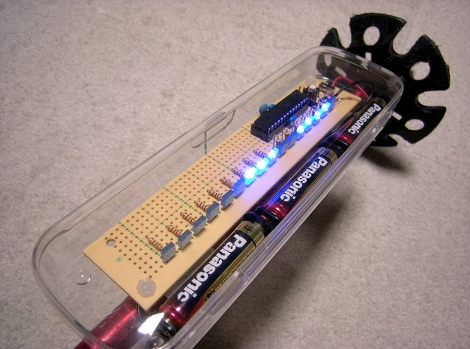
Ski Pole Persistence Of Vision

[Powder4u] wanted to make a persistence of vision display for his bicycle but with 50 cm of snow on the ground it’s hard to get out and ride right now. Instead he made this persistence of vision ski-pole accessory. We asked him to share some details and he obliged. It’s made using an Arduino compatible ATmega168, LEDs with resistors, and installed on some protoboard. The enclosure is a clear pencil case, which isn’t water tight but he’s tried to bolster that with some creative scotch tape placement. There’s no sensor to detect which direction the board is moving in so displaying alpha-numeric messages will have some issues, but as you can see he managed to display image data without issue.

We’re used to night skiing with floodlights along the slopes. This would be a fun little thing to have along with you on those dark lift rides.

Clap To Remove This Brassiere

Like some strange manga come to life, you can remove this brassiere with a clap of your hands. Under the red bow is a not-so-small mechanical clasp that replaces the original on the strapless front-clasping undergarment. We hate to criticize, but [Randofo] really went off the deep end of hardware overkill on this project. The clasp itself is the electromagnetic coil removed from the case of a mechanical relay. An ATmega168 listens for a spike in sound pressure from a microphone, then drives the relay to release the feminine support system.

It is Valentine’s day. The question being is this romantic or sleazy? Watch the NSFW video after the break and let us know your opinion in the comments.

Continue reading “Clap To Remove This Brassiere”

Fermentation Temperature Control

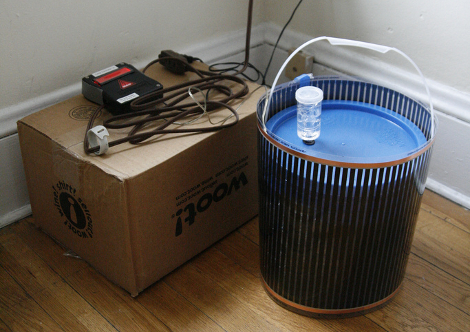
[Eric Friedrich] needed to keep the wort warm enough for yeast to ferment it into beer. To solve the problem he built his own fermentation temperature controler using a microprocessor to turn some heating tape on and off. You can see the heating element embracing that diminutive fermentation bucket in the picture above. This was originally meant for keeping reptile cages warm. It costs less than similar products meant just for brewing and works well for [Eric]. A DS1820 temperature sensor gives feedback to an ATmega168 which then uses a relay to switch the heat on and off. The target temperature can be changed using a potentiometer on the board, with the setting displayed on a character LCD screen on the project enclosure.

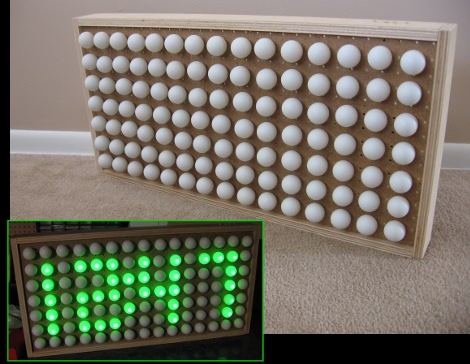
How To Build A Ping-pong Ball Display

If you’ve been lusting after your own glowing display we’re here to help by sharing some simple building techniques that will result in an interesting project like the one you see above. This is a super-accurate clock That uses ping-pong balls as diffusers for LEDs, but with a little know-how you can turn this into a full marquee display. Join me after break where I’ll share the details of the project and give you everything you need to know to build your own.

Continue reading “How To Build A Ping-pong Ball Display”

The OpenServo Project

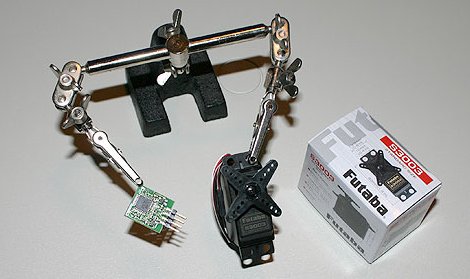
When it comes to using servos in projects, there is a definite distinction between the cheap ones and the expensive high power and precision models. The OpenServo project gives you a couple options for enhancing your servo experience. By replacing the control board with a new one based on a familiar microcontroller, a whole new set of features can be attained. For those of you out there with a need for servos like these, you can buy the pre-built replacement board (unfortunately sold out right now), or build your own from the provided schematic, BOM, and source code.

Magnetic Digital Scale

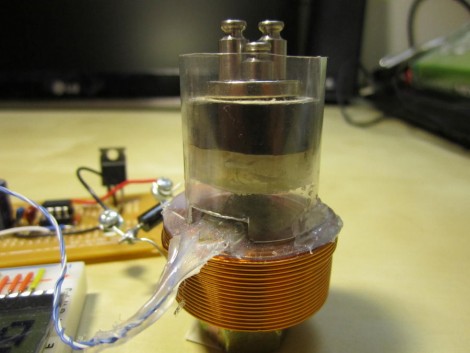
Above you see a solenoid being used as a digital scale. The magnetic field from the coil in the base levitates the platform above, where a load to be measured is place. This floating platform has a permanent magnet in it, hovering above a hall effect sensor in the base. As the distance between that magnet and the sensor changes, the measurable magnetic field changes as well. The hall effect sensor is linear so the measured value can easily be correlated with a weight. In the video after the break [Vsergeev] demonstrates the device using test weights to show off its 0.5 gram resolution. He thinks that with a few hardware improvements he could easily achieve 0.1g accuracy.

Continue reading “Magnetic Digital Scale”