It may be nearly 40 years old, but the Atari 5200 still inspires legions of fans to relive the 8-bit glory days of their youth. There was much to love about the game console, but the joystick-and-keypad controllers were not among its many charms. The joystick didn’t auto-center, the buttons were mushy, and the ergonomics were nonexistent.
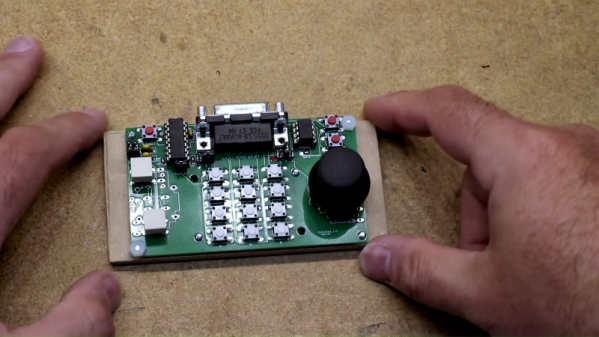
Retro-aficionados need not suffer in silence, though, thanks to this replacement controller for the Atari 5200. [Scott Baker] didn’t want to settle for one of the commercial replacements or, horrors, an adapter for the old PC-style joystick, so he rolled his own. Working from the original Atari schematics, [Scott] devised a plan for using a readily available thumbstick controller as the basis for his build. The essential problem was how to adapt the 10k pots on the new joystick to work in an environment expecting 500k pots, which he solved using an analog to digital and back to analog approach. The ADCs on an ATtiny85 convert each joystick pot’s voltage to a digital value between 0 and 255, which is sent to a 100K digital potentiometer. A little fiddling with RC constants brings it back in line with what the console expects. The thumbstick and buttons live on a custom PCB – kudos to [Scott] for designing an ambidextrous board. The video below shows the design and the finished product in action.
[Scott] is on a bit of a 5200 kick these days; he just finished up a Raspberry Pi multi-cartridge for the venerable console. His controller should make retro-gameplay on the console a little easier on the hands.
Continue reading “Thumbs Up For This Custom Atari 5200 Controller”