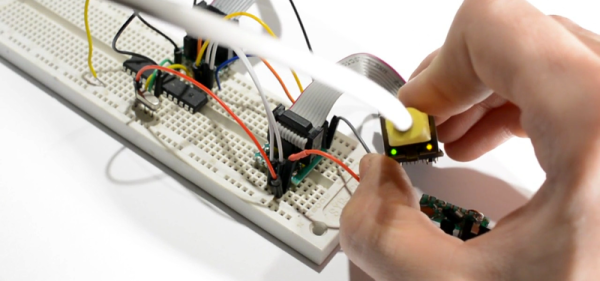
Boot Your Pi Over USB

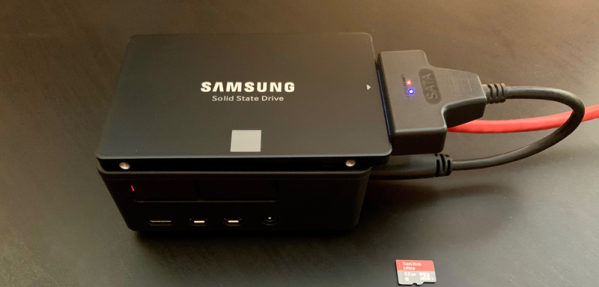
Historically, booting a Raspberry Pi required an SD card. However, if you follow [tynick’s] instructions, you can get a Pi 4 to boot from the USB port. Combine it with a small solid state disk drive, and you’ll get great performance, according to his post.

The caveat is this depends on a beta bootloader and, of course, you’ll still have to boot from an SD card at least once to load that bootloader. If you were deploying something serious, you’d probably want to make sure the bootloader is suitable for your needs.

Continue reading “Boot Your Pi Over USB”

Analog Failures On RF Product Cause Production Surprise

A factory is a machine. It takes a fixed set of inputs – circuit boards, plastic enclosures, optimism – and produces a fixed set of outputs in the form of assembled products. Sometimes it is comprised of real machines (see any recent video of a Tesla assembly line) but more often it’s a mixture of mechanical machines and meaty humans working together. Regardless of the exact balance the factory machine is conceived of by a production engineer and goes through the same design, iteration, polish cycle that the rest of the product does (in this sense product development is somewhat fractal). Last year [Michael Ossmann] had a surprise production problem which is both a chilling tale of a nasty hardware bug and a great reminder of how fragile manufacturing can be. It’s a natural fit for this year’s theme of going to production.

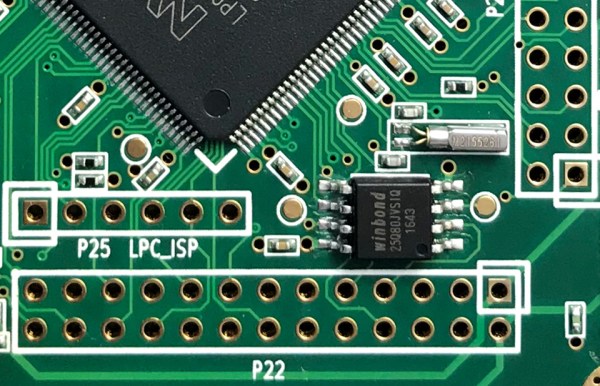
Surprise VCC glitching causing CPU reset

The saga begins with [Michael] receiving an urgent message from the factory that an existing product which had been in production for years was failing at such a high rate that they had stopped the production line. There are few worse notes to get from a factory! The issue was apparently “failure to program” and Great Scott Gadgets immediately requested samples from their manufacturer to debug. What follows is a carefully described and very educational debug session from hell, involving reverse engineering ROMs, probing errant voltage rails, and large sample sizes. [Michael] doesn’t give us a sense for how long it took to isolate but given how minute the root cause was we’d bet that it was a long, long time.

The post stands alone as an exemplar for debugging nasty hardware glitches, but we’d like to call attention to the second root cause buried near the end of the post. What stopped the manufacturer wasn’t the hardware problem so much as a process issue which had been exposed. It turned out the bug had always been reproducible in about 3% of units but the factory had never mentioned it. Why? We’d suspect that [Michael]’s guess is correct. The operators who happened to perform the failing step had discovered a workaround years ago and transparently smoothed the failure over. Then there was a staff change and the new operator started flagging the failure instead of fixing it. Arguably this is what should have been happening the entire time, but in this one tiny corner of the process the manufacturing process had been slightly deviated from. For a little more color check out episode #440.2 of the Amp Hour to hear [Chris Gammell] talk about it with [Michael]. It’s a good reminder that a product is only as reliable as the process that builds it, and that process isn’t always as reliable as it seems.

Arduino Leonardo Gets A Lockable Bootloader

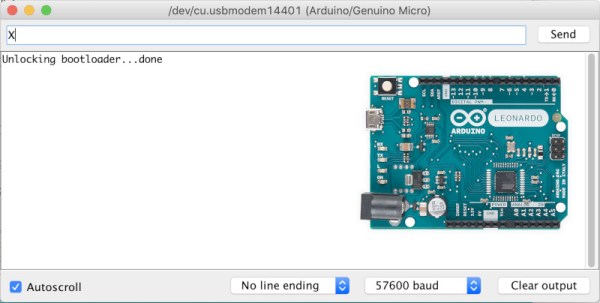
Security is something that’s far too often overlooked in embedded devices. One of the main risks is that if the device doesn’t verify the authenticity of incoming firmware updates. [Walter Schreppers] was working on a USB password storage device, so security was paramount. Thus, it was necessary to develop a secure bootloader.

[Walter]’s device was based upon the Arduino Leonardo. Starting with the Caterina bootloader, modifications were made to enable the device to be locked and unlocked for programming. This can be done in a variety of ways, depending on how things are setup. Unlocking can be by using a secret serial string, an onboard jumper, and [Walter] even suspects a SHA1 challenge/response could be used if you were so inclined.

It’s never too soon to start thinking about security in your projects. After all, we must stave off the cyberpunk future in which leather-clad youths flick all your lights on and off before burning your house down in the night by overclocking the water heater. Naturally, we’ve got a primer to get you going in the right direction. Happy hacking!

Show Your Skills With A Bootable CV

It’s a thankless task, searching for a job. You send off your CV, or resume, and it joins a thousand other destined for the round file. What on earth can you do to make your career stand out, and catch the eye of the recruiter?

Your bootable CV isn't eye-catching if the recruiter uses GitHub to view the PDF.
Your bootable CV isn’t eye-catching if the recruiter uses GitHub to view the PDF.

If you are [Pablo Jiménez Mateo], the answer is straightforward enough. Simply combine the document as a PDF with an x86 bootloader, to make a readable document that will also boot an x86 computer system. He can do this relatively easily by prepending the bootloader file to the PDF, as long as the “%PDF” header of the CV remains within the first 1024 bytes it will remain a readable document. Which it does, though as our GitHub screenshot shows, not in all PDF readers.

A bootable PDF is pretty cool and we have to salute his effort in getting it in front of us in the hope of  career boost, but it would be fair to admit that it’s a trick that has been done before. So it’s time to turn attention to the bootloader itself, whose code comes in the form of an extremely well-commented assembly file that loads some sprites and a border to a VGA screen that looks as though it might be the first room in a top-down adventure game. Through the code we can gain an appreciation of just how simple a bootloader can be, and that in itself makes this project worth a second look.

If writing your own bootloader interests you, that’s certainly a subject we’ve covered in the past. It’s possible to make bootable images very small indeed, even down to fitting in a Tweet.

Want To Learn Ethernet? Write Your Own Darn AVR Bootloader!

There’s a school of thought that says that to fully understand something, you need to build it yourself. OK, we’re not sure it’s really a school of thought, but that describes a heck of a lot of projects around these parts.

[Tim] aka [mitxela] wrote kiloboot partly because he wanted an Ethernet-capable Trivial File Transfer Protocol (TFTP) bootloader for an ATMega-powered project, and partly because he wanted to understand the Internet. See, if you’re writing a bootloader, you’ve got a limited amount of space and no device drivers or libraries of any kind to fall back on, so you’re going to learn your topic of choice the hard way.

[Tim]’s writeup of the odyssey of cramming so much into 1,000 bytes of code is fantastic. While explaining the Internet takes significantly more space than the Ethernet-capable bootloader itself, we’d wager that you’ll enjoy the compressed overview of UDP, IP, TFTP, and AVR bootloader wizardry as much as we did. And yes, at the end of the day, you’ve also got an Internet-flashable Arduino, which is just what the doctor ordered if you’re building a simple wired IoT device and you get tired of running down to the basement to upload new firmware.

Oh, and in case you hadn’t noticed, cramming an Ethernet bootloader into 1 kB is amazing.

Speaking of bootloaders, if you’re building an I2C slave device out of an ATtiny85¸ you’ll want to check out this bootloader that runs on the tiny chip.

I2C Bootloader For ATtiny85 Lets Other Micros Push Firmware Updates

There are a few different ways of getting firmware onto one of AVR’s ATtiny85 microcontrollers, including bootloaders that allow for firmware to be updated without the need to plug the chip into a programmer. However, [casanovg] wasn’t satisfied with those so he sent us a tip letting us know he wrote an I2C bootloader for the ATtiny85 called Timonel. It takes into account a few particulars of the part, such as the fact that it lacks a protected memory area where a bootloader would normally reside, and it doesn’t have a native I2C interface, only the USI (Universal Serial Interface). He’s just released the first functional version for the ATtiny85, but there’s no reason it couldn’t be made to work with the ATtiny45 and ATtiny25 as well.

Timonel is designed for systems where there is a more powerful microcontroller or microprocessor running the show (such as an ESP8266, Arduino, or even a board like a Raspberry Pi.) In designs where the ATtinys are on an I2C bus performing peripheral functions such as running sensors, Timonel allows the firmware for these peripheral MCUs to be updated directly from the I2C bus master. Embedded below is a video demo of [casanovg] sending simple serial commands, showing a successful firmware update of an AVR ATtiny85 over I2C.

Continue reading “I2C Bootloader For ATtiny85 Lets Other Micros Push Firmware Updates”

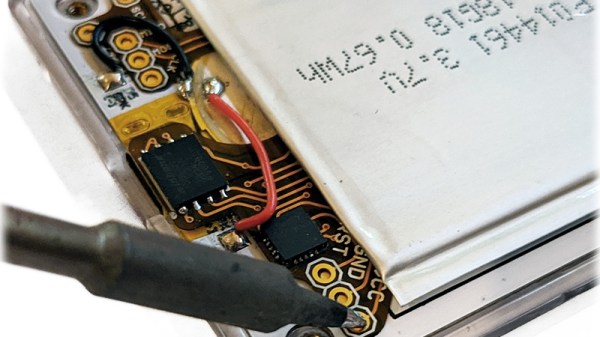
SMART Response XE Gets Wireless Bootloader

A few months back we first brought word of the progress being made in unlocking the SMART Response XE, an ATmega128RFA powered handheld computer that allowed teachers to create an interactive curriculum in the days before all the kids got Chromebooks. Featuring 2.4 Ghz wireless communication, a 384×160 LCD, and a full QWERTY keyboard, schools paid around $100 each for them 2010. Now selling for as little as $5 on eBay, these Arduino-compatible devices only need a little coaxing and an external programmer to get your own code running.

The previous post inspired [Larry Bank] to try his hand at hacking the SMART Response XE, and so far he’s made some very impressive progress. Not only has he come up with his own support library, but he’s also created a way to upload Arduino code to the devices through their integrated 802.15.4 radio. With his setup, you no longer need to open the SMART Response XE and attach a programmer, making it much easier to test and deploy software.

[Larry] has written up a very detailed account of his development process, and goes through the trouble of including his ideas that didn’t work. Getting reliable communication between two of these classroom gadgets proved a bit tricky, and it took a bit of circling around until he hit on a protocol that worked.

The trick is that you need to use one SMART Response XE attached to your computer as a “hub” to upload code to other XEs. But given how cheap they are this isn’t that big of a deal, especially considering the boost in productivity it will net you. [Larry] added a 5 x 2 female header to his “hub” XE so he could close the device back up, and also added a physical power switch. In the video after the break, you can see a demonstration of the setup sending a simple program to a nearby XE.

Between this wireless bootloader and the Arduboy compatibility covered previously, we’d suggest you get your SMART Response XE now. We wouldn’t be surprised if the prices of these things start going up like they did with the IM-ME. Continue reading “SMART Response XE Gets Wireless Bootloader”