Open Source Hardware Video Game Music Player

[Aidan Lawrence] likes classic synthesized video game music in the same way that other people “like” breathing and eating. He spent a good deal of 2017 working on a line of devices based on the Yamaha YM2612 used in the Sega Genesis to get his feet wet in the world of gaming synths, and is now ready to take the wraps off his latest and most refined creation.

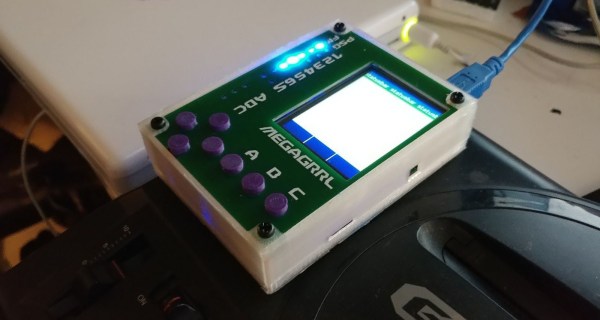
One of his earlier attempts at a hardware VGM player.

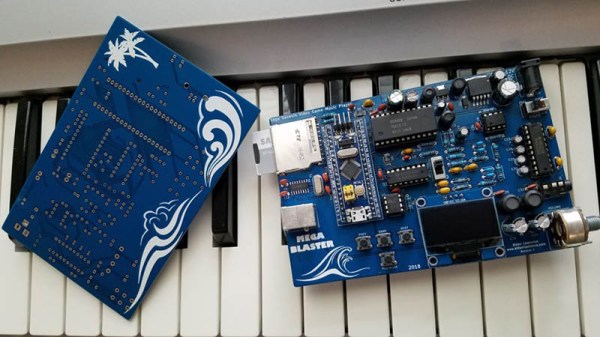
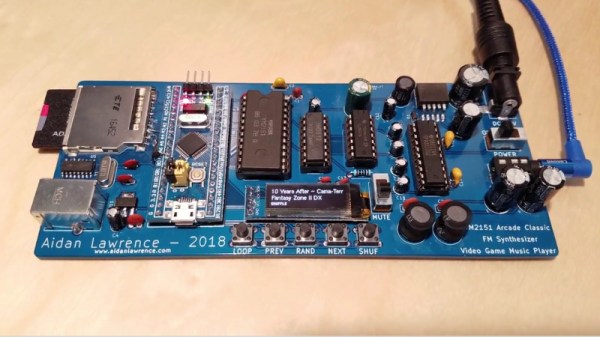
The YM2151 Arcade Classic is an open source hardware player for Video Game Music (VGM) files. It uses no emulation, the files are played on the device’s YM2151 chip in the same way they would have been on a real arcade cabinet at the time of their release. Interestingly, as some arcade machines were exceedingly rare or even scrapped before release, [Aidan] believes that his player may be the first time some of these songs have ever been played (at least in public) on real hardware.

The YM2151 synthesizer is powered by a STM32 “Blue Pill” board, which was selected as much for its capabilities as it was its low cost. The STM32 loads the VGM files from an SD card, and puts track information for the currently playing song on the 128×32 OLED display. A few tactile switches under the screen allow for shuffling through the songs stored on the card, and a slide switch for mute rounds out the simplistic but functional user interface.

In the GitHub repository, [Aidan] has provided the source code, schematics, Bill of Materials, and KiCad-generated Gerber files; everything you need to create your own version of his player. After listening to it rock out for a few minutes in the video after the break, we’re tempted to take him up on that offer.

This player reminds us of a similar design, also using original hardware, that we covered last year. The logical next step for this project would be to flesh out the UI and put it into an enclosure like this SNES chiptune player.

Continue reading “Open Source Hardware Video Game Music Player”

A Passive Mixer’s Adventure Through Product Development

The year was 2014, and KORG’s volca line of pint-sized synthesizers were the latest craze in the music world. Cheap synths and drum machines were suddenly a reality, all in a backpack-friendly form factor. Now practically anyone could become an electronic music sensation!

I attended a jam with friends from my record label, and as was the style at the time, we all showed up with our latest and greatest gear. There was the microKORG, a MiniNova, and a couple of guitars, but all attention was on the volcas, which were just so much fun to pick up and play with.

There was just one problem. Like any game-changing low-cost hardware, sacrifices had been made. The volcas used 3.5mm jacks for audio and sync pulses, and the initial lineup came with a bassline, lead, and drum synth. Syncing was easy, by daisy chaining cables between the boxes, but if you wanted to record or mix, you’d generally need to stack adapters to get your signals in a more typical 6.5mm TS format used by other music hardware.

After mucking around, I did some research on what other people were doing. Most were suffering just like we were, trying to patch these little machines into full-sized mixing desks. It seemed like overkill — when you just want to muck around, it’s a bit much to drag out a 24 channel powered mixer. I wanted a way to hook up 3 of these machines to a single set of headphones and just groove out.

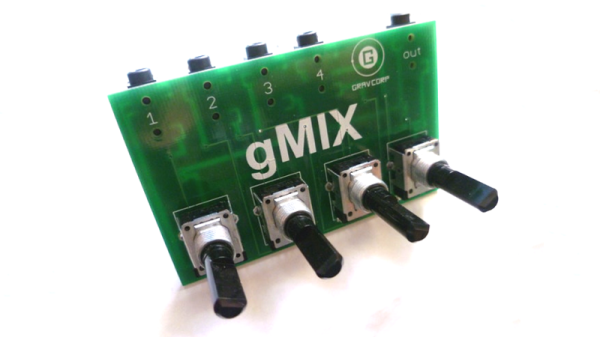
To solve this problem, we needed a mixer to match the philosophy of the volcas; simple, accessible, and compact. It didn’t need to be gold-plated or capable of amazing sonic feats, it just had to take a few 3.5mm audio sources, and mix them down for a pair of headphones.

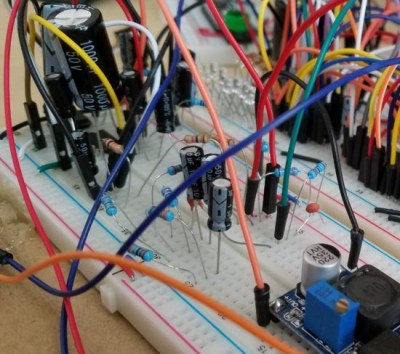
I’d heard of people using headphone splitters with mixed results, and it got me thinking about passive mixing. Suddenly it all seemed so clear — I could probably get away with a bunch of potentiometers and some passives and call it a day! With a friend desperate to get their hands on a solution, I decided to mock up a prototype and took it round to the studio to try out.

Continue reading “A Passive Mixer’s Adventure Through Product Development”

Portable SNES Chiptune Player

Chiptunes are the fantastic, bleeping musical renditions of the soundchips of retro consoles past. Performers of the art overwhelmingly favour the various flavours of Game Boy, though there are those who work with such varied machines as the Commodore 64, Sega Genesis, and the Nintendo Entertainment System. A little more off the beaten track in the chiptune scene is the Super Nintendo, but [kevtris] has struck out and built a chiptune player for SNES-based music.

The heavy lifting is handled by an FPGA, which emulates the SNES’s S-SMP sound processor, and handles loading the music from the SPC-format files. Being chiptunes, these files store both the instrument data as well as the note data for the music. Audio output is clean and crisp, as heard in the test video.

The laser cut case lends the device a great aesthetic.

Case design is where this project really shines. Laser cut clear acrylic is combined with a bright LCD character display and some LEDs which create an effect not unlike a glowing magical block from your 90s platformer of choice. It’s combined with some slick capacitive buttons that avoid the need to drill holes for bulky traditional buttons. [kevtris] goes through the case design, showing how it all fits together with a combination of screws and standoffs. Being built out of a series of essentially 2D slices, the case is stacked up one layer at a time.

What really stands out about this project is the fit and finish. There’s plenty of microcontroller and FPGA projects out there that can hum out a tune, but the attention to detail paid to the case design and the neatly laid out PCB really add polish to a project like this. For a different take, why not check out this chiptune player built around a Raspberry Pi?

[Thanks Morris!]

Multifunction Raspberry Pi Chiptune Player

General Instrument’s AY-3-8910 is a chip associated with video game music and is popular with arcade games and pinball machines. The chip tunes produced by this IC are iconic and are reminiscent of a great era for electronics. [Deater] has done an amazing job at creating a harmony between the old and new with his Raspberry Pi AY-3-8910 project.

[Deater] already showed us an earlier version of the project on a breadboard however after having made some PCBs and an enclosure the result is even more impressive. The system consists of not one but two AY-3-8910 for stereo sound that feed a MAX98306 breakout for amplification. A Raspberry Pi 2 sends six channels worth of data via 74HC595 shift registers driven by SPI. There is a surplus of displays ranging from a matrix to bar graph and even 14-segment displays. The entire PCB is recognized as a hat courtesy an EEPROM which sits alongside a DS1307 RTC breakout board. The enclosure is simple but very effective at showing the internals as well as the PCB art.

The software that [Deater] provides, extends the functionality of the project beyond the chiptunes player. There is a program to use the devices as an alarm clock, CPU meter, electronic organ and even a playable version of Tetris as seen in the demo video below. The blog post is very informative and shows progress in a chronological fashion with pictures of the design at various stages of development. [Deater] provides a full set of instructions as well as the schematic along with code posted on GitHub.

If you have a soft spot for the Arduino you may want to check out the 8-bit version of a chip tune player and if you are craving some old hardware peripheral information, do check out the computer curiosities from the Iron Curtain periodContinue reading “Multifunction Raspberry Pi Chiptune Player”

Talk Like A Game Boy, Sting Like A Beep

Have you ever listened to a song and wondered how they created the robotic-sounding vocals? There’s a huge variety of ways to do so. [scythe1005] decided to take their inspiration from rock history, creating a Game Boy powered talkbox (Japanese, Google Translate recommended for those that don’t speak the language).

Human speech is generated when vibrations from the vocal chords are shaped into intelligible sounds by the motion of the mouth, tongue, and other body parts known as “articulators”. A talkbox creates robotic speech sounds by using the articulators while replacing the vibrations from the vocal chords with alternative source.

A talkbox is a device most typically used with the electric guitar. The signal from the electric guitar is amplified and played through a speaker or transducer connected to a tube that is placed in the user’s mouth. The user then proceeds to mouth the desired words they wish to say, with the vibrations provided by the guitar’s signal instead of the vocal chords. A popular example of this is Peter Frampton’s use of the talkbox in Do You Feel Like We Do.

[scythe1005] used the same basic bones in their design, using a Game Boy to feed sound into a basic audio amplifier kit and a transducer connected to a tube. This gives a very 1980s synth sound to the vocals. It’s a simple build in concept but one we haven’t seen a whole lot of before. Using off-the-shelf modules, you could build something similar in a weekend. Also featured in the video is an ArduinoBoy — a useful way of controlling a Game Boy over MIDI. It’s used here to interface the keyboard to the handheld console. Video below the break.

As we’ve seen before, the Game Boy is an incredibly popular platform for music — chiptune artists regularly modify the device for better sound.

Continue reading “Talk Like A Game Boy, Sting Like A Beep”

Raspberry Pi Chiptune Player Rocks A Sound Chip From The 80’s

Sometimes it’s worth doing something in an inefficient way. For example, it might be worth it in order to learn something new, or just to use a particular part. [Deater] did just that with the Raspberry Pi AY-3-8910 Chiptune Player (with LED visualizers!)

The venerable General Instrument AY-3-8910 series sound chips were common in older hardware like home computers and game consoles as well as sound cards for the Apple II family. They were capable of generating three channels of square waves with various effects. Developers eventually squeezed every little bit of performance out with clever hacks. The Raspberry Pi has more than enough power to do all this in software, but as [Deater] puts it, it’s far more interesting to use an actual AY-3-8910 from the 80’s. Some LED bar graphs and matrices round out the whole system.

All the code for the Raspberry Pi AY-3-8910 chiptune player can be found on [deater]’s github repository for the project. A video of the player banging out some sounds is embedded after the break.

Continue reading “Raspberry Pi Chiptune Player Rocks A Sound Chip From The 80’s”

Recreating Chiptunes In Verilog

The semester is wrapping up at Cornell, and that means it’s time for the final projects from [Bruce Land]’s lab. Every year we see some very cool projects, and this year is no exception. For their project, [Andre] and [Scott] implemented the audio processing unit (APU) of the Nintendo Entertainment System (NES). This is the classic chiptune sound that regaled a generation with 8-bit sounds that aren’t really eight bits, with the help of a 6502 CPU that isn’t really a 6502 CPU.

Unlike the contemporaneous MOS 6581 SID, which is basically an analog synthesizer on a chip, the APU in the NES is extraordinarily spartan. There are two pulse wave channels, a triangle wave channel, a random noise channel, and the very rarely used delta modulation channel (DMC) used to play very low quality audio samples. This is a re-implementation of the NES APU for a university lab; it is very understandable that [Andre] and [Scott] didn’t implement the rarely used DMC.

Everything about the circuitry of the NES is well documented, so [Andre] and [Scott] had a great wiki for their research. At the highest level, the APU runs on a 894kHz clock and controls three channels through dedicated registers. These outputs are fed through a mixer, which the guys scaled and combined into a 16-bit output played through a Wolfson WM8731 audio codec.

After implementing the NES APU, [Andre] and [Scott] added an SD card reader that can read the Nintendo Sound Format – the standard distribution format for NES chiptunes – and emulated a 6502 to control the registers. The result is a relatively simple device that plays NES chiptunes with amazing accuracy. The sound files on the project report sound like the real thing, but this is entirely emulated on modern hardware.