Almost Making A Camera Sensor From Scratch

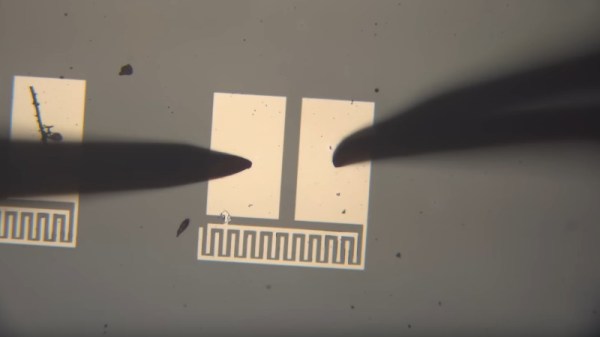
On our travels round the hardware world we’ve encountered more than one group pursuing the goal of making their own silicon integrated circuits, and indeed we’ve seen [Sam Zeloof] producing some of the first practical home-made devices. But silicon is simply one of many different semiconductor materials, and it’s possible to make working semiconductor devices in a less complex lab using some of the others. As an example, [Breaking Taps] has been working with copper (II) oxide, producing photodiodes, and coming within touching distance of a working matrix array.

The video below the break is a comprehensive primer on simple semiconductor production and the challenges of producing copper (II) oxide rather than the lower temperature copper (I) oxide. The devices made have a Schottky junction between the semiconductor and an aluminium conductor, and after some concerns about whether the silicon substrate is part of the circuit and even some spectacular destruction of devices, he has a working photodiode with a satisfying change on the curve tracer when light is applied. The finale is an array of the devices to form a rudimentary camera sensor, but sadly due to alignment issues it’s not quite there  yet. We look forward to seeing it when he solves those problems.

As we’ve seen before, copper oxide isn’t the only semiconductor material outside the silicon envelope.

Continue reading “Almost Making A Camera Sensor From Scratch”

Copper: Rectifying AC A Century Ago

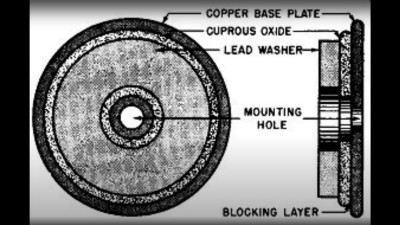
[Robert Murray-Smith] presents for us an interesting electronic device from years gone by, before the advent of Silicon semiconductors, the humble metal oxide rectifier. After the electronic dust had settled following the brutal AC/DC current wars of the late 19th century — involving Edison, Tesla and Westinghouse to name a few of the ringleaders — AC was the eventual winner. But there was a problem. It’s straightforward to step down the high voltage AC from the distribution network to a more manageable level with a transformer, and feed that straight into devices which can consume alternating current such as light bulbs and electrical heaters. But other devices really want DC, and to get that, you need a rectifier.

It turns out, that even in those early days, we had semiconductor devices which could perform this operation, based not upon silicon or germanium, but copper. Copper (I) Oxide is a naturally occurring P-type semiconductor, which can be easily constructed by heating a copper sheet in a flame, and scraping off the outer layer of Copper (II) Oxide leaving the active layer below. Simply making contact to a piece of steel is sufficient to complete the device.
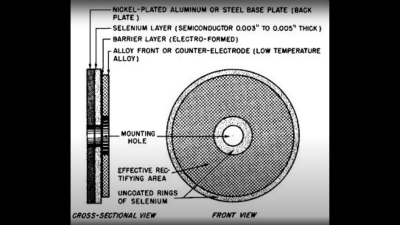
Obviously a practical rectifier is a bit harder to make, with a degree of control required, but you get the idea. A CuO metal rectifier can rectify as well as operate as a thermopile, and even as a solar cell, it’s just been forgotten about once we got all excited about silicon.

Other similar metallic rectifiers also saw some action, such as the Selenium rectifier, based on the properties of a Cadmium Selenide – Selenium interface, which forms an NP junction, albeit one that can’t handle as much power as good old copper. One final device, which was a bit of an improvement upon the original CuO rectifiers, was based upon a stack of Copper Sulphide/Magnesium metal plates, but they came along too late. Once we discovered the wonders of germanium and silicon, it was consigned to the history books before it really saw wide adoption.

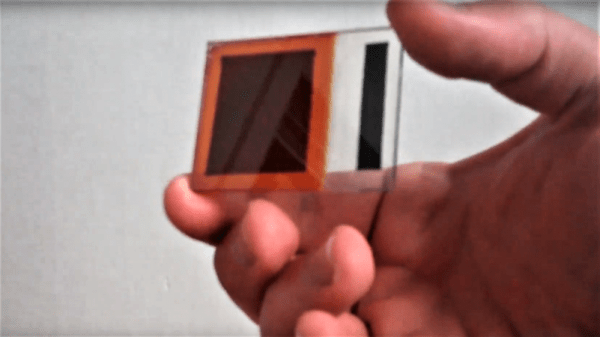
We’ve covered CuO rectifiers before, but the Copper Sulphide/Magnesium rectifier is new to us. And if you’re interested in yet more ways to steer electrons in one direction, checkout our coverage of the history of the diode.

Continue reading “Copper: Rectifying AC A Century Ago”

Cook Up Your Own High-Temperature Superconductors

It looks more like a charcoal briquette than anything, but the black brittle thing at the bottom of [Ben Krasnow]’s crucible is actually a superconducting ceramic that can levitate magnets when it’s sitting in liquid nitrogen. And with [Ben]’s help, you can make some too.

Superconductors that can work at the relatively high temperature of liquid nitrogen instead of ultracold liquid helium are pretty easy to come by commercially, so if you’re looking to just float a few magnets, it would be a lot easier to just hit eBay. But getting there is half the fun, and from the look of the energetic reaction in the video below, [Ben] had some fun with this. The superconductor in question here is a mix of yttrium, barium, and copper oxide that goes by the merciful acronym YBCO.

The easy way to make YBCO involves multiple rounds of pulverizing yttrium oxide, barium chloride carbonate, and copper oxide together and heating them in a furnace. That works, sort of, but [Ben] wanted more, so he performed a pyrophoric reaction instead. By boiling down an aqueous solution of the three components, a thick sludge results that eventually self-ignites in a spectacular way. The YBCO residue is cooked in a kiln with oxygen blowing over it, and the resulting puck has all the magical properties of superconductors. There’s a lot of detail in the video, and the experiments [Ben] does with his YBCO are pretty fascinating too.

Things are always interesting in [Ben Krasnow]’s life, and there seem to be few areas he’s not interested in. Of course we’ve seen his DIY CAT scanner, his ruby laser, and recently, his homemade photochromic glass.

Continue reading “Cook Up Your Own High-Temperature Superconductors”

Home Brew Solar Cells For The Chemically Curious

The idea of making your own semiconductors from scratch would be more attractive if it weren’t for the expensive equipment and noxious chemicals required for silicon fabrication. But simple semiconductors can be cooked up at home without anything fancy, and they can actually yield pretty good results.

Granted, [Simplifier] has been working on the method detailed in the video below for about a year, and a look at his post on copper oxide thin-film solar cells reveals a meticulous approach to optimize everything. He started with regular window glass, heated over a propane burner and sprayed with a tin oxide solution to make it conductive while remaining transparent. The N-type layer was sprayed on next in the form of zinc oxide doped with magnesium. Copper oxide, the P-type layer, was electroplated on next, followed by a quick dip in copper sulfide to act as another transparent conductor. A conductive compound of sodium silicate and graphite was layered on the back to form the electrical contacts. The cell worked pretty well — 525 mV open circuit voltage and 6.5 mA short-circuit current. Not bad for home brewed.

If you want to replicate [Simplifier]’s methods, you’ll find his ample documentation of his site. Of course, if you yearn for DIY silicon semiconductors, there’s a fab for that, too.

Continue reading “Home Brew Solar Cells For The Chemically Curious”

History Of The Diode

The history of the diode is a fun one as it’s rife with accidental discoveries, sometimes having to wait decades for a use for what was found. Two examples of that are our first two topics: thermionic emission and semiconductor diodes. So let’s dive in.

Vacuum Tubes/Thermionic Diodes

Our first accidental discovery was of thermionic emission, which many years later lead to the vacuum tube. Thermionic emission is basically heating a metal, or a coated metal, causing the emission of electrons from its surface.

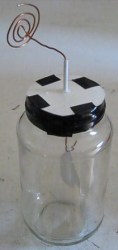
Electroscope
Electroscope

In 1873 Frederick Guthrie had charged his electroscope positively and then brought a piece of white-hot metal near the electroscope’s terminal. The white-hot metal emitted electrons to the terminal, which of course neutralized the electroscope’s positive charge, causing the leafs to come together. A negatively charged electroscope can’t be discharged this way though, since the hot metal emits electrons only, i.e. negative charge. Thus the direction of electron flow was one-way and the earliest diode was born.

Thomas Edison independently discovered this effect in 1880 when trying to work out why the carbon-filaments in his light bulbs were often burning out at their positive-connected ends. In exploring the problem, he created a special evacuated bulb wherein he had a piece of metal connected to the positive end of the circuit and held near the filament. He found that an invisible current flowed from the filament to the metal. For this reason, thermionic emission is sometimes referred to as the Edison effect.

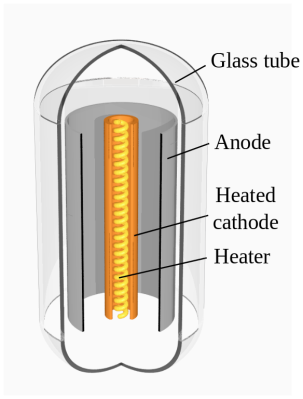
Thermionic diode
Thermionic diode. By Svjo [CC BY-SA 3.0], via Wikimedia Commons
But it took until 1904 for the first practical use of the effect to appear. John Ambrose Fleming had actually consulted for the Edison Electric Light Company from 1881-1891 but was now working for the Marconi Wireless Telegraph Company. In 1901 the company demonstrated the first radio transmission across the Atlantic, the letter “S” in the form or three dots in Morse code. But there was so much difficulty in telling the received signal apart from the background noise, that the result was disputed (and still is). This made Fleming realize that a more sensitive detector than the coherer they’d been using was needed. And so in 1904 he tried an Edison effect bulb. It worked well, rectifying the high frequency oscillations and passing the signals on to a galvanometer. He filed for a patent and the Fleming valve, the two element vacuum tube or thermionic diode, came into being, heralding decades of technological developments in many subsequent types of vacuum tubes.

Vacuum tubes began to be replaced in power supplies in the 1940s by selenium diodes and in the 1960s by semiconductor diodes but are still used today in high power applications. There’s also been a resurgence in their use by audiophiles and recording studios. But that’s only the start of our history.

Continue reading “History Of The Diode”

Copper Oxide Thermoelectric Generator Can Light An LED

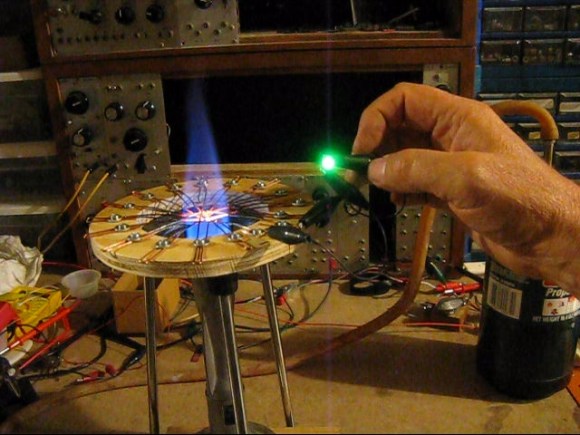
On Hackaday, we usually end up featuring projects using building blocks (components, platforms…) that can be bought on the market. We however don’t show many hacks that rely on basic physics principles like the one shown in the picture above.

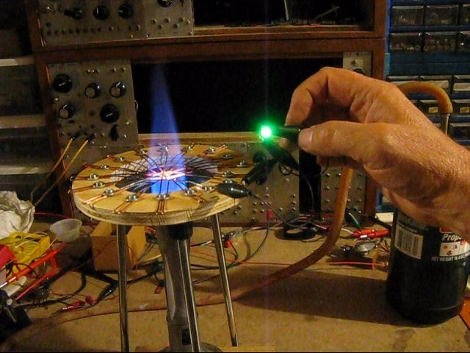
In the video embedded below, [nylesteiner] explains that copper oxide can be formed when heating a copper wire using a propane flame. When two oxidized wires are placed in contact with each other, an electrical current is produced when one wire is heated much hotter than the other. The trade-off is that the created thermocouple generates a small voltage but a ‘high’ current. However, when you cascade 16 junctions in series you can generate enough voltage to light up an LED. Even though the complete system isn’t particularly efficient at converting heat into electricity, the overall result is still quite impressive in our opinion. We advise our readers to give a look at [nylesteiner]’s article and blog to discover his interesting adventures.


Continue reading “Copper Oxide Thermoelectric Generator Can Light An LED”

Light LED’s With FIRE!

Reader [Andre] sent in a link which tells us all about this “cool” Copper Oxide Thermoelectric Generator. All you need is a bit of solid copper wire and a gas torch. Burn the wire so it gets a nice coating of oxide. From there, it is a matter of making the 2 sections of burned wire cross at a point and heat up only one of the wires. Whichever is hotter forms a cathode and whichever one is cooler is the anode.

Just one of these junctions is enough to produce a few hundred millivolts, but the author takes it a step further, well 16 steps further. He made a ring of these junctions in series, which is enough to light a bright blue LED. While the author notes that this thing is producing a considerable amount of voltage, its not producing much amperage. This could come in very handy in the future, like if you need some additional LED lighting for your camp stove.