By all accounts, the ARM architecture should be a forgotten footnote in the history of computing. What began as a custom coprocessor for a computer developed for the BBC could have easily found the same fate as National Semiconductor’s NS32000 series, HP’s PA-RISC series, or Intel’s iAPX series of microprocessors. Despite these humble beginnings, the first ARM processor has found its way into nearly every cell phone on the planet, as well as tablets, set-top boxes, and routers. What made the first ARM processor special? [Ken Shirriff] potsed a bit on the ancestor to the iPhone.
The first ARM processor was inspired by a few research papers at Berkeley and Stanford on Reduced Instruction Set Computing, or RISC. Unlike the Intel 80386 that came out the same year as the ARM1, the ARM would only have a tenth of the number of transistors, used one-twentieth of the power, and only use a handful of instructions. The idea was using a smaller number of instructions would lead to a faster overall processor.
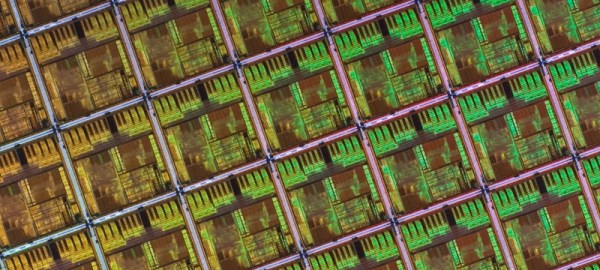
This doesn’t mean that there still isn’t interesting hardware on the first ARM processor; for that you only need to look at this ARM visualization. In terms of silicon area, the largest parts of the ARM1 are the register file and the barrel shifter, each of which have two very important functions in this CPU.
The first ARM chip makes heavy use of registers – all 25 of them, holding 32 bits each. Each bit in a single register consists of two read transistors, one write transistor, and two inverters. This memory cell is repeated 32 times vertically and 25 times horizontally.
The next-largest component of the ARM1 is the barrel shifter. This is just a device that allows binary arguments to be shifted to the left and right, or rotated any amount, up to 31 bits. This barrel shifter is constructed from a 32 by 32 grid of transistors. The gates of these transistors are connected by diagonal control lines, and by activating the right transistor, any argument can be shifted or rotated.
In modern terms, the ARM1 is a fantastically simple chip. For one reason or another, though, this chip would become the grandparent of billions of devices manufactured this year.