Jumbo LEDs Make For A Handy ATtiny Beacon

Inspiration can come from anywhere. Sometimes it’s just a matter of seeing an interesting part that you want to fiddle around with badly enough that you end up developing a whole idea, and potentially product, around it. That’s how [Bobricius] found himself creating this very slick little warning beacon, and looking at the end result, we think he made the right decision.

The Kingbright DLC-6SRD “jumbo” LED is actually six individual emitters built into a plastic diffuser. Interfacing with the device is simple enough; each LED has its normal anode and cathode leg, all you need to do is power them up. What [Bobricius] has created is a simple PCB design that the DLC-6SRD can plug right into, complete with a 2032 coin cell holder on the opposite side.

Of course, just lighting up all six elements at the same time wouldn’t be very interesting. [Bobricius] is controlling them individually right off of the digital pins of an ATtiny10 with the help of some Charlieplexing. This makes all kinds of interesting patterns possible, and as demonstrated in the video after the break, the current iteration of the project uses some very simple code to “rotate” the LED as if it was the flasher on an emergency vehicle.

The addition of a few blinking LEDs can make a world of difference in terms of nighttime visibility, so a cheap stick-on module that adds such a distinctive light pattern could be a very important safety device. It could also be useful for UAVs, following the FAA’s new rules which would mandate anti-collision lights for night flying.

Continue reading “Jumbo LEDs Make For A Handy ATtiny Beacon”

Be Ready To Roll With Universal Electronic Dice

There are applications you can download for your smartphone that can “roll” an arbitrary number of dice with whatever number of sides you could possibly want. It’s faster and easier than throwing physical dice around, and you don’t have to worry about any of them rolling under the couch. No matter how you look at it, it’s really a task better performed by software than hardware. All that being said, there’s something undeniably appealing about the physical aspect of die rolling when playing a game.

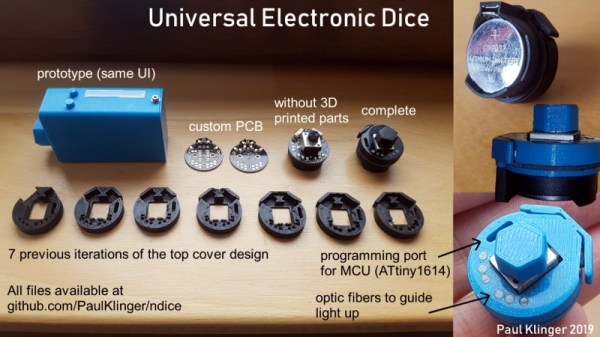
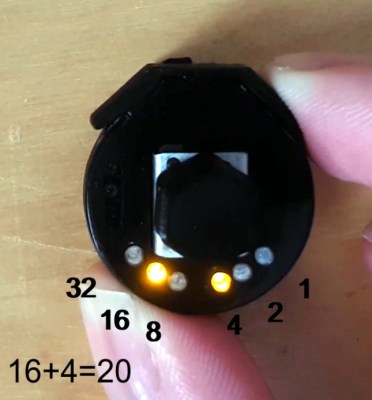
Luckily, [Paul Klinger] thinks he has the solution to the problem. His design combines the flexibility of software number generation with the small form factor of a physical die. The end result is a tiny gadget that can emulate anything from a 2 to 64 sided die with just 6 LEDs while remaining as easy to operate as possible. No need to tap on your smartphone screen with Cheetos-stained hands when you’ve got to make an intelligence check, just squeeze the Universal Electronic Die and off you go. Granted you’ll need to do some binary math in your head, but if you’re the kind of person playing D&D with DIY electronic dice, we think you’ll probably be able to manage.

The 3D printed case that [Paul] came up with for his digital die is very clever, though it did take him awhile to nail it down. As shown in the video after the break, it took seven iterations before he got the various features such as the integrated button “flaps” right. There’s also a printed knob to go on the central potentiometer, to make it easier to select how many sides your virtual die will have.

In terms of the electronics, the design is actually quite simple. All that lives on the custom PCB is a ATtiny1614 microcontroller, the aforementioned LEDs, and a couple of passive components. A CR2032 coin cell powers the whole operation, and it should provide enough juice for plenty of games as it’s only turned on when the user is actively “rolling”.

We’ve seen a number of very impressive electronic dice projects over the years, and it doesn’t look like the trend is slowing down anytime soon. Of course, if you absolutely must hear those physical dice rolling, we can help you with that too.

A Cloned Bluetooth Tracker Meets Its Maker

The holidays bring us many things. Family and friends are a given, as is the grand meal in which we invariably overindulge. It’s a chance for decades old songs and movies to somehow manage to bubble back up to the surface, and occasionally a little goodwill even slips in here or there. But perhaps above all, the holidays are a time for every retailer to stock themselves to the rafters with stuff. Do you need it? No. Do they want it? No. But it’s there on display anyway, and you’re almost certainly going to buy it.

Which is precisely how I came to purchase a two pack of Bluetooth Low Energy (BLE) “trackers” for the princely sum of $10 USD. I didn’t expect much out of them for $5 each, but as this seemed an exceptionally low price for such technology in a brick and mortar store, I couldn’t resist. Plus there was something familiar about the look of the tracker that I couldn’t quite put my finger on while I was still in the store.

That vague feeling of recollection sent me digging through my parts bin as soon as I got home, convinced that I had seen something among the detritus that reminded me of my latest prize. Sure enough, I found a “Cube” Bluetooth tracker which, ironically, I had received as a Christmas gift some years ago. Putting them side by side, it was clear that the design of these “itek” trackers took more than a little inspiration from the better known (and five times as expensive) product.

The Cube was a bit thicker, but otherwise the shape, size, and even button placement on the itek was nearly identical. Reading through their respective manuals, the capabilities also seemed in perfect parity, down to being able to use the button on the device as a remote camera control for your smartphone. Which got me thinking: just how similar would these two devices be internally? Clearly they looked and functioned the same, but would they be built the same as well? They would have to cut costs somewhere.

Determined to find out how a company can put out what for all the world looks like a mirror image of a competitor’s device while undercutting them by such a large margin, I cracked both trackers open to get a bit more familiar with what makes them tick. What I found on closer inspection of these two similar gadgets is perhaps best summarized by that age old cautionary adage: “Don’t judge a book by its cover.”

Continue reading “A Cloned Bluetooth Tracker Meets Its Maker”

Lighting Up A Very Wiry Candle

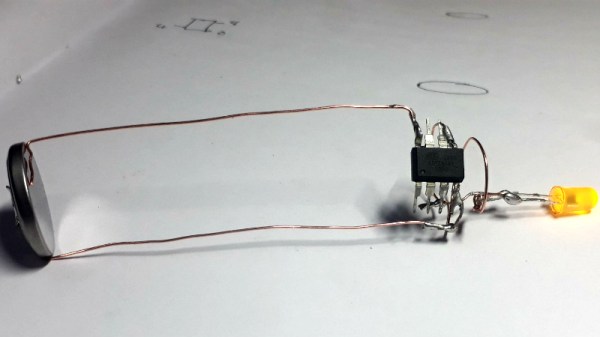
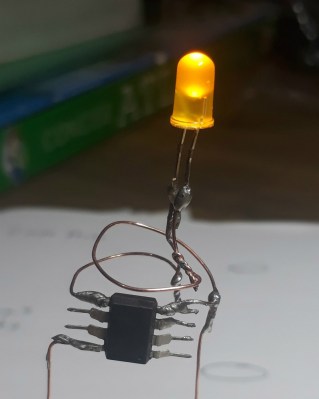
Entries into the Circuit Sculpture Contest tend to be pretty minimalist by nature, and this LED candle by [Amal Mathew] is a perfect example. The idea here was to recreate the slim and uncomplicated nature of a real candle but with a digital twist, and we think he’s pulled it off nicely with a bare minimum part count and exaggerated wire length that gives it the look of a thin pillar candle.

To give the LED a fading effect, [Amal] uses a ATtiny85 programmed with the Arduino IDE. His code uses the analogWrite() in a loop to gradually increase and then decrease the PWM frequency. With the LED connected directly to one of the pins on the ATtiny85, the simple program achieves the fading effect without needing any additional components.

On the opposite side of the candle, connected by long copper wires, is the single CR2032 which provides power for the circuit. In a nice touch, [Amal] has turned the battery 90 degrees relative to the rest of the circuit, so it can serve as a weighted base. We imagine getting it to stand up might be a little fiddly from the looks of it, but once it’s up and merrily fading in and out, it really helps sell the candle idea.

The finished product might look fairly straight-forward, but in his write-up on Hackaday.io, [Amal] gives detailed instructions on how to build your own version if you’re not a bare microcontroller wizard. This includes direction on how to program the ATtiny85 using an Arduino Uno; a neat trick to know even if you aren’t planning on making any candles in the near future. The next logical step is making it so you can “blow out” the LED, which should only take the addition of a resistor and some updated code.

There’s still plenty of time to enter your own functional piece of art in the Circuit Sculpture Contest. Just write it up on Hackaday.io and submit it before the January 8th, 2019 deadline.

Continue reading “Lighting Up A Very Wiry Candle”

Coin Cell Hacks That Won The Coin Cell Challenge

It’s amazing what creative projects show up if you give one simple constraint. In this case, we asked what cool things can be done if powered by one coin cell battery and we had about one hundred answers come back. Today we’re happy to announce the winners of the Coin Cell Challenge.

Continue reading “Coin Cell Hacks That Won The Coin Cell Challenge”

Welding Batteries With Batteries

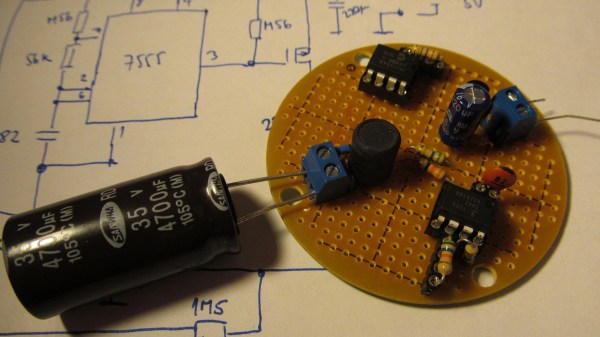
Welding equipment is always expensive and bulky, right? Heavens no! [Jaromir Sukuba] is making a welder for battery tabs which can fit in a pocket and gets its power from a coin cell. It may be expensive to power compared to a mains welder, but for the sake of portability this is quite the hack. Not only that, but it uses 555 timers in the charging circuit.

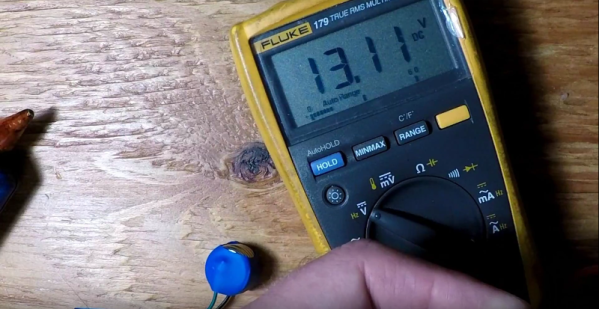
His entry for the 2017 Coin Cell Challenge saps every bit of power from a coin cell and stores it up in a 100F supercapacitor bank. All that stored energy takes a long time to get into the supercapacitors but it comes out in a flash. In fact, it can take 12 hours to fully charge. For the convenience of size, we have to trade the convenience of speed. This should be a strong contestant for the Supernova and Heavy Lifting categories.

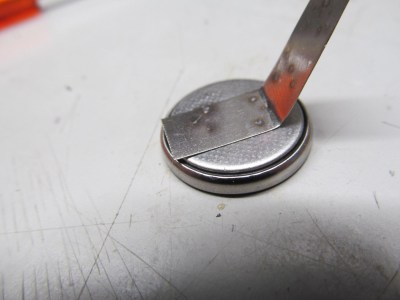
We see a quick demonstration of a successfully welded tab which shows that using coin cells to weld metal to coin cells is equally ironic and apropos. Other welders on Hackaday feature a quicker way to control your battery tab welding, safety-rich spot welding, or just go off the rails completely and use an arc welder to make a coil gun.

The Incredible Shrinking Coin Cell Battery Pack

How’s it going with your project for the coin cell challenge? You can only use a single one, but Hackaday alum [Jeremy S Cook] has a great way to package coin cells into a sleek little power packs whether you need one, two, or even four.

[Jeremy] is building a wireless Wii nunchuk, so he needs a small battery that won’t short out or get punctured in the confines of the controller body. A single coin cell holder is already a bit bulky, and he needs to use two in series. He thought, why not try shrink wrapping them together? The only downside here is that the biggest tube that came with your average heat shrink multi-pack is probably a bit too tight to fit around them, so you might have to buy more (aw, shucks!).

After trying a few ways to make a good connection between the leads and the bare coin cell faces, [Jeremy] settled on generously stripping stranded wire and wrapping the long strands around the end to form a conductive swab. This slides in nicely between the coin cell and preshrunk tube. A little more heat will make a good connection, and some hot glue secures the wires. Click past the break for his build video and the other connection methods he tried. Have you come up with something better? Let us know in the comments.

Stray a bit further from the bench and you might come up with something like this googly eye battery holder we saw a few months ago.

Continue reading “The Incredible Shrinking Coin Cell Battery Pack”