The Easiest Way To Put Your Doorbell On The Internet

Thanks to low-cost WiFi enabled microcontrollers such as the ESP8266 and ESP32, it’s never been a better time to roll your own smart home system. But that doesn’t mean it isn’t daunting for new players. If you’re looking for an easy first project, putting your old school doorbell on the Internet of Things is a great start, but even here there’s some debate about how to proceed.

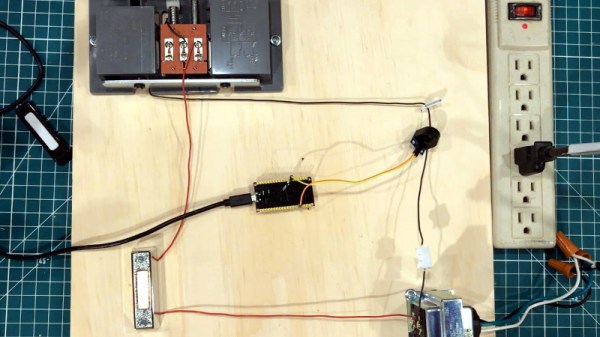
Most people stumble when they get to the point where they have to connect their low-voltage microcontroller up to the relatively beefy transformer that drives a standard doorbell. We’ve seen a number of clever methods to make this connection safely, but this tip from [AnotherMaker] is probably the easiest and safest way you’re likely to come across.

His solution only requires an inductive current sensor, which can be had for less than $1 from the usual overseas suppliers. One leg of the doorbell circuit is passed through the center of this sensor, and the sensor itself is connected up to your microcontroller of choice (here, and ESP32). The rest is software, which [AnotherMaker] explains in the video after the break. With the addition of a little debounce code, your microcontroller can reliably determine when somebody is out there jabbing the bell button; what you do with this information after that is up to you.

If you’re worried this method is too easy you could always try it with an optocoupler, or maybe convert the low-voltage AC to something your microcontroller can handle.

Continue reading “The Easiest Way To Put Your Doorbell On The Internet”

Hackaday Prize Entry: Smart USB Hub And IoT Power Meter

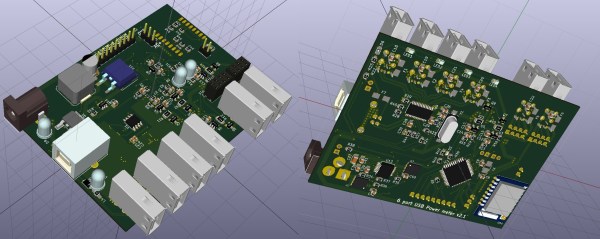
[Aleksejs Mirnijs] needed a tool to accurately measure the power consumption of his Raspberry Pi and Arduino projects, which is an important parameter for dimensioning adequate power supplies and battery packs. Since most SBC projects require a USB hub anyway, he designed a smart, WiFi-enabled 4-port USB hub that is also a power meter – his entry for this year’s Hackaday Prize.

[Aleksejs’s] design is based on the FE1.1s 4-port USB 2.0 hub controller, with two additional ports for charging. Each port features an LT6106 current sensor and a power MOSFET to individually switch devices on and off as required. An Atmega32L monitors the bus voltage and current draw, switches the ports and talks to an ESP8266 module for WiFi connectivity. The supercharged hub also features a display, which lets you read the measured current and power consumption at a glance.

Unlike most cheap hubs out there, [Aleksejs’s] hub has a properly designed power path. If an external power supply is present, an onboard buck converter actively regulates the bus voltage while a power path controller safely disconnects the host’s power line. Although the first prototype is are already up and running, this project is still under heavy development. We’re curious to see the announced updates, which include a 2.2″ touchscreen and a 3D-printable enclosure.

Non-Invasive Smart Electricity Meter

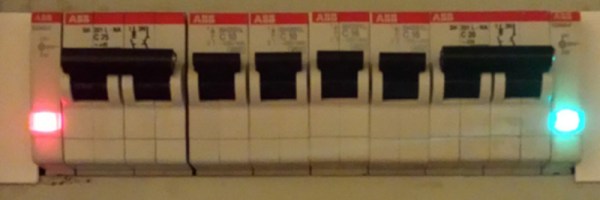
There are a lot of ways to measure energy usage in the home, but most of them involve handling mains voltage. Not only that, but sometimes they require handling mains voltage before it gets through a breaker panel or fuse box, meaning that if you make a mistake there are a lot of bad things that can happen. [Yonas] has been working on this problem, and has come up with a non-invasive, safer way to monitor electricity consumption without having to work directly on live wires.

Please note that you should still not be working on mains voltage without proper training, but if you have the required know-how then the installation should be pretty straightforward. The project is based on the Spark Core, and uses clamp-on current sensors to measure energy use. The sensors wrap around the mains cable, meaning you don’t have to disconnect anything to hook them up. The backend runs on a LAMP server which could be a Raspberry Pi if you have one. [Yonas] runs it on a hosted server as a matter of preference.

All of the source code for this is available, and assuming you can get your hands on the current sensors this could be a great way to get started monitoring your energy usage in the house. Be sure to check out the video below for a demonstration of the operation of this device. Of course, if you have a gas line you’ll need this energy monitoring setup too.

Continue reading “Non-Invasive Smart Electricity Meter”