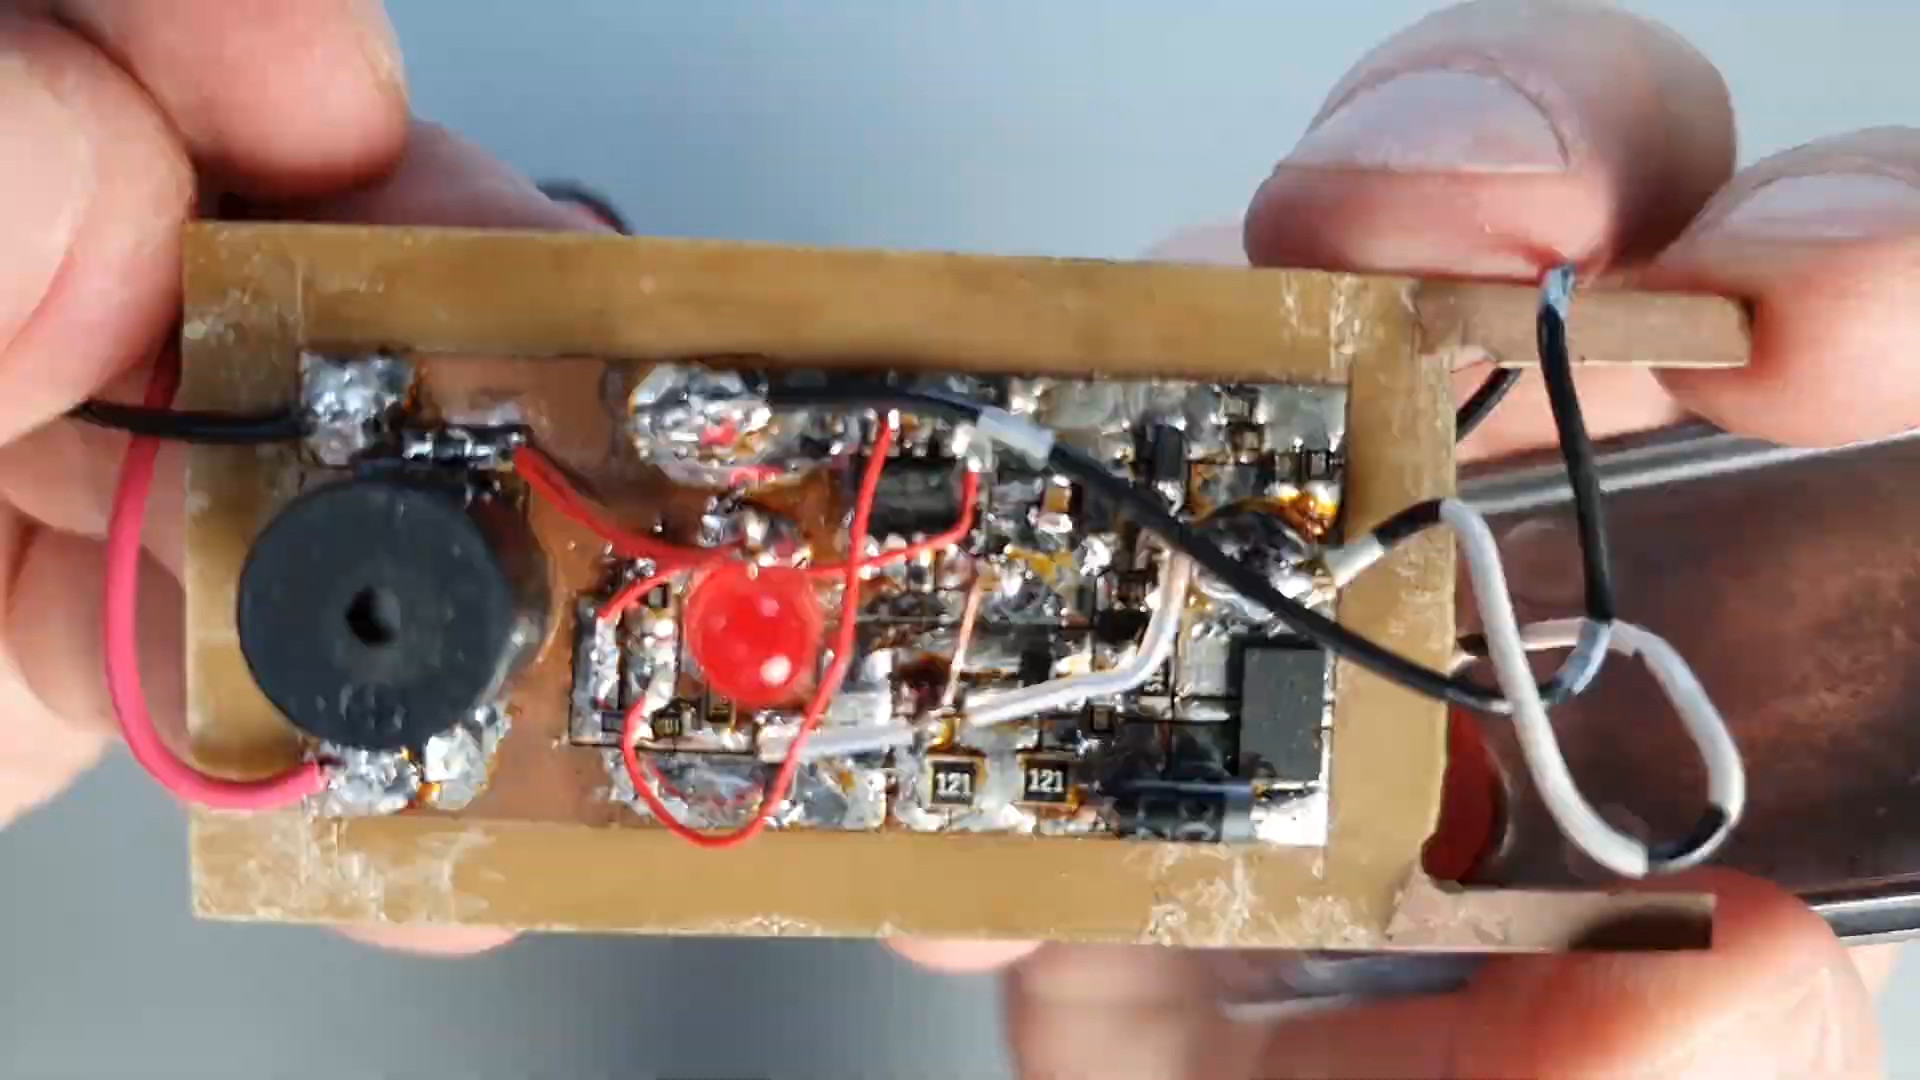
Mobile Electronics Workstation Has It All In A Small Package

Home is absolutely everything these days. Plenty of spaces around the abode have had to do double and triple duty as we navigate work, play, and everything in between. Although it’s been a great time to engage in hobbies and even find new ones, where exactly are we supposed put all the stuff that accumulates?

[Fabse89] needed a portable, usable solution for doing electronics work that could be easily packed away. They happened upon a tool case being thrown out, and repurposed it into a great one-stop solution for whenever the urge to play with pixies strikes.

[Fabse89] started by stripping the box out to the bare walls and modeling the inside in Fusion360. Then they built and cut an acrylic insert that holds two power supplies and a soldering station. There are fixed 5 V and 12 V outputs on one power supply, plus a variable supply that maxes out at 48 V.

When it came to tool storage options, [Fabse89] got lucky with a small, seldom-used set of plastic drawers that fits perfectly next to the power station. These hold all the small tools like flush cutters, pliers, and a de-soldering pump. The top section of the case folds back and is the perfect place for component storage boxes. We think this is a tidy solution and especially like that you don’t have to dismantle it to use it — can be used with everything in place and packed up quickly. We also like that the front lid pulls down into a makeshift table, so this really could go anywhere with mains power.

Acrylic not rugged enough for your tastes? Here’s a DIY supply that doubles as a melee weapon.

Build An Everlasting Continuity Tester

When you need a continuity tester at the bench, what do you reach for? Probably your multimeter, right? It may surprise you to know that the continuity tester in the meter isn’t all that sensitive, even if it’s the yellow expensive kind. [Leo]’s will beep even if there is 50Ω of resistance in the line.

Disgusted by modern commercial testers, [Leo] set out to make the ideal continuity tester in the spirit of old school tools that do one thing and do it really well. It had to be simple to use, always ready to go, and capable of measuring continuity at 5Ω or less resistance (video, embedded below).

There’s no power switch or even labels, because it doesn’t need any. Just put the probes where you want ’em, and it either beeps and lights the LED or it doesn’t. It looks simple, but inside that blast-resistant enclosure are lots of cool features that certainly make it seem like the ideal tester to us.

Our favorite has to be the transient blocking unit that works like a little circuit breaker. They’re used to protect circuits from lighting and electrostatic discharge by way of depletion-mode MOSFETs and switches to protected mode in under a microsecond. Watch [Leo] build this workbench necessity and then abuse test it with mains power after the break.

Making your own tools, however simple or complex is a great experience. If you want to up your speedy prototyping game, [Leo]’s got you covered there with a special scratching tool for hand-scribing copper PCBs. Continue reading “Build An Everlasting Continuity Tester”

Debugging Electronics: To Know Why It Didn’t Work, First Find What It Is Actually Doing

Congratulations, you have just finished assembling your electronics project. After checking for obvious problems you apply power and… it didn’t do what you wanted. They almost never work on the first try, and thus we step into the world of electronics debugging with Daniel Samarin as our guide at Hackaday Superconference 2019. The newly published talk video embedded below.

Beginners venturing just beyond blinking LEDs and premade kits would benefit the most from information here, but there are tidbits useful for more experienced veterans as well. The emphasis is on understanding what is actually happening inside the circuit, which explains the title of the talk: Debugging Electronics: You Can’t Handle the Ground Truth! So we can compare observed behavior against designed intent. Without an accurate understanding, any attempted fix is doomed to failure.

To be come really good at this, you need to embrace the tools that are often found on a well stocked electronics bench. Daniel dives into the tricks of the trade that transcend printf and blinking LED to form a plan to approach any debugging task.

Continue reading “Debugging Electronics: To Know Why It Didn’t Work, First Find What It Is Actually Doing”

The Obscure Electronics Tools You Didn’t Know You Needed

The right tool for the job can turn a total headache into a 30-second operation. This is all the more important when you’re trying to streamline an assembly process, and the reason why you’ll find so many strange and wonderful purpose-built tools on any production line. With a nod to that old adage, [EvilMadScientist] have collected the tools you didn’t know you needed – until now.

If you’re wiring big through-hole boards all day, you’ve probably bemoaned the uneven bends on all your resistors. How did the big companies get it right way back when? They used a tool to set the distance of the resistor legs just right. What about DIP ICs? It’s a total pain trying to take them fresh out of the tube and get them to seat in a socket, but there’s a tool to do that too. It’s actually a two-part series, and while we’re sure you’ve all seen a solder sucker before, the fresh take on helping hands is pretty ingenious.

Overall, it’s a combination of little things that, with a bit of cash or a day’s work, you can have in your own lab and once you’ve got them, you won’t ever want to go back. Be sure to tell us about your favourite obscure tools in the comments.

Now that you’ve got your tools to hand, why not wrap them all up in a handy workstation?

Tools: Proxxon Drill Press TBM115/TBM220

tbm220ii

A decent drill press is a crucial tool for an electronics lab. We use our drill press to make holes in our own circuit boards, and tap or break traces on existing circuit boards. We’ve used a lot of tools to drill circuit boards — power drills, power drills in “drill press stands”, and high-speed rotary tools — but when we started doing projects on a schedule, it was time for something more reliable.

We first spotted the Proxxon TBM115/TBM220 drill press in the window of a local shop.  Its tiny size and adjustable speed seemed ideal for drilling circuit boards. At $200, this is one of the pricier tools in our lab, but quality bearings and smooth drilling action aren’t cheap.  Read about our experience with this tool below the break.

Continue reading “Tools: Proxxon Drill Press TBM115/TBM220”