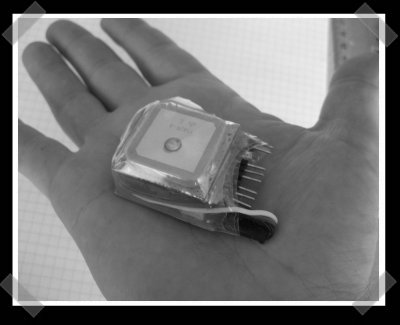
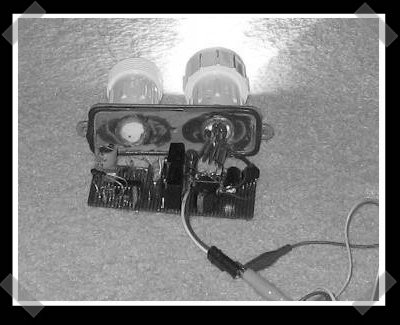
This is a nice, compact gps logger that’s built around a PIC16F872 and some eeprom chips. It was designed for a particular GPS receiver, but should be easily adaptable to others since the unit ouputs standard sentences at 4800 baud. Full schematics and board layout are available on the project page.
diy447 Articles
How-To: Make An RGB Combination Door Lock (Part 2)
In part 1 we showed you how to build your own prototype RGB keypad. Today we’ll show off some new ideas we worked on to create the project and turn it from prototype to fully functional battle station er door lock.
Continue reading “How-To: Make An RGB Combination Door Lock (Part 2)”
Nokia 1100 LCD PIC Controller Interface
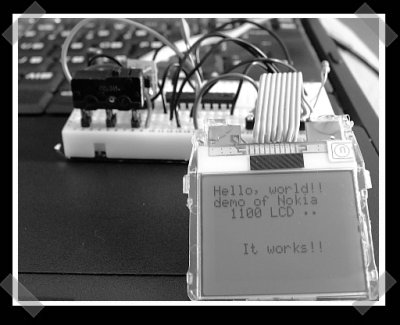
Nokia LCDs have been a popular choice for hardware projects for quite a while. [Ramandeep] published a how-to on interfacing the 1100 series LCD with a PIC controller. The 1100 features easily soldered contacts and a backlight, making it an good choice for adding an LCD to your project.
Accelerometer Mouse From Scratch
[Mahavir] sent in his group’s final project for the College of Engineering in Pune (it’s over here). They built an accelerometer based Bluetooth mouse. They ended up creating a mouse that maps rotational movements to x/y motion. From the video movement, it strikes us as responding the same way that touch pointer mice do. You can hit the demo video after the break or get more details from the project page. Even if you’re not into the mouse idea, you can probably learn something from their Bluetooth implementation.
DIY HID Ballast
HID lights have a major power consumption and lumen output advantage over halogen lights. Unfortunately the ballast component isn’t very cheap. [brian]’s been building his own ballasts for his mountain bike. We couldn’t find any more info on his design, but we did find some interesting stuff. This document lays out the requirements for a ballast. Here’s an older HID ballast design to get rolling. Keep in mind that the lamp requires high voltages – don’t play with it unless you know what you’re doing. If you’d rather use off the shelf components, check out the HID dive light we wrote up a while back. It uses a fairly inexpensive ballast/lamp combo.
DIY TomTom Docking Station
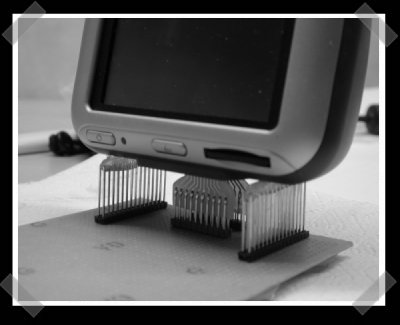
TomToms have been getting pretty cheap. We like ’em because they’re nice and hackable. This diy docking station was made from some etched PCBs, a bunch of male pin headers and a bit of hot glue.
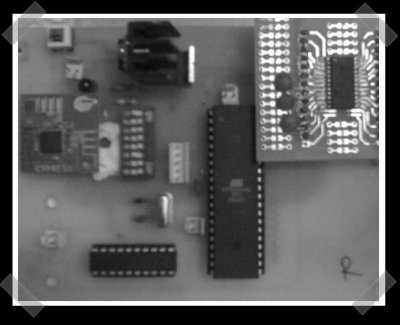
IR Controlled Relays
If you’re thinking of building some DIY home automation, this looks like an interesting idea. At the heart is a PIC16F84 that decodes IR signals and controls six outputs – in this case, relays to activate various appliances. The PIC is dirt cheap – if you get a deal on some relays you should be able to build a small local IR HA system for $30… This might be just the thing for my office. It’s cheap enough that it probably wouldn’t walk off.


