The Electric Imp And An Easy Hackaday Prize Entry

impy

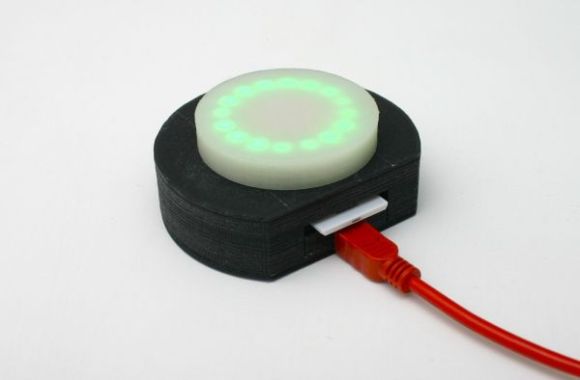
We’re a little under a month until the first cutoff date for The Hackaday Prize, and there have been a few questions we’ve been answering again and again: ‘what does ‘connected’ mean?’ and, ‘do I really have enough time to build something for The Hackaday Prize?’ Lucky for you, [Matt] from Electric Imp put together a very short demo of a sample THP entry. It’s a ‘HACKING’ light, kind of like an ‘on air’ light you’d find in a TV or Radio studio.

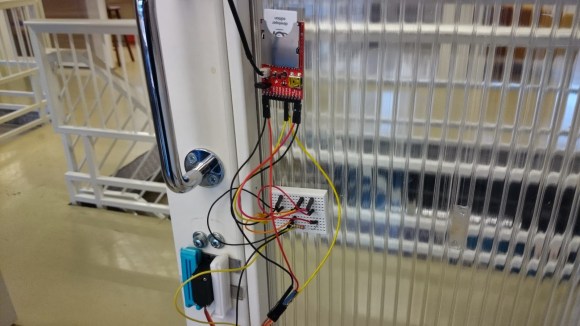
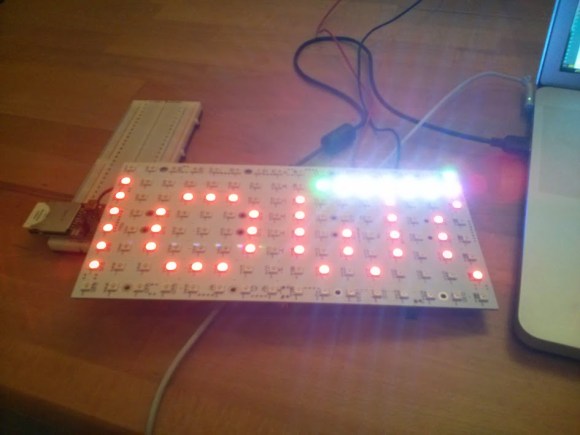
The idea for the project came from a tweet to [Matt] that seemed simple enough to implement. After grabbing an Imp and a breakout board, a LED, button, and resistor were wired up, with power supplied over USB. The code for the device was simple enough, and the Imp makes it easy to make that ‘hacking’ button tweet and serve a simple web page.

[Matt] pulled this project together in an afternoon, and although it’s not nearly as complex as the 3D printers, CNC machines, and freakin’ tricorders that are also entered into The Hackaday Prize, it meets all the requirements we’re looking for.

Of course, ‘connected’ is a very broad term, and even if you have a project that communicates with LEDs, a serial connection, or even pigeons, it’ll be more than enough to tick that ‘connected’ check box.

There’s still a few weeks until the first cutoff date for The Hackaday Prize, so get moving.

[via Bearded Inventor]

Breaking Open The Quirky Nimbus

Nimbus

The Nimbus is a little Internet-connected device put out by a company called Quirky. It features four analog dials, each with graphic LCDs, with WiFi connectivity to show you how many tweets you’ve made in the past day. You know, in case you forgot, or something.

[Edu] didn’t find the social media-oriented Nimbus very useful, but Internet connected analog gauges are just so cool, so out came the screwdriver and the writing of new firmware commenced.

Inside the Nimbus there’s an SPI Flash, PIC micro, and an Electric Imp, a tiny ARM microcontroller and WiFi adapter stuffed inside an SD card. The Imp is always tied to a cloud service, in this case, a Quirky-lined cloud, but the folks at Quirky were keen to help [Edu] in his quest for better firmware.

After figuring out all the traces, [Edu] wrote a simple firmware that can control everything there is to control – the dials, displays, two buttons, and a speaker. So far he’s put some graphics on the display and PWM’d the theme from Monkey Island. This is just scratching the surface of what the device can do – [Edu] can still make use of the WiFi connectivity, and those dials can do much more than spin around in circles.

Monkey Island video below.

Continue reading “Breaking Open The Quirky Nimbus”

Electric Imp Locks And Unlocks Your Door Automatically

2013-11-19 14.23.18

When the folks over at PinMeTo moved into a new office, they were dismayed to find out an extra key would run them a whopping 500 sek (~$75 USD). Instead, they decided to build their own automatic door lock using the Electric Imp system.

If you’re not familiar, the Electric Imp is a small SD card designed to provide internet (Wi-Fi) functionality to consumer devices. While it looks like an SD card, you cannot just plug it into any SD card slot and expect it to work — it still needs a prototyping board. We’ve seen it used to make a wireless thermal printer, or even make a tweeting cat door to let you know of any feline intruders!

Anyway — back to the hack. To move the lock cylinder they’re using a basic RC servo connected directly to the Imp. A flex sensor is installed on the side of the door over-top the lock — this provides feedback to the Imp whether or not the door is in fact locked. The Imp then communicates to Everymote to allow for keypad access from your mobile phone.

It probably ended up costing more in time and money than a new key, but hey, it looks like it was a fun project to do!

Electric Imp Thermal Printer

imp_printer_01_23

If you’re the type of person that doesn’t mind having a pocket/purse full of crumpled receipts, then maybe you should check out this tutorial from [tombrew] on giving a thermal printer internet-connectivity.

For some of us, there’s something kind of cool about thermal printers, but it’s probably not the kind of project you’d want to burn a lot of calories on. As a developer over at Electric Imp, [tombrew] agrees with this statement, but since the Electric Imp contains both a WiFi module and processor built in, it makes it pretty easy to get your thermal printer printing off the daily weather, stock prices, news headlines, etc… In fact, the claim here is that you could have this project completed before you even finish your morning coffee… knock on wood!

From a hardware standpoint, the project is pretty straight forward; an Electric Imp with breakout board, thermal printer, and a power supply are pretty much all that’s needed. Local communication between the Electric Imp and the thermal printer is accomplished through a simple serial interface. With the roll-out of the new Electric Imp IDE a few months back, we were introduced to ‘Agents’. This is kind of a neat concept, and this tutorial breaks everything down, but basically the agent is server-side code that runs in the ‘ImpCloud’, thus giving your Electric Imp more power and capabilities to deal with complex APIs. Also, handling images (like something you want to print) can take up a ton of memory, so for this project, the agent is used to send down slices of the image you want to print one at a time. This project is just the beginning of what [tombrew] has planned, so we can’t wait to see more insanely detailed tutorials.

Giving A Roomba Internet Connectivity

roombahack01_09

What was supposed to be a fun 1-day build ended up turning into a 3-day journey full of close calls when [Arthur] decided to give his Roomba Internet Connectivity.

The Roomba, whom [Arthur] calls Colin, has been in service for a couple of years, and once he got his hands on the Electric Imp, he had just the project in mind.  With embedded Wi-Fi and a 32-bit processor all in an SD Card form factor, the Electric Imp makes it very easy to add the “Internet of Things” to just about anything you can think of.  [Arthur] wanted to gain control of the Roomba, so he tapped into the SCI (Serial Command Interface).  Now he can read out the Roomba’s on-board sensor data including battery voltage, current draw, and even the temperature.

These are the kind of walk-through’s we love to see, because he did it in real-time, so you get to experience all of the “surprises” along the way.  For example, he removed an external charging port to make room for the added components, but that ended up disabling the dock charger.  Then he discovered that when the Roomba was charging, the input voltage to the Electric Imp breakout board was too high, so he had to introduce an intermediate voltage regulator.  But perhaps the biggest bump in the road was when he accidentally brushed the Electric Imp breakout board along the Roomba’s control board while power was on.  Luckily the damage was isolated to just one smoked — a simple FET.  The project turned out great, and (today) Colin’s data is actually visible through a public Xively feed.

Continue reading “Giving A Roomba Internet Connectivity”

Status Light Tells You The Code Is Borked Again

status light

[Arthur] is teaching himself product development. Rather than create a few mock-up products, he’s taking the path of designing real devices he can use. His current device is a status light for automated software tests.  We’ve seen test and GitHub status lights before, however this is the first one to integrate with an outside web service. The status light’s state is based upon output from CodeShip, an online continuous deployment test engine.

The electronic design is simple. An Electric Imp retrieves test status data from CodeShip. The Imp then sends the status data over two GPIO lines to an AdaFruit Trinket. The Trinket controls a NeoPixel ring. A green ring indicates all tests are passing. Purple means tests are in progress. A spinning red ring (of death) means one or more tests have failed. Power is supplied via a mini USB connector.

[Arthur] spent quite a bit of time on the mechanical design of the status light as well. All the parts are 3D printed. This allowed him to quickly go through several revisions of each part. We like the use of white PLA for a frosted effect on the top section of the light, as it diffuses the eye piercing glow from all those RGB LEDs. As a finishing touch, [Arthur] created a fake product page for his light. He doesn’t have any plans to sell it, but we hope he drops the source and STL files so we can create one of our own.

Continue reading “Status Light Tells You The Code Is Borked Again”

Monitor GitHub Activity With An RGB LED Matrix

tim-display

Ever wonder who is forking your code? [Jack] did, so he built a real time GitHub activity display for his company’s repositories. The display is based a Wyolum The Intelligent Matrix (TiM) board. The TiM is an 8 x 16 matrix of the ubiquitous WS2811/Smart Pixel/NeoPixel RGB LEDs with built-in controller. We’re seeing more and more of these serial LEDs as they drop in price. Solder jumpers allow the TiM to be used as 8 parallel rows of LEDs (for higher refresh rates), or connected into one long serial chain.

[Jack] wasn’t worried about speed, so he configured his board into a single serial string of LEDs. An Arduino drives the entire matrix with a single pin. Rather than reinvent the wheel, [Jack] used Adafruit’s NeoMatrix library to drive his display. Since the TiM uses the same LEDs as the Adafruit NeoPixel Matrix, the library will work. Chalk up another victory for open source hardware and software!

An Electric Imp retrieves Github data via WiFi and passes it on to the Arduino. This is a good use of a microcontroller such as the AVR on the Arduino. [Jack’s] display has a scrolling username. Every step in the scroll animation requires all the pixel data be clocked out to the TiM board. The Arduino can handle this while the IMP takes care of higher level duties.

Continue reading “Monitor GitHub Activity With An RGB LED Matrix”