A metal needle tip comes to a point against a white background. A scale bar in the lower left shows a 300 micrometer length.

Etching Atomically Fine Needle Points

[Vik Olliver] has been extending the lower resolution limits of 3D printers with the RepRapMicron project, which aims to print structures with a feature size of ten micrometers. A molten plastic extruder would be impractical at such small scales, even if a hobbyist could manufacture one small enough, so instead [Vik]’s working on a system that uses a very fine needle point to place tiny droplets of UV resin on a substrate. These points have to be sharper than anything readily available, so his latest experiments have focused on electrochemically etching his own needles.

The needles start with a fine wire, which a 3D-printed bracket holds hanging down into a beaker of electrolyte, where another electrode is located. By applying a few volts across the circuit, with the wire acting as an anode, electrochemical erosion eventually wears through the wire and it drops off, leaving an atomically sharp point. Titanium wire performs best, but Nichrome and stainless steel also work. Copper wire doesn’t work, and by extension, nor does the plated copper wire sometimes sold as “stainless steel” by sketchy online merchants.

The electrolyte was made from either a 5% sodium chloride solution or 1% nitric acid. The salt solution produced a very thin, fine point, but also produced a cloudy suspension of metal hydroxides around the wire, which made it hard to tell when the wire had broken off. The goal of nitric acid was to prevent hydroxide formation; it produced a shorter, blunter tip with a pitted shaft, but it simply etched the tip of the wire to a point, with the rest of the wire never dropping off. Some experimentation revealed that a mixture of the two electrolyte solutions struck a good balance which etched fine points like the pure salt solution, but also avoided cloudy precipitates.

If you’re interested in seeing more of the RepRapMicron, we’ve looked at a previous iteration which scribed a minuscule Jolly Wrencher in marker ink. On a more macro scale, we’ve also seen one 3D printer which used a similar resin deposition scheme.

Extreme Refurbishing: Amiga Edition

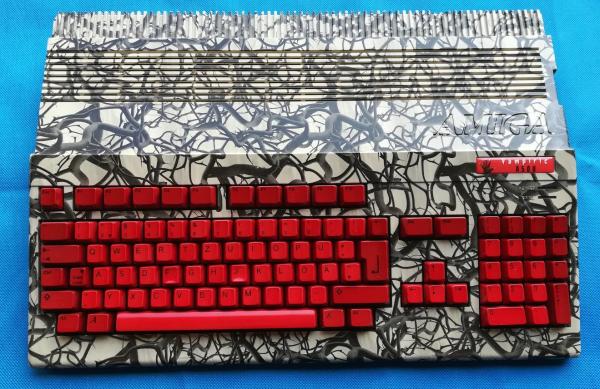
The last Amiga personal computer rolled off the assembly line in 1996, well over 20 years ago. Of course, they had their real heyday in the late 80s, so obviously if you have any around now they’ll be in need of a little bit of attention. [Drygol] recently received what looks like a pallet of old Amiga parts and set about building this special one: The Vampiric Amiga A500.

The foundation of this project was a plain A500 with quite a bit of damage. Corrosion and rust abounded inside the case, as well as at least one animal. To start the refurbishment, the first step was to remove the rust from the case and shields by an electrochemical method. From there, he turned his attention to the motherboard and removed all of the chips and started cleaning. Some of the connectors had to be desoldered and bathed in phosphoric acid to remove rust and corrosion, and once everything was put back together it looks almost brand new.

Of course, some other repairs had to be made to the keyboard and [Drygol] put a unique paint job on the exterior of this build (and gave it a name to match), but it’s a perfect working Amiga with original hardware, ready to go for any retrocomputing enthusiast. He’s no stranger around here, either; he did another extreme restoration of an Atari 800 XL about a year ago.

Cyborg, Or Leafy Sensor Array?

Some plants react quickly enough for our senses to notice, such as a Venus flytrap or mimosa pudica. Most of the time, we need time-lapse photography at a minimum to notice while more exotic sensors can measure things like microscopic pores opening and closing. As with any sensor reading, those measurements can be turned into action through a little trick we call automation. [Harpreet Sareen] and [Pattie Maes] at MIT brought these two ideas together in a way which we haven’t seen before where a plant has taken the driver’s seat in a project called Elowan. Details are sparse but the concept is easy enough to grasp.

We are not sure if this qualifies as a full-fledged cyborg or if this is a case of a robot using biological sensors. Maybe it all depends on which angle you present this mixture of plant and machine. Perhaps it is truly is the symbiotic relationship that the project claims it to be. The robot would not receive any instructions without the plant and the plant would receive sub-optimal light without the robot. What other ways could plants be integrated into robotics to make it a bona fide cyborg?

Continue reading “Cyborg, Or Leafy Sensor Array?”

Electrochemical Etching With A Microcontroller

IMAG1459_zps68634c16

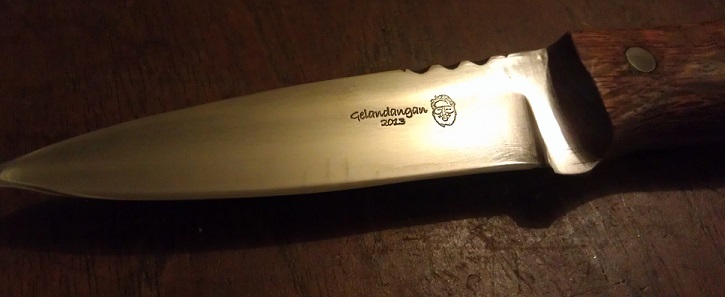
While most of the time the name of the game is to remove a lot of metal, etching is an entirely other process. If you just want to put a logo on a piece of steel, or etch some labels in a piece of aluminum, You need to think small. Mills and CNC routers will do, but they’re expensive and certainly not as easy to work with as a small, homebrew electrochemical etcher.

This etchinator is the brainchild of [Gelandangan], and gives the techniques of expensive commercial etchers to anyone who can put together a simple circuit. This etcher can etch with both AC and DC thanks to a H bridge circuit, and can be fabbed up by anyone who can make their own circuit board.

To actually etch a design in a piece of metal, simply place the piece on a metal plate, put the stencil down, and hold a felt-covered electrode moistened with electrolyte down over the stencil. Press a button, and in about 30 seconds, you have a wonderfully etched piece of metal.

[Gelandagan] has some templates that will allow you to make your own electro etcher, provided you can etch your own boards and can program the PIC16F1828 microcontroller. All this info is over on the Australian blade forum post he put up, along with a demo video below.

Continue reading “Electrochemical Etching With A Microcontroller”