Embed With Elliot: Debounce Your Noisy Buttons, Part I

“Psst…hey buddy! Wanna see the sweetest little debouncing routine this side of Spokane? C’mon over here. Step right over those bit-shift operators, they don’t bite. Now look at this beauty right here: I call her The Ultimate Debouncer(tm)!”

Everybody who works with microcontrollers eventually runs into the issue of switch bounce or “chatter”, and nearly everyone has their own favorite solution. Some fix it in hardware, others fix it in software. Some hackers understand chatter, and others just cut-and-paste the classic routines. Some folks even try to ignore it, and they might even get lucky, but everyone’s luck runs out sometimes.

In the next two “Embed with Elliot” installments, I’ll look a little bit at bouncing, look into doing hardware debouncing both the simple way and the right way, and build up a basic software routine that demonstrates some of the principles and which works just fine, though it’s not optimized. We’ll be laying the groundwork.

In the next installment, I’ll let you in on my personal favorite debounce routine. It’s a minor tweak on a standard, but with some special sauce that’s worth spreading around. I’ll call it the Ultimate Debouncer(tm), but will it stand up to the scrutiny of the Hackaday commenteers? (How’s that for a cliffhanger?!?)

For now, though, let’s look into switch bounce and the standard ways to fix it in hardware and software.

Continue reading “Embed With Elliot: Debounce Your Noisy Buttons, Part I”

Hacking A KVM: Teach A Keyboard Switch To Spy

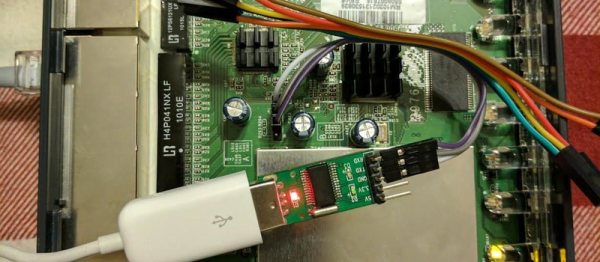
When it comes to large systems, there are a lot more computers than there are people maintaining them. That’s not a big deal since you can simply use a KVM to connect one Keyboard/Video/Mouse terminal up to all of them, switching between each box simply and seamlessly. The side effect is that now the KVM has just as much access to all of those systems as the human who caresses the keyboard. [Yaniv Balmas] and [Lior Oppenheim] spent some time reverse engineering the firmware for one of these devices and demonstrated how shady firmware can pwn these systems, even when some of the systems themselves are air-gapped from the Internet. This was their first DEF CON talk and they did a great job of explaining what it took to hack these devices.

Continue reading “Hacking A KVM: Teach A Keyboard Switch To Spy”

Dumping Old PROMs With New Hardware

[ijsf] recently came across a very old synthesizer from a defunct West German company. This was one of the first wavetable synths available, and it’s exceptionally rare. Being so rare, there isn’t much documentation on the machine. In an attempt at reverse engineering, [ijsf] decided to dump the EPROMs and take a peek at what made this synth work. There wasn’t an EPROM programmer around to dump the data, but [ijsf] did have a few ARM boards around. It turns out building a 27-series PROM dumper is pretty easy, giving [ijsf] an easy way to dig into the code on this machine.

The old EPROMs in this machine have 5v logic, so [ijsf] needed to find a board that had a ton of IOs and 5v tolerant inputs. He found the LPC2148, which has a nice USB system that can be programmed to dump the contents of a PROM over serial. Interfacing the PROM is as simple as connecting the power and ground, the address lines, data, and the signal lines. After that, it’s just a matter of stepping through every address according to the timing requirements of the PROM. All the data was dumped over a serial interface, and in just a few seconds, [ijsf] had 32768 bytes of ancient data that made this old synth tick.

Hard Drive Rootkit Is Frighteningly Persistent

There are a lot of malware programs in the wild today, but luckily we have methods of detecting and removing them. Antivirus is an old standby, and if that fails you can always just reformat the hard drive and wipe it clean. That is unless the malware installs itself in your hard drive firmware. [MalwareTech] has written his own frightening proof of concept malware that does exactly this.

The core firmware rootkit needs to be very small in order to fit in the limited memory space on the hard drive’s memory chips. It’s only a few KB in size, but that doesn’t stop it from packing a punch. The rootkit can intercept any IO to and from the disk or the disk’s firmware. It uses this to its advantage by modifying data being sent back to the host computer. When the computer requests data from a sector on the disk, that data is first loaded into the disk’s cache. The firmware can modify the data sitting in the cache before notifying the host computer that the data is ready. This allows the firmware to trick the host system into executing arbitrary code.

[MalwareTech] uses this ability to load his own custom Windows XP bootkit called TinyXPB. All of this software is small enough to fit on the hard drive’s firmware. This means that traditional antivirus cannot detect its presence. If the owner of the system does get suspicious and completely reformats the hard drive, the malware will remain unharmed. The owner cannot even re-flash the firmware using traditional methods since the rootkit can detect this and save itself. The only way to properly re-flash the firmware would be to use an SPI programmer, which would be too technical for most users.

There are many more features and details to this project. If you are interested in malware, the PDF presentation is certainly worth a read. It goes much more in-depth into how the malware actually works and includes more details about how [MalwareTech] was able to actually reverse engineer the original firmware. If you’re worried about this malicious firmware getting out into the wild, [MalwareTech] assures us that he does not intend to release the actual code to the public.

Disassembled D-Link Firmware

D-Link Fails At Strings

Small Office and Home Office (SOHO) wireless routers have terrible security. That’s nothing new. But it is somewhat sad that manufacturers just keep repurposing the same broken firmware. Case in point: D-Link’s new DIR-890L, which looks like a turtled hexapod. [Craig] looked behind the odd case and grabbed the latest firmware for this device from D-Link’s website. Then he found a serious vulnerability.

D-Link's DIR-890 Router

The usual process was applied to the firmware image. Extract it, run binwalk to find the various contents of the firmware image, and then extract the root filesystem. This contains all the code that runs the router’s various services.

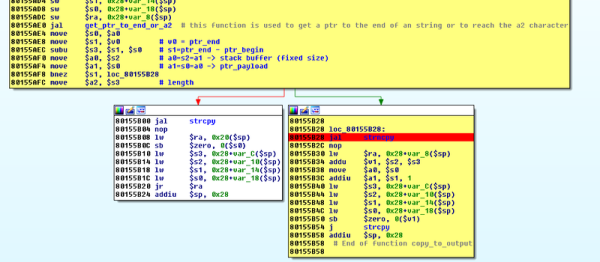
The CGI scripts are an obvious place to poke for issues. [Colin] disassembled the single executable that handles all CGI requests and started looking at the code that handles Home Network Administration Protocol (HNAP) requests. The first find was that system commands were being built using HNAP data. The data wasn’t being sanitized, so all that was needed was a way to bypass authentication.

This is where D-Link made a major error. They wanted to allow one specific URL to not require authentication. Seems simple, compare string A to string B and ensure they match. But they used the strstr function. This will return true if string A contains string B. Oops.

So authentication can be bypassed, telnetd can be started, and voila: a root shell on D-Link’s most pyramid-shaped router. Oh, and you can’t disable HNAP. May we suggest OpenWrt or dd-wrt?

Magic Lantern Brings Linux To Canon EOS Cameras

On April 1st the Magic Lantern team announced a proof of concept that lets you run Linux on a Canon EOS camera. Because of the date of the post we’ve poured over this one and are confident it’s no joke. The development has huge potential.

The hack was facilitated by a recent discovery that the LCD screen on the camera can be accessed from the bootloader. In case you don’t recognize the name, Magic Lantern is an Open Source project that adds features to these high-end cameras by utilizing the bootloader with binary files on the SD card. It’s long been a way of hacking more features in but has always been complicated by the fact that you must figure out how to play nicely with the existing firmware. Commanding the LCD was the last part of the hardware that had previously not been driven directly from Magic Lantern.

Now that the Linux kernel is in the picture, ground-up features can be built without dealing with the stock firmware in any way (and without overwriting it). We’re excited to see where this one goes. Currently it’s just a proof that you can boot Linux, it’s not actually functional yet. Here’s your chance to polish those kernel porting skills you’ve been holding in reserve.

Kindle Hack

Unlock Your Demo Kindle Paperwhite

If you’ve been holding off on upgrading your kindle, this project might inspire you to finally bite the bullet. [WarriorRocker] recently saved quite a few dollars on his Kindle upgrade by using a demo unit. Of course, it’s not as simple as just finding a demo unit and booting it up. There’s some hacking involved.

[WarriorRocker] found his Kindle Paperwhite demo unit on an online auction site for just $20. Kindles are great for reading but also make popular displays for your own projects. This used display model was much less expensive than a new unit, which makes sense considering it had probably received its share of abuse from the consumers of some retail store. The problem with a demo unit is that the firmware that comes with it is very limited, and can’t be used to sync up with your Amazon account. That’s where the hacking comes in.

pwdu-01The first step was to crack open the case and locate the serial port. [WarriorRocker] soldered a small three pin header to the pads to make it easier to work on his device as needed. He then connected the Kindle to his PC using a small serial to USB adapter. Pulling up the command prompt was as simple as running Putty and connecting to the correct COM port. If the wires are hooked up correctly, then it just takes a press of the enter key to pull up the login prompt.

The next step requires root access. The root password for each unit is related to the unit’s serial number. [WarriorRocker] obtained the serial number by rebooting the Kindle while the Serial connection was still open. The boot sequence will spit out the number. This number can then be entered in to an online tool to generate possible root passwords. The tool is available on [WarriorRocker’s] project page linked above.

Next, the Kindle needs to be rebooted into diagnostic mode. This is because root logins are not allowed while the device is booted to the system partition. To enter diagnostic mode, [WarriorRocker] had to press enter over and over during the boot sequence in order to kill the automatic boot process. Then he checked some environment variables to locate the memory address where the diagnostic mode is stored. One more command tells the system to boot to that address and into diagnostic mode.

The last step of the process begins by mounting the Kindle as a USB storage device and copying over the stock Kindle firmware image. Next [WarriorRocker] had to exit the diagnostic menu and return to a root command prompt. Finally, he used the dd command to copy the image to the Kindle’s partition bit by bit. Fifteen minutes and one reboot later and the Kindle was working just as it should. [WarriorRocker] even notes that the 3G connection still works. Not bad for $20 and an hour or two of work.