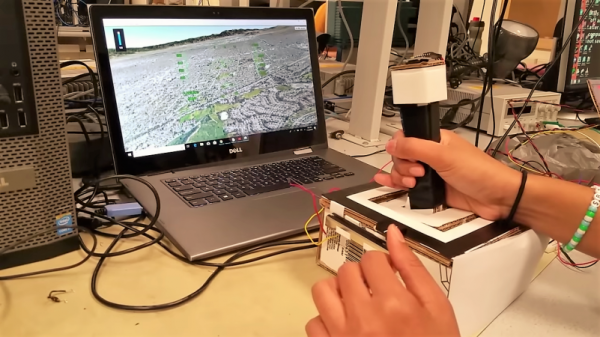
Many people enjoy playing flight simulators or making the occasional orbit in Kerbal Space Program, but most are stuck controlling the onscreen action with nothing more exotic than a keyboard and mouse. A nice compromise for those that don’t have the space (or NASA-sized budget) to build a full simulator cockpit is a USB “button box” that you can plug in whenever you need a couple dozen extra knobs, switches, and lights.
 If you’ve been considering building one for yourself, this incredible build by [nexprime] should prove quite inspirational. Now at this point, a box of buttons hooked up to a microcontroller isn’t exactly newsworthy. But there are a few features that [nexprime] packed in which we think make this particular build worth taking a closer look at.
For one, the powder coated 8.5” x 10” enclosure is absolutely gorgeous. The console itself was purchased from a company called Hammond Manufacturing, but of course it still took some work to turn it into the object you’re currently drooling over. A CNC machine was used to accurately cut out all the necessary openings, and the labels were laser etched into the powder coat.
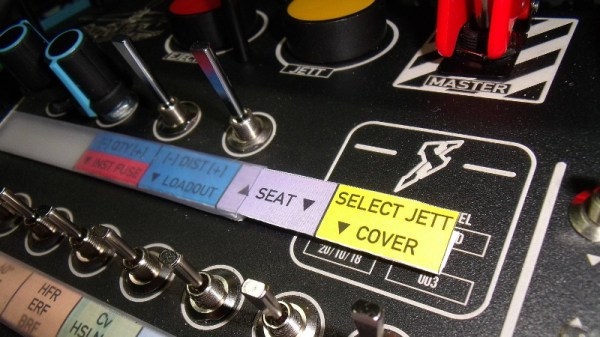
But not all the labels. One of the things we like best about this build is that [nexprime] thought ahead and didn’t just design it for one game. Many of the labels are printed on strips of paper which slide into translucent plastic channels built into the front of the box. Not only does this allow you to change out the overlays for different games, but the paper labels look fantastic when lit with the LED strips placed behind the channels.
Internally, [nexprime] used a SparkFun Pro Micro paired with a SX1509 I/O expander. The electronics are all housed on professionally manufactured PCBs, which gives the final build an incredibly neat look despite packing in 68 separate inputs for your gaming pleasure. On the software side this box appears as a normal USB game controller, albeit one with a crazy number of buttons.
If this build doesn’t have enough switches and buttons for you, don’t worry. This Kerbal Space Program cockpit has banks of switches below and above the player, so one can more realistically scramble for the correct onet to flip when things start going sideways. On the other hand, we’ve seen slightly less intense builds if you’re not quite ready to take out a loan just to get into orbit.