Minicut2d And Omniwheel Robot

You’d think we would be done with the World Maker Faire posts by now, but no! We keep looking at our memory cards and finding more awesome projects to write about.

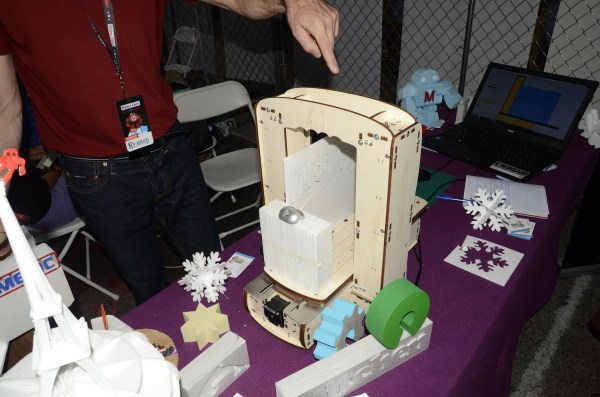
[Renaud Iltis] flew over from France to show off MiniCut2D, his CNC hot wire foam cutter. MiniCut2D uses X and Y, and Z stMINICUT2epper motors much like a 3D printer. Rather than print though, it pulls a heated nichrome wire through styrofoam. Foam cutting is great for crafts, but it really takes off when used for R/C aircraft. [Renaud] was cutting some models out of Depron foam in his booth. [Renaud] has set up FrenchFoam.com as a central location for users to upload and share designs in DXF format.
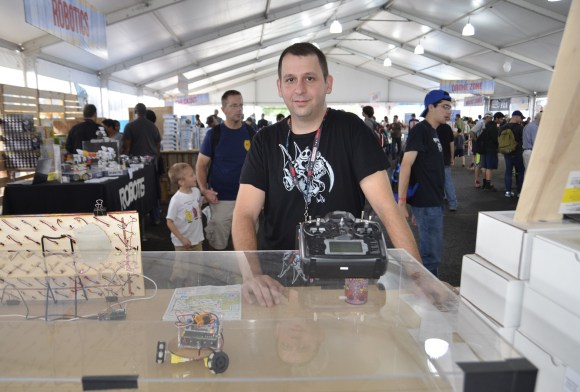
One of the neater features of MiniCut2D is that it can be loaded with a stack of foam boards to make several cuts at once. Not only is this a time saver when cutting repeating designs like wing ribs, but it also ensures the cut pieces are identical. Hey, even CNCs make mistakes once in a while.

 Omniwheel Robot

vic

In the MakerShed booth, we found [Victor Aprea] showing off Wicked Device’s new product, the Omniwheel Robot. Omniwheel utilizes a holonomic drive with omnidirectional wheels. The kit comes with a Nanode Zero, Wicked Devices’ own Arduino Uno clone, a motor control board, 3 motors, 3 omnidirectional wheels, and a whole list of hardware. The only thing needed to complete the kit is a radio control unit and receiver. Omniwheel may be simple, but we found driving it around to be mesmerizing – and a bit challenging. It’s a good thing [Victor] brought that plexiglass cover, as we bumped it a few times.

We’d love to see one of these little bots with a couple of sensors and autonomous control. If you build one, make sure to post it to Hackaday.io!

Piles Of Foam With A Hot Wire Slicer

foam

There are a million things you can do with foam, from some very impressive RC airplanes, all the way up to full-scale planes you can fly off into the wild blue yonder. Cutting foam, though, that’s a problem, and your best option is usually a hot wire foam cutter. [Darcy] put up some plans for a very nice bow cutter, but there’s also some experimentation for a foam slicer – a hot wire machine that takes a foam part and slices it like a smokehouse ham.

The bow-style cutter features laser cut parts, a pair of 1/4-20 bolts, a power supply, and about a foot of nichrome wire. It’s the bare minimum for cutting foam, but it seems to work really, really well.

The hot wire foam slicer is a much more interesting contraption, capable of making multiple thin sheets out of foam. Basically, it’s a laser cut tray with a bolt hole pattern running along the sides. Put two bolts along the side, loop some nichrome wire around the screw flights, and you have a way to cut foam in thicknesses of about 1/20th of an inch. Great if you’re trying to skin a model in very thin depron, or you just can’t find the right thickness of foam for your project.

Find The Giant Jolly Wrencher At Maker Faire This Weekend

scaled_DSC_0038

Check it out, I made something really geeky for Maker Faire. If you’re going to be in San Mateo this weekend for Maker Faire Bay Area, watch for the floating Skull and Wrenches. I won’t be alone, and my compatriots and I will be loaded down with stuff to give away to those who ask for it. If you are hell-bent on finding us, just check this Twitter list as we’ll frequently be tweeting our locations and exploits.

Want to grab a beer with some other Hackaday folk? Even if you’re not attending the Faire, you can take part in the festivities. We’re descending on O’Neil’s Irish Pub on Saturday night. You might want to let us know you’re coming. You can show up unannounced, but we can’t guarantee that you’ll be able to squeeze into the 80-person-pub. If we have way too many hackers overflowing into the street we’ll probably split the party up and go bar hopping. The place is apparently right next to a train stop for your traveling convenience. We just hope to keep things tame enough to make it to Maker Faire again on Sunday morning, but we can’t guarantee that either ;-)

Advanced Beer Carrier, Or How To Get Beer Onto A Plane

beer-import-case

[Badmonky] was facing a life crisis. How could he enjoy the hard-to-find German beers from his homeland while living in Princeton, New Jersey? Sure, you can find many good imports if you try, but that may come at a hefty price. Plus, the lesser known beers are completely unavailable in the States. Of course the solution is to import them himself after each trip home. He just needed a way to get as much beer on a plane as he possibly could.

We’d have no problem walking down the aisle with a couple of cases of cold ones, but let’s be honest here. Security won’t even let you on the plane with a bottle of water these days much less a case of tallboys. [Badmonky] hacked together this custom carrier so that it could be checked as luggage while protecting the frothy goodness. Two limiting factors to consider are size and weight. He started with the latter, calculating that 24 bottles would remain under his 50 pound limit. From there he selected a sports bag and picked up sheets of foam which were perforated using a hole saw. Alas the size constraint forced him to leave three of the (now empty?) vessels behind.

The bottles ride upside down and made the international voyage without incident. In retrospect he would have picked a roller-bag as this thing is hard on your shoulder after a trip through the airport and the public transit ride home.

The real question in our mind: why didn’t he check a keg?

DIY Foam Cutter Makes It Too Easy

Cutting foam is pretty tricky without a hot wire cutter. Don’t have one? Well, lucky for you, [Darcy Whyte] has a guide on how to make one. It takes just over an hour to build, and it costs next to nothing in supplies!

[Darcy] is using an old 9V power wart that he had lying around, but you can probably use any DC power supply. He designed the frame in SketchUp and cut it out with his CNC router, although a saw will work just as well for MDF. A piece of 40 gauge nickel chromium wire was strung taught between two 1/4-20 bolts, with one held back by a spring. The spring acts as a safeguard to prevent snapping the wire during overly aggressive cuts. This may be a simple build, but it does produce a handy tool.

[Darcy] demonstrates cutting foam with his creation in a video after the break. We think he could cut thin plastic with it as well—modify your 3D prints, anyone?—though he may need to crank up the voltage a bit.

Continue reading “DIY Foam Cutter Makes It Too Easy”

Temperature Controlled Wine Cellar Substitute

temperature-controlled-wine-cellar-substitute

Serious wine enthusiasts keep their bottles in a room built for the task. If you don’t have that kind of space you can still fabricate a similar storage environment. This foam box keeps stored wine at a controlled temperature. It also keeps light off of the precious goods. [Michael] built it himself to use in his apartment and published a description of the build process.

He picked up some foil-coated foam board from the home store. Six sections come together into a box about the size of a mini-fridge; 24″ by 24″. A square hole was cut in the center of the top section. This receives the smaller of two heat sinks mounted to a Peltier cooler. The temperature inside is monitored by a thermistor which [Michael] tore out of an old iPod battery. To give him some visual feedback on the internal temperature he added that yellow and black striped meat thermometer.

Since this is for long-term storage, we’d bet the system is rather efficient. As long as the door isn’t frequently opened the temperature change should be quite slow thanks to the insulation and the cool liquid in wine bottles.

How To Build A Foam Machine For Your Next Party

Your neighbors are going to love you if you start filling up the back yard with foam at your next party. It’s an easy enough build, but depending on your ability to source the major components it could cost a pretty penny to use it at your next rager.

[Species287] used a big fan and water pump which he already had on hand. All together that saved him about $200 (he’s pricing in Australian Dollars but they’re almost even right now with USD). The soap solution is super cheap, just a bottle of dish washing liquid mixed to the correct proportions with water, but you’ll need a way to apply it to the fan. Some irrigation supplies connected to the fan grate with zip ties did the trick. The pump is submerged in the bubble liquid, causing it to spray from the nozzles near the fan. But this won’t actually create bubbles. The last piece is a bag-shaped hunk of shade cloth from the garden store. Each pore of the cloth acts as a bubble ring. The cloth gets sprayed with soap by the sprinklers and the air from the fan then blows the bubbles.

There’s no video of this project so if you want to see it in action this other diy foam cannon will have to do.