Glove-based Touch Screen From A CRT Monitor

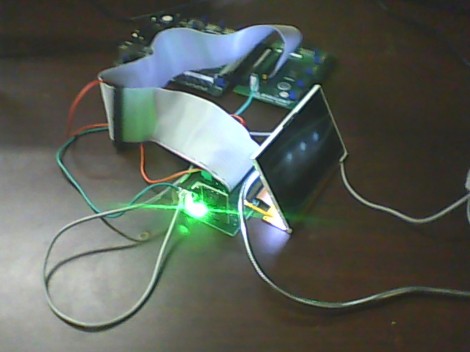
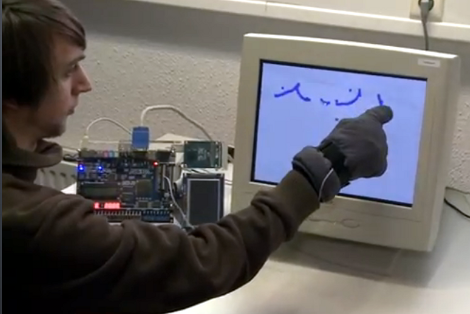
Here’s a bulky old CRT monitor used as a touch-screen without any alterations. It doesn’t use an overlay, but instead detects position using phototransistors in the fingertips of a glove.

Most LCD-based touch screens use some type overlay, like these resistive sensors. But cathode-ray-tube monitors function in a fundamentally different way from LCD screens, using an electron gun and ring of magnets to direct a beam across the screen. The inside of the screen is coated with phosphors which glow when excited by electrons. This project harness that property, using a photo transistor in both the pointer and middle finger of the glove. An FPGA drives the monitor and reads from the sensors. It can extrapolate the position of the phototransistors on the display based on the passing electron beam, and use that as cursor data.

Check out the video after the break to see this in action. It’s fairy accurate, but we’re sure the system can be tightened up a bit from this first prototype. There developers also mention that the system has a bit of trouble with darker shades.

Continue reading “Glove-based Touch Screen From A CRT Monitor”

$10 Camera Module For Your Next FPGA Project

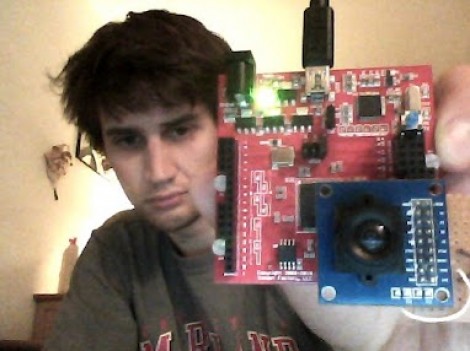
Here is [Voelker] showing off his FPGA-based camera hardware. He picked up an ov7670 camera on eBay for about $10 and set to work pulling pixels and processing the images. He’s now able to grab thirty frames per second and push them to his own Java display application. He’s using the Papilio board and if you want to give this a try yourself you might be able to snag a free breakout board (wing) for the unit.

[Voelker’s] approach is to grab each frame, and get it ready for quick serial transmission. The incoming frames are at 640×480 resolution. He scales that down to 80×60 and transmitted at 3M baud. The hardware resources used are actually quite light-weight. He wrote his own modules for transfer and photo processing using very little RAM for downscaling and one 128 byte buffer for data transmission. It sounds like he plans to use the camera to view and detect a line to create his own line-following robot.

Wondering where you’ve seen the ov7670 module before? It’s the part used on the TRAKR robot.

Up Your FPGA Game By Learning From This LCD Control Prototype

[Cesar] recently got a PSP display up and running with his FPGA development board. That’s a nice project, but what we really like is that he set aside a lot of time to show how it’s done every step of the way. This isn’t just a tutorial on that particular screen, but an overview of the skill set needed to get any piece of hardware working.

The screen itself is a Sharp LQ043T3DX02; a 480×272 TFT display with 16 million colors. Not bad for your project but when you start looking into the control scheme this isn’t going to be like using a Nokia screen with an Arduino. It takes twenty pins to control it; Red, green, and blue take sixteen pins, four pins are used for control, the rest are CK, DISP, Hsync, Vsync.

Wisely, [Cesar] designs his own interface board which includes the connector for the ribbon cable. It also has drivers for the screen’s backlight and supplies power to the device. With hardware setup complete he digs into the datasheets. We just love it that he details how to get the information you’re looking for out of this document, and shows his method of turning that first into a flow chart and then into code for the FPGA.

JTAG Dongle Pushes Code To FPGA After Bootup

This gnarly beast has near-magical qualities. [Sprite_TM] patched it together as a dongle which attaches to a JTAG header (we’re fairly certain this is not a standard footprint for that interface though). He uses it to push code to an FPGA after that device boots. Why? Well, there’s several reason, but the most generic answer is that some boards will not boot unless there is a chain of trust that validates the code which will be running.

In this case, [Sprite_TM] is using a knock-off board he acquired from a Chinese supplier. It’s a hardware network terminal (thin client), and as you can see in the video after the break, it works just fine. But that’s pretty boring and he wanted to use it for his own purposes. When he plugs in the dongle and powers up the board the network terminal is nowhere to be found, replaced with the code to play Pac-Man as if were a full arcade cabinet.

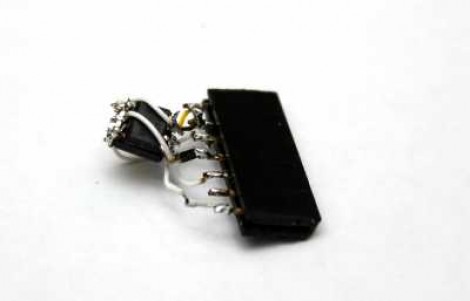
The dongle is simply a female DIL header, an ATtiny85, and a flash memory chip. The AVR has a software UART that speaks XSVF, the protocol used to push data to the FPGA. The data to be written is stored in the memory chip, and with that header in place reprogramming the AVR is just a matter of connecting an ISP programmer. Brilliant!

Continue reading “JTAG Dongle Pushes Code To FPGA After Bootup”

Fractal Viewer Can Zoom And Enhance Like On CSI

This fractal viewer is a great way to get your feet wet with Field-Programmable Gate Arrays. The project will give you some experience working with video output, user input, and a whole bunch of math and memory management. [Hamster] built it using the Papilio Plus board which hosts a Spartan 6 FPGA. This continues his odyssey into the realm of hardware design; part of which we looked at back in December.

The arcade Megawing for the dev board gives him easy access to the controls needed to scroll and zoom on the fractal design. Calculations to generate the shape are being run at 240 MHz, with the VGA output running at 80 MHz. The device has enough horse power and SRAM to show an 800×600 pixel output with a 60 Hz refresh rate.

We really liked the logic diagram that [Hamster] drew up when planning how the calculations would be handled. It’s not overly complex, but it took us a while to conceptualize how everything fits together. It’s certainly an improvement from his last attempt as we couldn’t make heads or tails out of that flow chart.

If you’re just interested in the pretty shapes and colors there’s a demo embedded after the break.

Continue reading “Fractal Viewer Can Zoom And Enhance Like On CSI”

FPGA Snake Game Uses No VHDL At All

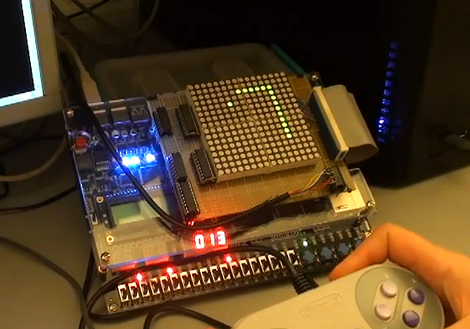
We’re really not supposed to start a feature like this; but this hack is awesome. It’s a game of Snake implemented by an FPGA dev board. It uses a 16×16 LED matrix as the display and an SNES controller for input. So far it sounds like a very normal version of the game. But as you start to hear how it works in the presentation after the break you fall in love with what’s going on here.

First of all, it’s not written in VHDL — the predominant programming language for FPGAs. Instead, [Darrell] used the schematic-only approach to build the logic. Okay, that’s starting to get more interesting. As he continues to explain the circuit we get to see how the control input works (pretty simple since the SNES controller uses a parallel-to-serial shift register) and how the display is multiplexed. But the actual game logic is where things really take off. Each pixel in the display has its own individual logic circuit. Basically every cell is its own processor which reacts both to what is passed into it, as well as to a random seed. That seed system is called the ‘bucket brigade’ and passes a chance to spawn a piece of food from one cell to the next. All of this together makes for one simple game that is eloquently executed. Continue reading “FPGA Snake Game Uses No VHDL At All”

Two Player Space Invaders Via FPGAs

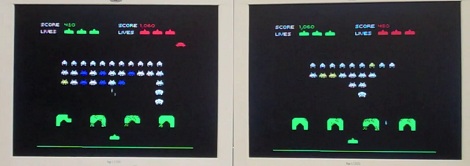
Last semester, [Peter], [Jared], and [Jeremy] took a course on embedded systems. They managed to turn out a very accurate copy of the classic Space Invaders in their class. Not wanting good code to go to waste, they decided to develop two player Space Invaders, and we wouldn’t mind testing it out.

The guys built their Space Invaders clone on a Virtex II dev board. Wanting a little more hardware development, they picked up a pair of RF trancievers so the two boards could communicate with each other. The rules of two-player Space Invaders is fairly simple; if you destroy an alien, there’s a 30% chance it will appear on your opponent’s screen. Hit the space ship that flies along the top of the screen, and 1 to 7 aliens will appear on the opponent’s screen. It’s a bit like two player Tetris where your victories bring about your friend’s downfall.

The guys put a really neat spin on an old game, and we’d love to try it out. Check out the guy on the left losing a game of Space Invaders to his lab partner after the break.

Continue reading “Two Player Space Invaders Via FPGAs”