‘LinuxCNC-Features’ Is The Garage-Fab’s Missing CAM Tool

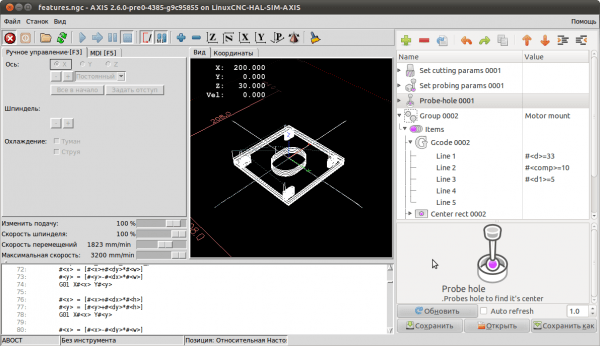
It takes a long toolchain to take the garage-machinist-to-be through all the hoops needed to start cranking out parts. From the choice of CAD software to the CAM tools that turn 3D models into gcode, to the gcode interpretters that chew up this source code and spit out step and direction pulses to turn the cranks of a cnc mill, there’s a multitude of open-and-closed source tools to choose from and even an opportunity to develop some of our own. That’s exactly what [Nick] and the folks over on the cnc-club forums did; they’ve written their own CAM tool that enables the end user to design a procedure of cuts and toolpaths that can export to gcode compatible with LinuxCNC.

Their tool, dubbed “LinuxCNC-features”, embeds a LinuxCNC-compatible graphical gcode programming interface directly into the LinuxCNC native user interface. Creating a part is a matter of defining a list of sequential cuts along programmable toolpaths. These sequential cuts are treatments like drilled holes, square pockets, bolt holes, and lines. The native embedding enables the machinist to preview each of the 3D toolpaths in LinuxCNC’s live view, giving him-or-her a quick-and-dirty check to make sure that their gcode performs as expected before running it. [Nick] has a couple of videos to get you up-and running on either your mill or lathe.

LinuxCNC-features has been out in the wild for almost two years now, but if you’re looking to get started cranking out parts in the garage, look no further for a CAM tool that can quickly generate gcode for simple projects. In case you’re not familiar with LinuxCNC, it’s one of the most mature open-source gcode interpreters designed to turn your PC into a CNC controller, and it’s the brains behind some outstanding DIY CNC machines like this plasma cutter.

Continue reading “‘LinuxCNC-Features’ Is The Garage-Fab’s Missing CAM Tool”

Embedding PCBs In 3D Prints

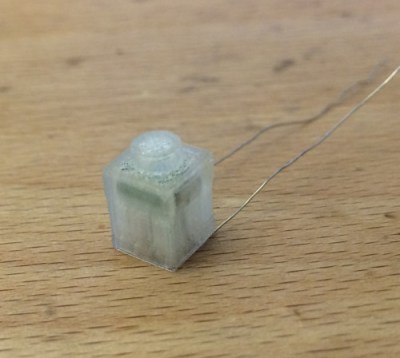
The folks over at Lunchbox Electronics are working on a very cool prototype: embedding LEDs inside standard 1×1 Lego bricks. Being a prototype, they needed a cheap way to produce Lego bricks stuffed with electronics. It turns out a normal 3D printer has okay-enough resolution, but how to put the electronics in the bricks? Gcode wizardry, of course.

3d-printed-LEGO-w-pcb-thumbThe electronics being stuffed into the bricks isn’t much – just a small PCB with an LED. It does, however, need to get inside the brick. This requires stopping the 3D printer at the right layer, moving the print head out of the way, inserting the PCB, and moving the head back to where it stopped.
Gcode to the rescue. By inserting a few lines into the Gcode of the print, the print can be paused, the print head raised and returned, and the print continued.

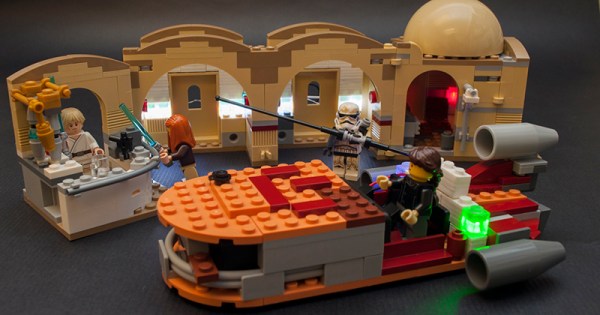
If you want to check out what these light up Lego look like, There’s a Kickstarter happening now. It’s exactly what the 80s space sets needed, only thirty years late.

CNC Milling Photos With A Halftone Generator

Looking for an awesome way to mill out a photo or graphic? Check out [Matt Venn]’s halftone gcode generator which creates halftone CNC toolpaths from any image file. We’ve run across some halftone generators before, but [Matt]’s generator has some interesting features and makes for some pretty unique output.

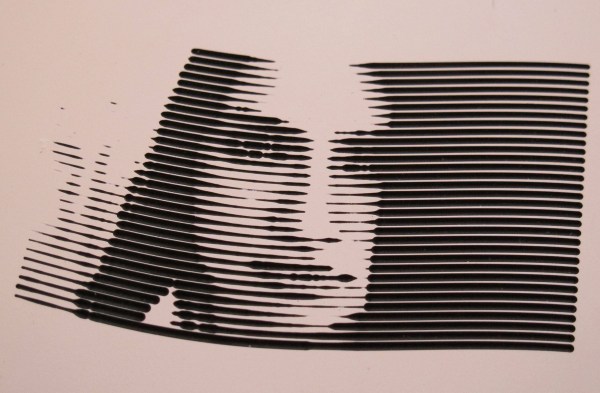
[Matt] initially wrote a simple command line program in Python, but just rewrote his script with a more user-friendly UI that renders a preview of the output as you change options.  The UI lets you change parameters like drill depth, number of lines, and the step size to tweak the output. It even has an option to map the halftone points along a sine wave which makes an interesting effect as shown in the image above.

[Matt]’s program generates standard gcode that you can use to run your CNC machine. [Matt] recommends milling a material with layers of different colors, but you can always mill a solid material and fill the routed areas with paint or dye instead. Want to grab the script or check out the source code? Head over to [Matt]’s GitHub repository.

Thanks for the tip, [Keith O].

Turning The Raspberry Into A CAD Workstation

Inventables has been working hard on a successor to the extremely popular Shapeoko CNC milling machine, and to bring digital fabrication to the masses, they’ve created Easel, possibly the easiest 3D design software you’ll ever use. [Sacha] was trying out the beta version of Easel and mentioned to the dev mailing list he was running his installation on a Raspberry Pi. One of the developers chimed in, and after a bit of back and forth we now have a workflow to use Easel with the Raspberry Pi.

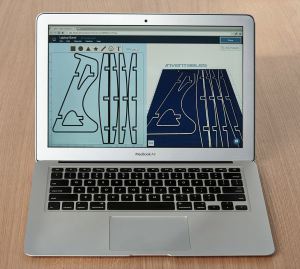
Easel is a web app, but since the graphics, design, and g-code generation are handled locally, even the most rudimentary CAD suite would choke the decidedly low power Raspi. Instead, [Sacha] is using the Raspberry to grab 2D and 3D files, turn that into g-code for a machine, and send it off to a Shapeoko router.

Easel doesn’t yet have local sender support that works on Linux, so a separate piece of software is used to shoot the g-code over a serial port to the machine. That’s something that will probably be added in a later version of Easel, making a Raspberry Pi a great way to control router or milling machine.

Walter Is A Robot Head Built From Scratch.

walter

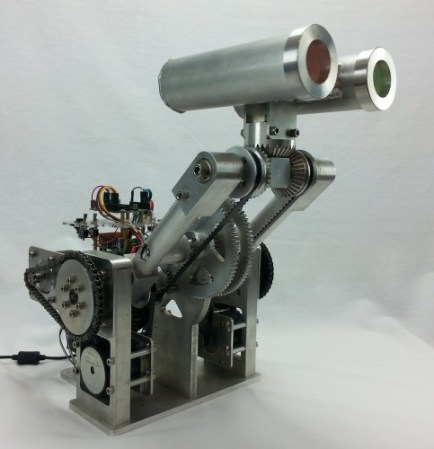
[Chris] has put together a robot head that is impressive at first sight. [Chris’] robot, Walter II, becomes even more impressive when you realize that [Chris] built every single part from scratch. Many of Walter’s parts were created using machines [Chris] built himself. Walter is a robot neck and head. His upper neck joint is based upon three bevel gears.Two steppers drive the side gears. When the steppers are driven in the same direction, Walter’s head nods. When they are driven in opposite directions, the head turns. The end result allows Walter’s head to be panned and tilted into almost any position.

A second pair of motors raise and lower Walter’s neck via a chain drive. What isn’t immediately visible is the fact that a system of gears and belts maintains the tilt on Walter’s head as his lower neck joint is actuated. For example, if Walter’s head is facing directly forward with his neck raised, one would expect him to be facing the ground when the neck is lowered. The gear/belt system ensures that Walter will still be facing forward when the neck joint reaches its lower limit. All this happens without any movement of the neck motors. [Chris] definitely put a lot of thought into the mechanical design of this system.

Continue reading “Walter Is A Robot Head Built From Scratch.”

Drawbot Software Aims To Do It Better Than The Rest

drawbot-software

There are plenty of drawbot projects out there, many of which come with their own special software in tow. While some of these packages are easier to use than others, [Dan Royer] is pretty sure he can do it better.

Looking for a fun and engaging way to teach STEM subjects in schools across the country, [Dan] developed a relatively simple drawbot which can be constructed by a wide range of age groups. While he is trying to get schools to purchase his robot kits, we’re guessing that our readers would be more inclined to build their own.

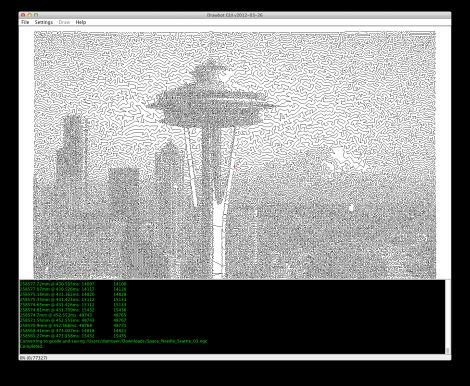
So what does [Dan] have to offer that might interest you? Well, he says he has developed some drawbot software that’s pretty darn easy to use. Rather than multiple applications generating machine-specific code, his software will transform your picture into a line drawing in one easy step. The app uses a traveling-salesman algorithm to generate drawings with nary a crossed line in sight before outputting the resultant machine instructions in easy-to-use GCode.

We don’t have a drawbot of our own handy to test his software out, so if you do happen to give it a shot, let us know how it worked for you in the comments.

Yet Another RepRap Host Looks Pretty Cool

Joining the pantheon of other RepRap host software packages such as ReplicatorG, RepSnapper, and Skeinforge is Yet Another RepRap Host, a project by [Arkadiusz] that combines a lot of neat features into a very cool package.

One thing we’ve really got to give [Arkadiusz] credit for is a virtual table that allows you to import several .STL files, place them on a virtual build platform, and print them all at once. Previously, the only way we knew how to do this was by either creating a single .STL file with all the desired parts already in place, or arraying several object to increase production. The virtual table feature allows anyone to bypass those steps and print out a lot of objects all at once.

YARRH also allows you to view the GCode in 3D. This feature is a little kludgy at the moment, but [Arkadiusz] says it’s functional and more than serviceable to run a 3D printer.

Right now, YARRH is only available for Windows, but a package for Ubuntu (and hopefully OS X) are coming down the pipe. You can check out some videos of YARRH in action after the break.

Continue reading “Yet Another RepRap Host Looks Pretty Cool”