Behold The Crimson Axlef*cker (Do Not Insert Finger)

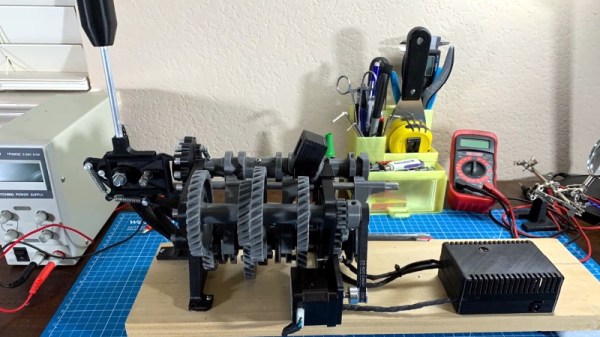
Are your aluminum extrusions too straight? The Crimson Axlef*cker can help you out. It’s a remarkable 3D printed, 4-stage, 125:1 reduction gearbox driven by a brushless motor. Designer [jlittle988] decided to test an early prototype to destruction and while he was expecting something to break, he didn’t expect it to twist the 2020 aluminum extrusion shaft before it did. We suppose the name kind of stuck after that.

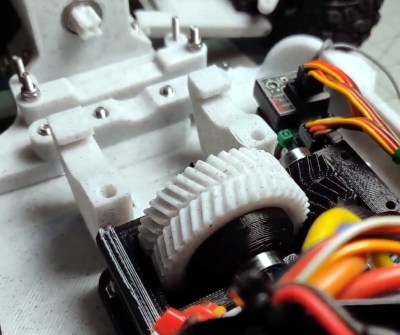
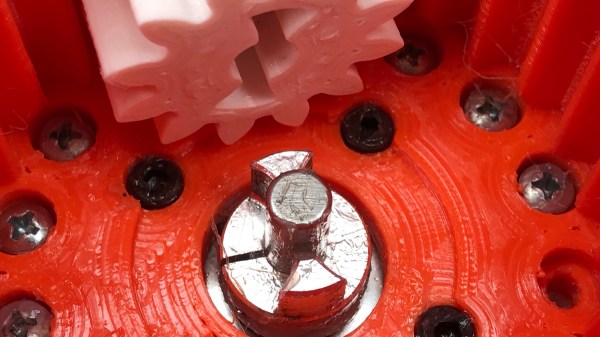
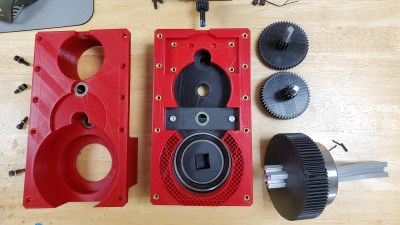
Internals of the first prototype, shaft of BLDC motor just visible at top. Twisted 2020 extrusion output shaft at bottom right.

[jlittle988] has been documenting the build progress on reddit, and recently posted a fascinating video (embedded below) of the revised gearbox twisting the output shaft even further. He’s a bit coy about the big picture, saying only that the unit is part of a larger project. In fact, despite the showy tests, his goal is not to simply obtain maximum torque. We can only speculate on what his bigger project is, but in the meantime, seeing the gearbox results is some good clean fun. He first announced the gearbox test results here, and swiftly followed it up with some revisions, then the aforementioned video. There’s also an image gallery of the internals, so check that out.

The Crimson Axlef*cker is driven by an ODrive brushless dual-shaft motor and an ODrive controller as well; that’s the same ODrive whose open source motor controller design impressed us so much in the past.

Between projects like this one and other gearboxes like this cycloidal drive, it’s clear that custom gearbox design is yet another door that 3D printing has thrown wide open, allowing hobbyists to push developments that wouldn’t have been feasible even just a few years earlier.

Continue reading “Behold The Crimson Axlef*cker (Do Not Insert Finger)”

Robotic Cheetah Teaches A Motors Class

It seems like modern roboticists have decided to have a competition to see which group can develop the most terrifying robot ever invented. As of this writing the leading candidate seems to be the robot that can fuel itself by “eating” organic matter. We can only hope that the engineers involved will decide not to flesh that one out completely. Anyway, if we can get past the horrifying and/or uncanny valley-type situations we find ourselves in when looking at these robots, it turns out they have a lot to teach us about the theories behind a lot of complicated electric motors.

This research paper (gigantic PDF warning) focuses on the construction methods behind MIT’s cheetah robot. It has twelve degrees of freedom and uses a number of exceptionally low-cost modular actuators as motors to control its four legs. Compared to other robots of this type, this helps them jump a major hurdle of cost while still retaining an impressive amount of mobility and control. They were able to integrate a brushless motor, a smart ESC system with feedback, and a planetary gearbox all into the motor itself. That alone is worth the price of admission!

The details on how they did it are well-documented in the 102-page academic document and the source code is available on GitHub if you need a motor like this for any other sort of project, but if you’re here just for the cheetah doing backflips you can also keep up with the build progress at the project’s blog page. We also featured this build earlier in its history as well.

A Compact Strain Wave Gear Assembly

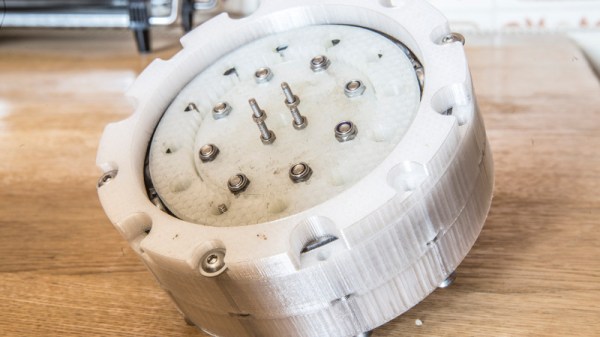
Strain wave gearing is a clever way to produce a high-efficiency, high ratio gearbox within a small space. It involves an outer fixed ring of gear teeth and an inner flexible ring of teeth which are made to mesh with the outer by means of an oval rotor distorting the ring. They aren’t cheap, so [Leo Vu] has had a go at producing some 3D-printable strain wave gearboxes that you could use in your robotic projects.

He’s created his gearbox in three ratios, 1:31, 1:21 and 1:15. It’s not the most miniature of devices at 145mm in diameter and weighing well over a kilogram, but we can still imagine plenty of exciting applications for it. We’d be curious as to how tough a 3D printed gear can be, but we’d expect you’ll be interested in it for modest-sized robots rather than Formula One cars. There’s a video featuring the gearbox which we’ve placed below the break.

This certainly isn’t the first strain wave gearset we’ve brought you, more than one 3D printed project has graced these pages. We’ve even brought you a Lego version. Continue reading “A Compact Strain Wave Gear Assembly”

Power Wheels Gets Real With Real Wheels

We’re no stranger to Power Wheels modifications, from relatively simple restorations to complete rebuilds which retain little more than the original plastic body. These plastic vehicles have the benefit of nostalgia to keep the adults interested, and naturally kids will never get tired of their own little car or truck to tear around the neighborhood in. Many toys come and go, but we don’t expect Power Wheel projects to disappear from our tip line anytime soon.

Today’s project starts with a straightforward Power Wheels restoration story: [myromes] picked up a well-worn Jeep and decided that it needed a fresh coat of paint and some tweaks before handing the keys over to the next generation. But in an interesting spin, he decided to try mounting proper pneumatic tires on it in hopes they might imbue the pint-sized Jeep with some of the abilities of its full scale inspiration. But as it turned out, the project wasn’t quite the Sunday drive he was hoping for.

For one thing, the new wheels were much thicker than the old ones. This meant cutting away some of the plastic where they mounted so he could get the shafts to slide all the way through. At 5/16″, the original Power Wheels shafts were also thinner than what the axle the wheels were designed for. Luckily, [myromes] found that a small piece of 1/2″ PEX water pipe made a perfect bushing. Then it was just a matter of buying new push nuts to lock them in place.

That got the front wheels on, but that was the easy part. The rears had to interface with the Jeep’s motors somehow. To that end, he cut out circles of plywood and used an equal amount of Gorilla Glue and intense pressure to bond them to the new wheels. He then drilled four holes in them which lined up with the original motor mounts so he could bolt them on.

Things were going pretty well until he tried to replace the Jeep’s rear axle with a length of threaded rod from the hardware store. It wasn’t nearly strong enough, and sagged considerably after just a few test rides. He eventually had to place it with a correctly sized piece of cold rolled steel rod to keep the car from bottoming out.

While the new wheels certainly perform better than the original hard-plastic ones, there’s a bit of a downside to this particular modification. The slippy plastic wheels were something of a physical safety to keep the motors and gearboxes from getting beat up to bad; with wheels that have actual grip, the Jeep’s stock gears are probably not long for this world. But [myromes] says he’s got plans for future upgrades to the powertrain, so hopefully the issue will be resolved before the little ones need a tow back home.

For more tales from the Power Wheels garage, you might want to take a look at this fantastic rebuild complete with digital speedometer or just head straight to the big leagues with some seriously upgraded rides.

A DIY Balcony Crane Lifts Groceries For The Lazy But Patient

If necessity is the mother of invention, then laziness is probably its father. Or at least a close uncle. Who hasn’t thought, “There has to be a better way to do this, one that doesn’t involve me burning precious calories”?

Motivational laziness seems to increase with potential energy, as anyone who needs to haul groceries up four flights of stairs will tell you. This appears to be where this balcony-mounted drill-powered crane came from. Starting with a surplus right-angle gearbox and drum, [geniusz K] fabricated the rest of the crane from steel plate and tubing. We like the quality of fabrication and the tip on making slip couplings from bits of square tubing. The finished product got a nice coat of brown paint to match the balcony railing; keeping the neighbors happy is always important. He tested the crane with a 20-kg weight before installing it on the balcony and put it to work hauling groceries up three stories. Check out the build and the test in the video below.

While it won’t set any speed records, at least the drill is doing the work. But what if you’re impatient as well as lazy? Aside from being two-thirds of the way to programming greatness, you may have to up the game. A heavy-lift quadcopter, perhaps?

Continue reading “A DIY Balcony Crane Lifts Groceries For The Lazy But Patient”

Printed Part Gets Classic Truck Rolling

When working on classic vehicles, and especially when modifying them outside of their stock configurations, things can get expensive. It’s a basic principle in economics: the rarer something is the more money somebody can charge you for it. But if you’ve got the skills and the necessary equipment, you can occasionally save yourself money by custom-fabricating some parts yourself.

After changing the gear ratio in his 1971 Ford F100, [smpstech] needed to adjust his speedometer to compensate. Unfortunately, a commercial speedometer reducer and the new cables to get it hooked up to his dash would have run into the hundreds of dollars, so he decided to try designing and 3D printing his own gearbox. The resulting development process and final product are a perfect example of how even a cheap desktop 3D printer, in the hands of a capable operator, can do a lot more than print out little toy boats.

The gearbox contains a large ring gear driven by a smaller, offset, spur gear. This compact inline package drops the speed of the input shaft by 25.5%, which [smpstech]  mentions is actually a bit slower than necessary, but it does give him some wiggle room if he decides to change his tire size.

Even if you’re not looking for a speedometer reducer for a nearly 50 year old truck, there are some lessons to be learned here in regards to 3D printed car parts. The first version of his gearbox, while functional initially, ended up looking like a deflated balloon after being exposed to the temperatures inside the F100’s engine bay. His cheapo PLA filament, which is probably fine for the aforementioned toy boats, simply wasn’t the right material for the job.

[smpstech] then reprinted the gadget in HTPLA, which needs to be annealed after printing to reach full strength. Usually this would involve a low-temperature bake in the oven, but he found that simmering the parts in a pot of water on the stove gave him better control over the temperature. Not only did the HTPLA version handle the under-hood conditions better, it was also strong enough that he was able to use a standard die on the connections for the speedometer cables to create the threads instead of having to model and print them. Definitely a material to keep an eye on if regular PLA isn’t cutting it for you.

This isn’t the first time we’ve seen 3D printed parts used to get a vintage vehicle back on the road. Building these custom parts would have been possible without a 3D printer, of course, but it’s a good example of how the technology can make these types of repairs faster and easier.

[via /r/functionalprint]

Bomb Hoist Teardown Shows Cold-War-Era Big Iron

Buying surplus equipment lends a frisson of excitement as you eagerly await the package or crate containing your purchase. Did you buy a hidden treasure, or has some shyster succeeded in unloading a pile of garbage onto you, their mark? [Professor Churls] shelled out $49.99 for a military surplus bomb hoist which definitely falls into the former category. His teardown reveals it to be a beautifully over-engineered piece of Cold-War-era American hardware.

As the package with its extremely heavy contents is first inspected, he reminds us just what a bomb hoist does, it is clipped to an aircraft by ground crew and serves as a small but extremely powerful crane to lift up to a 6000-pound piece of ordnance onto the wing pylon of an aircraft. This particular example dates from the 1960s, and features a 28-volt DC motor coupled to a bulky gearbox assembly on a swivel mount for attachment.

His teardown is extremely detailed, but such is the engineering and complexity of the device you’ll want to read every part of it. The motor is a fairly traditional separately-excited brushed DC design such as you’d expect from that era, but with unusual features such as brushes on pivots rather than a slide. The multiple sets of gears are packed in aged and phenolic-smelling grease, and have unusual features such as stub-form teeth for high torque at low durations. There is even an entirely separate gear train for the hex drive provided so that crews could keep the bombers rolling even when the power was out.

He leaves us with the tantalising information that there is a project awaiting this device, but doesn’t tell us what that might be. We hope we’ll get to see it, whatever it is. Meanwhile it’s great to see that this kind of item can still be found from military surplus suppliers, where this is being written they have degenerated into little more than stockists of camouflage-printed camping gear. Our colleague [Brandon Dunson] lamented in 2015 on the slow decline of the electronic surplus business in his location.