Power Wheels Gets Real With Real Wheels

We’re no stranger to Power Wheels modifications, from relatively simple restorations to complete rebuilds which retain little more than the original plastic body. These plastic vehicles have the benefit of nostalgia to keep the adults interested, and naturally kids will never get tired of their own little car or truck to tear around the neighborhood in. Many toys come and go, but we don’t expect Power Wheel projects to disappear from our tip line anytime soon.
Today’s project starts with a straightforward Power Wheels restoration story: [myromes] picked up a well-worn Jeep and decided that it needed a fresh coat of paint and some tweaks before handing the keys over to the next generation. But in an interesting spin, he decided to try mounting proper pneumatic tires on it in hopes they might imbue the pint-sized Jeep with some of the abilities of its full scale inspiration. But as it turned out, the project wasn’t quite the Sunday drive he was hoping for.

For one thing, the new wheels were much thicker than the old ones. This meant cutting away some of the plastic where they mounted so he could get the shafts to slide all the way through. At 5/16″, the original Power Wheels shafts were also thinner than what the axle the wheels were designed for. Luckily, [myromes] found that a small piece of 1/2″ PEX water pipe made a perfect bushing. Then it was just a matter of buying new push nuts to lock them in place.

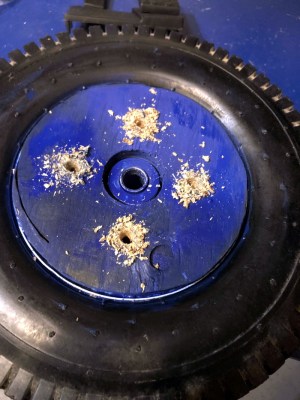
That got the front wheels on, but that was the easy part. The rears had to interface with the Jeep’s motors somehow. To that end, he cut out circles of plywood and used an equal amount of Gorilla Glue and intense pressure to bond them to the new wheels. He then drilled four holes in them which lined up with the original motor mounts so he could bolt them on.

Things were going pretty well until he tried to replace the Jeep’s rear axle with a length of threaded rod from the hardware store. It wasn’t nearly strong enough, and sagged considerably after just a few test rides. He eventually had to place it with a correctly sized piece of cold rolled steel rod to keep the car from bottoming out.

While the new wheels certainly perform better than the original hard-plastic ones, there’s a bit of a downside to this particular modification. The slippy plastic wheels were something of a physical safety to keep the motors and gearboxes from getting beat up to bad; with wheels that have actual grip, the Jeep’s stock gears are probably not long for this world. But [myromes] says he’s got plans for future upgrades to the powertrain, so hopefully the issue will be resolved before the little ones need a tow back home.

For more tales from the Power Wheels garage, you might want to take a look at this fantastic rebuild complete with digital speedometer or just head straight to the big leagues with some seriously upgraded rides.

Using FTDI Chips With Python

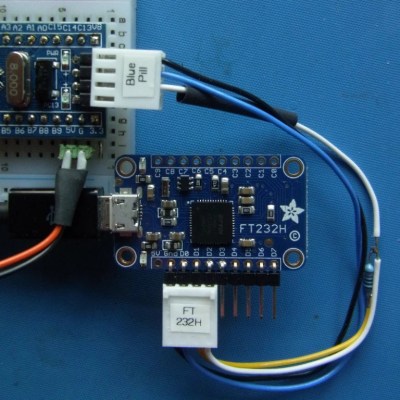
FTDI are a company known for producing chips for USB applications. Most of us have a few USB-to serial adapters kicking about, and the vast majority of them run on FTDI hardware (or, if we’re honest, counterfeit copies). However, FTDI’s hardware has a whole lot more to offer, and [jayben] is here to show us all how to take advantage of it using Python.

FTDI chips are an effective way to debug ARM projects, using the SWD protocol.

FTDI’s chips have varying capabilities, but most can do more than just acting as a USB-connected COM port. It’s possible to use the chips for SPI, I2C, or even bitbanging operation. [jayben] has done the hard work of identifying the best drivers to use depending on your operating system, and then gone a step further to demonstrate example code for sending data over these various interfaces. The article not only covers code, but also shows oscilloscope traces of output, giving readers a strong understanding of what should be happening if everything’s operating as it should. The series rounds out with a primer on how to use FTDI hardware to speak the SWD protocol to ARM devices for advanced debugging use.

It’s a great primer on how to work effectively with these useful chips, and we imagine there will be plenty of hackers out there that will find great use to this information. Of course, it’s important to always be careful when sourcing your hardware as FTDI drivers don’t take kindly to fake chips.

Lighting Up The Night Sky With A Flying POV Display

We’ve seen loads of persistence of vision displays before, but this sky-writing POV display seems as though it may be a first. And we have to agree with its creators that it’s pretty cool.

The idea man on this was [Ivan Miranda], who conceived of a flying POV as a twist on his robotic dot-matrix beach printer. But without any experience in RC flight, he turned to fellow YouTuber [Tom Stanton], whose recent aerial builds include this air-powered plane, for a collaboration. [Ivan]’s original concept was a long strip of Neopixels that would be attached to the underside of a wide-wingspread plane. WIthout much regard for the payload limits of most RC planes, he came up with a working display that was 3 meters long. His video below shows it in use in his shop, with some pretty impressive long exposure images.

[Tom]’s part was to make the POV display flyable. He cut the length down to 2 meters and trimmed the weight enough to mount it to a quadcopter. Ungainly as the machine was, he was able to master its control enough to start painting pictures across the twilight sky. The images at the end of his video are actually stunning – we’re especially fond of Thunderbird 2, which takes us back to our childhood.

We’re not sure what the practical uses of this are, but that’s hardly the point. It’s enough that it’s an interesting project from an unlikely duo. Continue reading “Lighting Up The Night Sky With A Flying POV Display”

Rigol MSO5000 Hacked, Features Unlocked

Rigol’s test gear has something of a history of being hacked. Years ago the DS1022C oscillocope was hacked to increase bandwidth, and more recently the DS1054Z was hacked to unlock licensed features. Now, it’s the MSO5000’s turn.

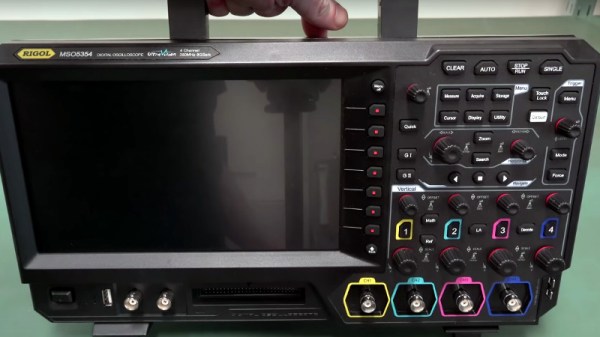
Over on the EEVBlog forums a group has been working on hacking another Rigol, the MSO5000, a 70 MHz oscilloscope which can be upgraded to 350 MHz via software licensing. Various other features including a two channel, 25 MHz arbitrary waveform generator are also built-in, but locked out unless a license key is purchased. The group have managed to enable all the locked options without license keys.

The hack is quite simple. The Linux system running on the scope has a default root password of, you guessed it, “root”. After logging in over SSH with these credentials, the user just needs to modify the startup file to add the “-fullopt” flag to the “appEntry” application. This starts the application in a fully unlocked state, which gives access to all the features.

The MSO5000 costs about $1000, and the bandwidth option alone adds over $3000 to the price. If you’re willing to risk your warranty, and you have the skills to edit a file with vi, this hack provides a serious upgrade for free.

If you have a DS1022C you’ll find our reporting on its hack here, and likewise DS1054Z owners will find theirs here.

Header image: EEVBlog.

PIC-Powered Game Console Is Blocky Goodness

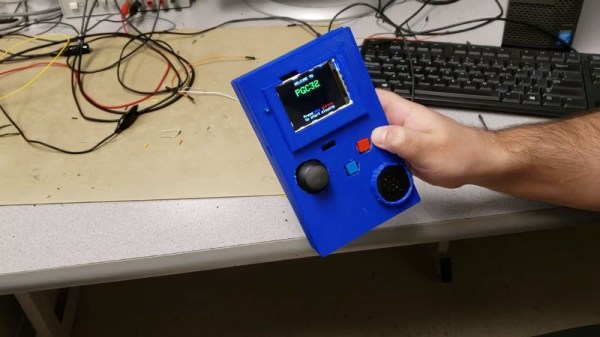
Picking up new skills in the electronics field is often best served by the classic mantra – “learn by doing”. [Juan] and [Leo] did just that, deciding to build a handheld game console for a University project, and delivering the PGC-32.

Built as a final project for the Digital Systems Design course at Cornell University, the PGC-32 takes on a daunting chunk of functionality, and pulls it off in time to get the grades. The team coded a basic block-based game for the hardware, and control is switchable between the analog stick and a built-in accelerometer. Gameplay is displayed on a 320 x 280 color TFT display. Learning to code a basic game is useful, as it teaches student engineers to consider important concepts like timing, race conditions, interrupts, and display routines.

As a university project, it is well documented and the team step through each detail in their code with explanations as to how and why things are done. The internals are particularly neat, too, with a tidy PCB layout and 3D printed case holding everything together.

We’ve seen plenty of work from Cornell’s courses before, too – like this sleep quality monitor.  Video after the break.

Continue reading “PIC-Powered Game Console Is Blocky Goodness”

Seeing Like Bees With Ultraviolet Photography

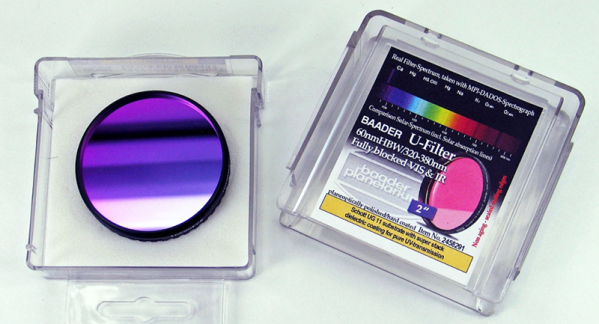
When it comes to seeing in strange spectrums, David Prutchi is the guy you want to talk to. He’s taken pictures of rocks under long, medium and short UV light, he’s added thermal imaging to consumer cameras, and he’s made cameras see polarization. There’s a lot more to the world than what the rods and cones on your retina can see, and David is one of the best at revealing it. For this year’s talk at the Hackaday Superconference, David is talking about DIY Ultraviolet Photography. It’s how bees see, and it’s the bees knees.

Continue reading “Seeing Like Bees With Ultraviolet Photography”

Hexagrow Robot Packs A Serious Sensor Package

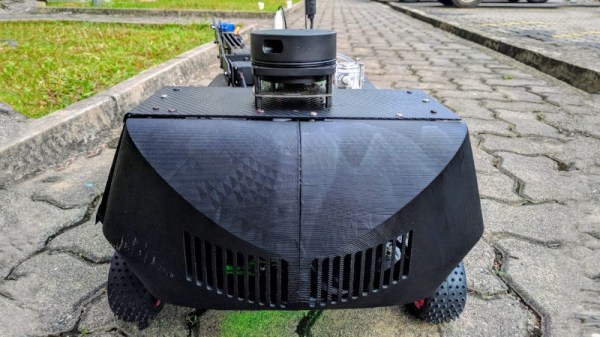
Automation is a lofty goal in many industries, but not always straightforward to execute. Welding car bodies in the controlled environment of a production line is relatively straightforward. Maintaining plants in a greenhouse, however, brings certain complexities due to the unpredictable organic processes at play. Hexagrow is a robot that aims to study automation in this area, developed as the final year project of [Mithira Udugama] and team.

The robot’s chassis is a very modern build, consisting of carbon fiber panels and 3D printed components. This kind of strength is perhaps overkill for the application, but it makes for a very light and rigid robot when the materials are used correctly.

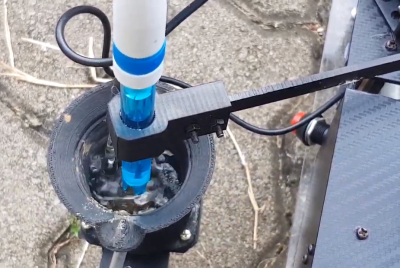
Testing soil pH isn’t easy, but Hexagrow is up to the challenge.

It’s the sensor package where this build really shines, however. There’s the usual accoutrement of temperature and humidity sensors, and a soil moisture probe, as we’d expect. But there’s more, including an impressive soil pH tester. This involves a robotic arm with a scoop to collect soil samples, which are then weighed by a load cell. This is then used to determine the correct amount of water to add to the sample. The mixture is then agitated, before being tested by the probe to determine the pH level. It recalls memories of the science packages on Mars rovers, and it’s great to see this level of sophistication in a university project build. There’s even a LIDAR mounted on top for navigation purposes, though it’s not clear as to whether this sensor is actually functionally used at this point in development.

Plants can be demanding of their caretakers, so perhaps you’d best check you’re measuring your soil moisture correctly? Video after the break.

[Thanks to Baldpower for the tip!]

Continue reading “Hexagrow Robot Packs A Serious Sensor Package”