Super Mario In Sed, Sort Of

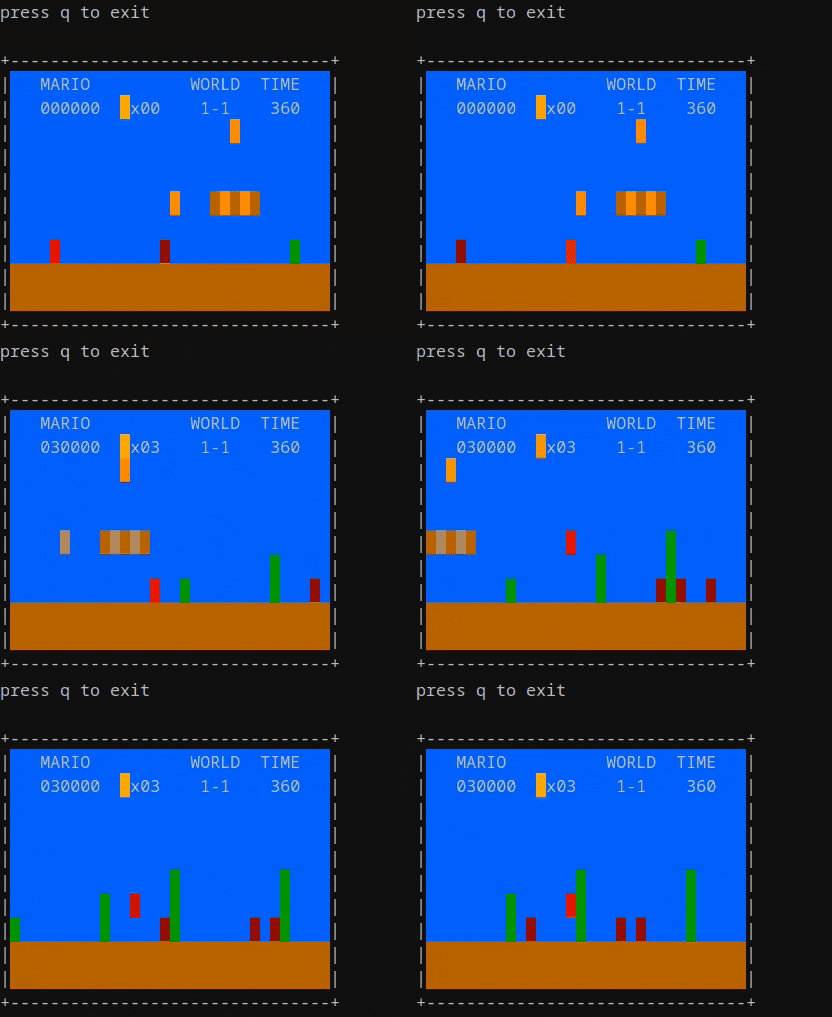
We definitely needed to reach for a sed reference guide for this one, but looking at the animated GIF of the script running, it is recognizably Super Mario Bros. albeit with minimal gameplay beyond jumping obstacles and avoiding or destroying koopas et al. Creator [Ivan Chebykin] is for certain a master of the dark arts.

Digging in a bit deeper, it’s not strictly speaking 100% sed. A wrapper shell script is required to interface to the shell and grab the keyboard input to pass along. This is simply because sed is a stream processor, and as such it requires text to be fed into it, and it produces a text output. It has no way of reading the terminal input directly, hence the wrapper script. However, all the game logic and ‘graphics’ rendering is pure sed, so that’s perfectly reasonable.

Such programming demos are a great way to hone the finer points of various tools we use every day, whilst not being serious enough to matter if we fail. Pushing the boundaries of what can be done with these basic nuts and bolts we take for granted, is for us the very essence of software hacking, and bravo we say.

Reckon you could top this? Show us! In the meantime, here’s a guide to hacking the recently released Game and Watch, and then doing the decent thing and running DOOM on it. Finally, sed is notoriously tricky to work with, so to help here’s a graphical debugger to make things a little clearer.

Bask In The Glory Of This 336 LED Digit Display

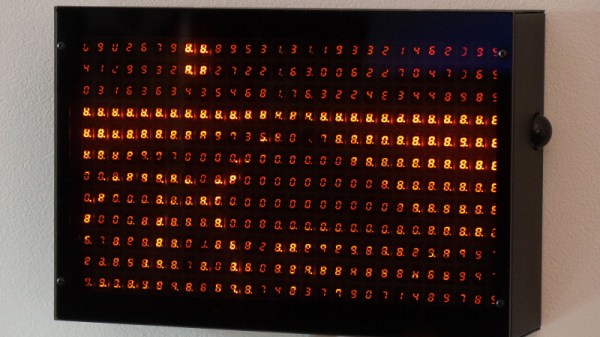
[Chris Combs] recently took the wraps off of an incredible art piece that he calls Road Ahead which uses 336 seven segment LED digits to create an absolutely gorgeous display. With a piece of smoked acrylic to slightly diffuse the orange glow of the LEDs, the end result has a distinctively retro look that we’d gladly spend all day staring at.

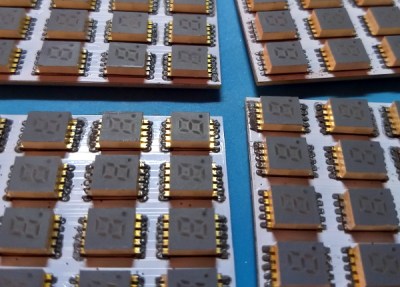
For those looking to dig a bit deeper, [Chris] has put together some very impressive documentation over on Hackaday.io that goes into plenty of detail on how he designed and built this beauty. From the design of the PCBs that carry all of the 0.3″ SMD displays to the custom software running on the Raspberry Pi 3 that powers it, there’s no technical stone left unturned.

According to the build log, this is the second version of the display. The first one was housed in a rather attractive wooden enclosure, but as [Chris] explains, that was precisely the problem. He wanted something that looked cold and unfeeling as the nearly 340 digits flashed away with potentially ominous intent. So he ditched the wooden case for a powder coated steel one that looks more like the front panel of a mainframe than something you’d pick up at the craft store.

Another interesting point explained in the write-up is how the Python software is designed to treat the hardware as a contiguous graphical display rather than just an array of independent digits. Grayscale images can be reproduced on the by using PWM to adjust the brightness of each segment’s corresponding “pixel”; though admittedly it takes a bit of imagination to see the intended image with a resolution this low.

This project reminds us of the incredible LED hexdump display we saw not that long ago, down to the PWM trickery for squeezing “graphics” out of these exceptionally non-graphical elements. With any luck, perhaps these are the opening shots in an arms race to see who can build the largest array of multi-segment LED displays.

Beginner’s Android/Arduino Example Shows The Power Of App Inventor

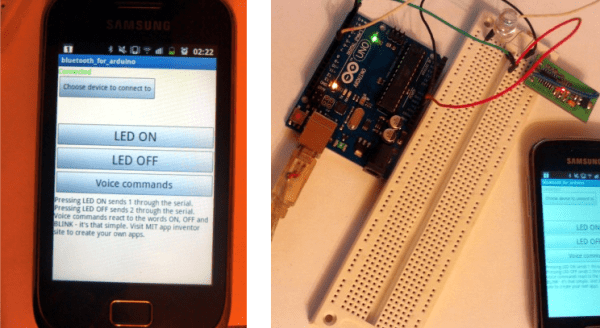
This is a simple project. It uses an Android device to switch an LED driven by the Arduino. Connectivity is provided by the Bluetooth module inserted in the breadboard. But one look at the UI on the Android device and you might think this is anything but simple. The truth is that [Kerimil] didn’t spend forever learning Java and programming the app. Instead he’s showing off the power of  App Inventor to get your Android controls up and running fast.

Check out the third button down; when was the last time you added voice commands to your project? It’s worth clicking through to see just how simple that portion was. App Inventor — a Google cast-out that is now maintained by MIT — is a graphical tool that unlocks the power of an Android handset to those with the most basic of programming understanding. For instance, the voice controls shown off after the break are provided by a single bracket which uses conditional statements to ‘listen’ for the words on, off, and blink. You’ll find the voice recognition diagram after the break as well.

You could try to go completely graphical with this project. There’s the option of programming the Arduino side of the project in a similar way.

Continue reading “Beginner’s Android/Arduino Example Shows The Power Of App Inventor”