How To Reverse Engineer A PCB

For [Peter]’s entry for the 2015 Hackaday Prize, he’s attempting to improve the standard industrial process to fix atmospheric nitrogen. Why? Fertilizers. He’s come up with an interesting technique that uses acoustic transducers in a pressure vessel, and to power that transducer, he’s turned to the greatest scrap heap in the world: eBay. He found a cheap ultrasonic power supply, but didn’t know offhand if it would work with his experiments. That’s alright; it’s a great opportunity to demo some basic reverse engineering skills.

A few months ago, [Dave Jones] posted a great video where he reverse engineers the front end of the new Rigol Zed. The basic technique is to make a photocopy, get some transparency sheets, grab a meter, and go to town. [Peter]’s technique is similar, only he’s using digital image manipulation, Photoshop, and a meter.

The process begins by taking pictures of both sides of the board, resizing them, flipping one side, and making an image with several layers. The traces on the bottom of the board were flooded and filled with the paint bucket tool, and components and traces carefully annotated.

With some effort, [Peter] was able to create a schematic of his board. He doesn’t know if this power supply will work with his experiments; there’s still some question of what some components actually do. Still, it’s a good effort, a great learning opportunity, and another log in [Peter]’s entry to The Hackaday Prize

Using LVDS Laptop Displays

No doubt anyone reading this has access to a few ancient laptops and the displays contained within. While those laptops are probably still stuck with a Gig of RAM and Windows ME, the display panels are probably still good. They don’t have HDMI, DVI, or VGA, though, which means those panels will need a converter.

[Jared] had a different idea. Instead of reusing laptop displays with a converter, why not connect them to an LVDS connector on some modern hardware? He had a RIoT board with a native LVDS connector, and with some clever reverse engineering and PCB fabrication he can put those old displays to work.

[Jared] had a very cool sunlight-readable ‘transflective’ LCD from on old Portege R500 laptop. If he was going to take apart one laptop to use with modern hardware, this was the one. Opening up the display he found a tiny connector but no obvious markings of what pins did what. The datasheet was also not to be found. By shorting two pins together, he could figure out what the pins were: shorting the clock freezes the screen, shorting the HSYNC and VSYNC means the screen loses sync. Blues, reds, and greens can be found the same way.

With the pins identified, a breakout board was in order. This is just a small board to break out the very small wires to solderable pads and a driver for the backlight. With that, and the RIoT with an LVDS output, [Jared] was able to use new hardware with this old but still serviceable display.

High Voltage AVR Programmer

The most common way of programming AVR microcontrollers is the In System Programming port. That little six-pin header with MOSIs and MISOs coming out of it will program every AVR you’ll ever come across. The ISP does have a downside – fuses. Set your fuses wrong, and without a High Voltage Serial Programmer, your chip is bricked. [Dilshan] designed his own HVSP that’s less expensive than the Atmel STK500 and has a nice GUI app.

Instead of following in the footsteps of the USBtinyISP, [Dilshan] is using a PIC18F as the main microcontroller in the programmer. This chip was chosen because of its built-in USB functionality. Because the High Voltage part of a HVSP operates at 12V, actually providing that voltage needed to be taken into consideration. For this, [Dilshan] is using standard 78xx regulators with an 18V input.

The app to control this programmer does everything you would expect, including all the usual AVRdude commands. A great build, and just what we need to reset the fuses on a few dozen chips we have sitting around.

Advanced Not-Reading Technology

Yesterday, there was a Hackaday post for a Kickstarter campaign. Because we force everyone to read every Hackaday post, there were some complaints and suggestions that we flag posts about Kickstarter campaigns. The most obvious solution to this problem of forcing people to read what they don’t want to read would be a UserScript or browser extension that automatically removes posts with objectionable tags.

It took 12 hours for [Daniel Ward] to lift you up to salvation, ending the inexorable toil you have all suffered under the thumb of idiotic and incompetent Hackaday editors.

[Daniel] wrote a UserScript for GreaseMonkey or TamperMonkey that looks at the tags for each and every Hackaday post. If a tag matches, “crowd-funding”, “crowdfunding”, or “kickstarter”, the post is removed from your browser.

It’s an astonishing advancement in state of the art, “not reading what you don’t want to read” technology. Bards and troubadours will sing of this day for years. Philosophers and theologians are citing this as evidence of something they’re calling, ‘free will.’ We don’t know who [Will] is, but at least he’s free now.

If that’s not enough, [RoGeorge] came up with an astonishing twist on this life-changing technology. By adding, ‘Arduino’ to the blacklisted tags, all posts tagged ‘Arduino’ are also removed. This can, of course, be extended to any tag. Imagine; a world where you don’t have to read what you don’t want to read. A futuristic utopia. Astounding.

The 2G Raspberry Pi Smartphone

For [Tyler]’s entry to the Hackaday Prize, he’s making something that just a few years ago would be unheard of in a homebrew build. He’s making a DIY smartphone. Yes, with cheap single-board Linux computers, GSM modules, and SPI touchscreen displays, it’s possible to build your own smartphone.

Inside [Tyler]’s DIY smartphone is a Raspberry Pi Model A, a 3.5 inch touchscreen PiTFT with 480×320 resolution, and an Adafruit FONA module The connections are simple enough; the TFT is connected over SPI, and the GSM module over serial. The entire device is powered by a 1200mAh LiIon battery, charged with a powerboost board, runs an operating system written in Python capable of making calls, sending texts, and takes pictures with a Pi camera.

This is not what you would normally call a smartphone. The FONA module is 2G only, meaning you’re limited to 2G speeds and 2G networks. AT&T will be shutting down 2G networks in a little bit, although T-Mobile will be keeping them up for anyone who still has an old Nokia Brick.

That said, [Tyler]’s phone is still exactly what you want in a minimal phone: it just makes calls and receives texts, it has a camera, and unlike the Nokia, you can take it apart and repair it easily. Not that you ever had to do that with a Nokia…

Hacklet 41 – Prosthetics Projects

Throughout human history, mankind has worked to enable those with disabilities. This applies especially to those who have missing limbs, either from injury or since birth. Every time technology improves, prosthetics improve along with the way. Unfortunately this now means prosthetics have become expensive systems. Hackers, makers, and engineers are working to make prosthetics more affordable, and more available to everyone. This week’s Hacklet focuses on some of the best prosthetics projects on Hackaday.io!

bionic1
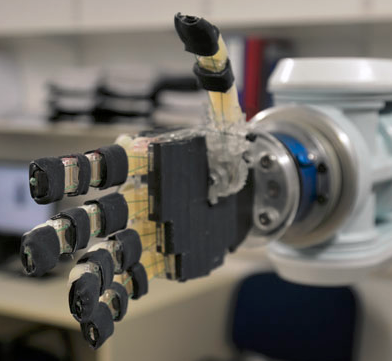
We start with [Open Bionics] and Affordable Bionic Hands For Amputees. The [Open Bionics] team are using 3D printers to bring the cost of a prosthetic arm and hand down from up to $100,000 USD to just $1000 USD. They’ve also reduced the time to create a custom device from weeks to just 5 days. The team’s current hand has five degrees of freedom, uses electromyography (EMG) for control, and weighs just 268 grams. [Open Bionics] discovered that many amputees are willing to trade off functions for a lighter weight device. Having a sensor and motor studded hand won’t help much if the wearer is worn out after just a couple of hours!

bionic2
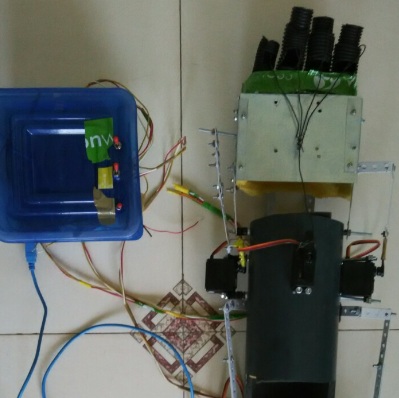
Next up is [yash.gajra56] and RE-ARM. RE-ARM is a prosthetic arm project which aims to help both those who have lost limbs, and those with full or partial paralysis of a limb. Movement is provided by radio control style servos. Control is via voice commands and Bluetooth from a cell phone. [Yash] has incorporated feedback into RE-ARM by using flex sensors. Processing is handled by an Arduino. We like the low-cost, low tech approach RE-ARM uses. We’d love to see everyone have access to a 3D printer, but unfortunately the world isn’t there quite yet. RE-ARM uses readily available components to build a functional prosthetic. Nice work [yash]!

bionic3
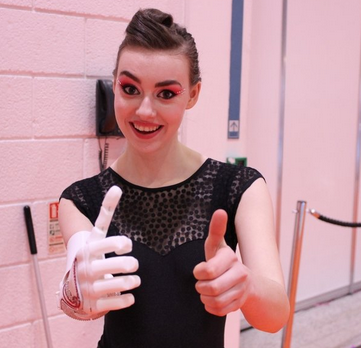
[OpenBionics] brings us  Affordable Prosthetic Hands. No, you didn’t read that name wrong. There are two “Open Bionics” on Hackaday.io! This [OpenBionics] team has no space, and is based in Athens, Greece. The other [Open Bionics] team does have a space between the words, and is based in Bristol in the United Kingdom. We’re hoping the two groups can come together and collaborate now that they’re both using Hackaday.io. This [OpenBionics] team is working on prosthetic hands, in the sub $200 USD price range. The team has come up with a novel thumb design which provides nearly full functionality with only one rotating joint. [OpenBionics] also allows their users to selectively lock digits, which allows for up to 144 different grasping postures.


bionic4

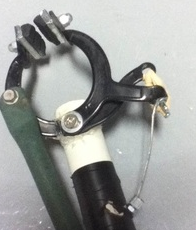
Finally we have [Daniel Mead] with Third World Medical Equipment (Arm). [Daniel] created this project as an independent study back in high school. The idea is create a simple arm with a gripper out of cheap or freely available items. The gripper is fashioned from a bicycle brake. The fitting system is especially novel. [Daniel] used an old soda bottle to create a custom mold for the amputee’s residual limb. Plastic bottles are generally made of polyethylene terephthalate, or PET, a thermoplastic. [Daniel] placed a wet sock over his arm, and a plastic bottle over the sock. Holding the plastic bottle above a fire created enough heat to shrink the bottle to his arm. the sock provided room for padding, and insulated him from getting burned during the molding process.

Not satisfied? Want more prosthetics? Check out the Prosthetics list over on Hackaday.io! If any of these projects inspire you, don’t forget that prosthetics are a great starting point for an entry in The Hackaday Prize!

That’s about all the time we have for this week’s Hacklet. As always, see you next week. Same hack time, same hack channel, bringing you the best of Hackaday.io!

Visualizing Digital Logic With EL Wire

[Bob] and [Aubrey] run the System Source Computer Museum a little north of Baltimore, Maryland. For an exhibit, they thought a visual representation of digital logic and came up with a two-bit binary adder. Yes, it’s just a full adder and exactly what you would find somewhere in the second or third chapter of any digital logic textbook. The way they’re illustrating how a full adder works is the killer feature here: they’re using EL wire for all of the wires connecting the gates.

The full adder is implemented with an Arduino Mega, but the interface is the real show here. On the left side of the display there are four illuminated toggle switches that show virtual electrons flowing through EL wires, through gates and finally out to a seven-segment display. The EL wires are controlled with an EL Escudo Dos shield – a good thing, since there are a lot of lines between switches, gates, and outputs.

You can check out [Aubrey]’s demo video that also shows off how they built it below. If you’re around Baltimore, you can check out the display at the museum.

Continue reading “Visualizing Digital Logic With EL Wire”