Home Monitoring, Without All The Sensors

Smart homes come with a lot of perks, not least among which is the ability to monitor the goings-on in your home, track them, and make trends. Each piece of monitoring equipment, such as sensors or cameras, is another set of wires that needs to be run and another “thing” that needs to be maintained on your system. There are sometimes clever ways of avoiding sensors, though, while still retaining the usefulness of having them.

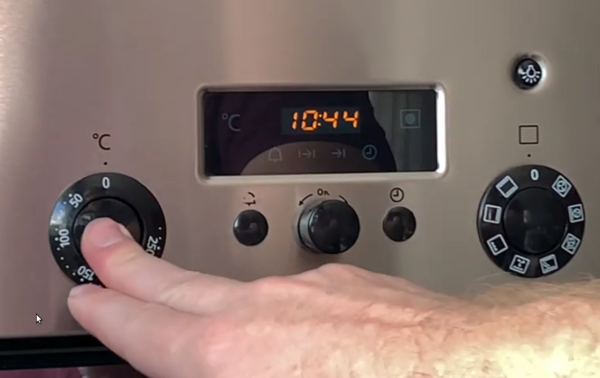
In this build, [squix] uses existing sensors for electricity metering that he already had in order to alert him when his oven is pre-heated. The sensor is a Shelly 3EM, and the way that it interfaces with his home automation is by realizing that his electric oven will stop delivering electricity to the heating elements once it has reached the desired temperature. He is able to monitor the sudden dramatic decrease in electricity demand at his house with the home controller, and use that decrease to alert him to the fact that his oven is ready without having to install something extra like a temperature sensor.

While this particular sensor may only be available in some parts of Europe, we presume the idea would hold out across many different sensors and even other devices. Even a small machine learning device should be able to tell what loads are coming on at what times, and then be programmed to perform functions based on that data.

Continue reading “Home Monitoring, Without All The Sensors”

Arduino Reduces Heating Costs

While almost everyone has a heater of some sort in their home, it’s fairly unlikely that the heat provided by a central heating system such as a furnace is distributed in an efficient way. There’s little reason to heat bedrooms during the day, or a kitchen during the night, but heating systems tend to heat whole living space regardless of the time of day or the amount of use. You can solve this problem, like most problems, with an Arduino.

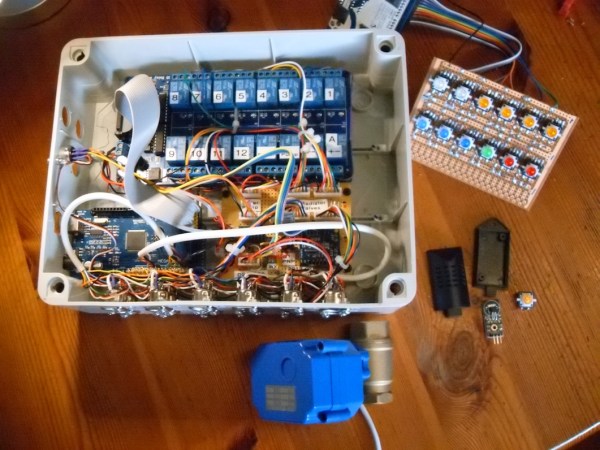
[Karl]’s build uses a series of radiator valves to control when each room gets heat from a boiler. The valves, with a temperature monitor at each valve, are tied into a central Arduino Mega using alarm wiring. By knowing the time of day and the desired temperature in each room, the Arduino can control when heat is applied to each room and when it is shut off, presumably making the entire system much more efficient. It also has control over the circulating pump and some of the other boiler equipment.

Presumably this type of system could be adapted to a system which uses a furnace and an air handler as well, although it is not quite as straightforward to close vents off using a central unit like this as it is to work with a boiler like [Karl] has. With careful design, though, it could be done. Besides replacing thermostats, we can’t say we’ve ever seen this done before.

Thanks to [SMS] for the tip!

Home Safety Monitoring With IoT

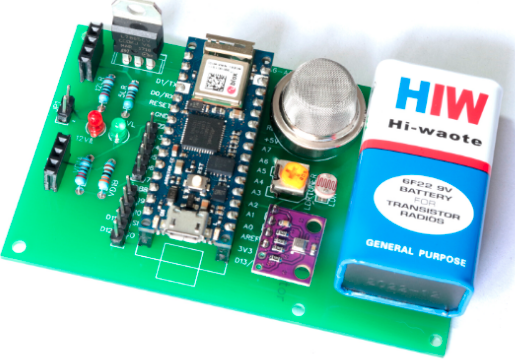
Home automation is a popular project to undertake but its complexity can quickly become daunting, especially if you go further than controlling a few lights (or if you’re a renter). To test the waters you may want to start with something like this home safety monitor, which is an IoT device based on an Arduino. It allows remote monitoring of a home for things such as temperature, toxic gasses, light, and other variables, which is valuable even if you don’t need or want to control anything.

The device is built around an Arduino Nano 33 IOT which has WiFi and Bluetooth capabilities as well as some integrated security features. This build features a number of sensors including pressure/humidity, a gas/smoke detector, and a light sensor. To report all of the information it gathers around the home, an interface with Ubidots is configured to allow easy (and secure) access to the data gathered by the device.

The PCB and code for the project are all provided on the project page, and there are a number of other options available if Ubidots isn’t your preferred method of interfacing with the Internet of Things. You might even give Mozilla’s WebThings a shot if you’re so inclined.

Mozilla WebThings: An Open Platform For Building IoT Devices

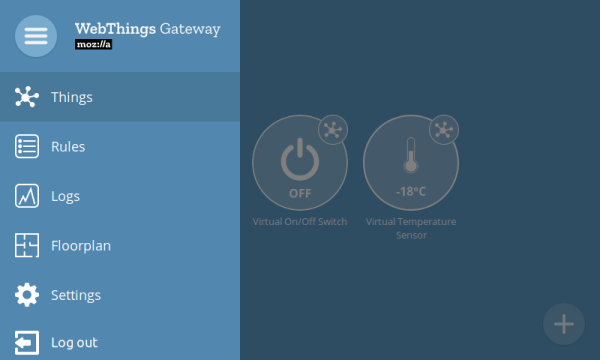
Mozilla recently officially released their IoT platform. This framework comes with “Gateway” software that can run on a Raspberry Pi and a framework that can run on any number of devices.

As we’ve seen, IoT is a dubious prospect for consumers. When you throw in all the privacy issues, support issues, and end-of-life issues; it gets even worse. Nobody wants their light bulbs to stop working because a server in faraway land shut down, but that’s an hilariously feasible scenario.

WebThings comes with a lot out of the box. It comes with a user interface, logging, rules, and an easy-to-understand API. Likewise the actual framework allows for building on many common devices and can be written in Node, Python, Java, Rust, Micropython, and used as an Arduino library. This opens it up for everything from a eBay ESP32 to a particle board.

We’ve started to notice some projects that use it trickling in on the tip line and on hackaday.io. We’re interested to see what kind of community grows around this, and are curious if it won’t be too long before easy-to-hack kits start showing up on your favorite online retailers.

There’s good documentation and of course, being open source, you can check out the source for yourself.

Another Way To Make PCBs At Home

One of the more popular ways of rolling out your own custom PCB is to simply create the model in your CAD program of choice and send it off to a board manufacturer who will take care of the dirty work for you. This way there is no need to deal with things like chemicals, copper dust, or maintaining expensive tools. A middle ground between the board manufacturer and a home etching system though might be what [igorfonseca83] has been doing: using an inexpensive laser engraver to make PCBs for him.

A laser engraver is basically a low-power laser CNC machine that’s just slightly too weak to cut most things that would typically go in a laser cutter. It turns out that the 10W system is the perfect amount of energy to remove a mask from a standard PCB blank, though. This in effect takes the place of the printer in the old toner transfer method, and the copper still has to be dissolved in a chemical solution, but the results are a lot more robust than trying to modify a printer for this task.

If you aren’t familiar with the days of yore when homebrew PCBs involved a standard desktop printer, many people still use this method, although the results can be mixed based on printer reliability. If you want to skip the middleman, and the need for a chemical bath, a more powerful laser actually can cut the traces for you, too.

Continue reading “Another Way To Make PCBs At Home”

Always Have A Square To Spare

Some aspects of humanity affect all of us at some point in our lives. Whether it’s getting caught in the rain without an umbrella, getting a flat tire on the way to work, or upgrading a Linux package which somehow breaks the entire installation, some experiences are truly universal. Among these is pulling a few squares of toilet paper off the roll, only to have the entire roll unravel with an overly aggressive pull. It’s possible to employ a little technology so that none of us have to go through this hassle again, though.

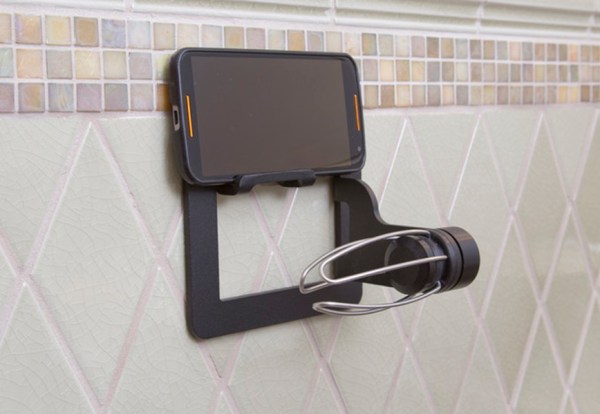
[William Holden] and [Eric Strebel] have decided to tackle this problem with an innovative bearing of sorts that replaces a typical toilet paper holder. Embedded in the mechanism is a set of magnetic discs which provide a higher resistance than a normal roll holder would. Slowly pulling out squares of paper is possible, but like a non-Newtonian fluid becomes solid when a higher force is applied, the magnets will provide enough resistance when a higher speed tug is performed on the toilet paper. This causes the paper to tear rather than unspool the whole roll, and also allows the user to operate the toilet paper one-handed.

This is a great solution to a problem we’ve all faced but probably forgot about a minute after we experienced it. And, it also holds your cell phone to keep it from falling in the toilet! If you’d like to check out their Kickstarter, they are trying to raise money to bring the product to market. And, if you want to upgrade your toilet paper dispenser even further, there’s also an IoT device for it as well, of course.

Continue reading “Always Have A Square To Spare”

Give The Clapper A Hand

While “The Clapper” probably first conjures images of low-budget commercials, it was still a useful way to remotely switch lights and other things around the house. But if the lights you want to switch weren’t plugged into the wall, like a ceiling fan, for example, The Clapper was not going to help you. To add some functionality to this infamous device, [Robin] built one from scratch that has all the extra features built in that you could ever want.

First, the new Clapper attaches to the light switch directly, favoring mechanical action of the switch itself rather than an electromechanical relay which requires wiring. With this setup, it would be easy to install even if you rent an apartment and can’t do things like rewire outlets and it has the advantage of being able to switch any device, even if it doesn’t plug into the wall. There’s also a built-in microphone to listen for claps, but since it’s open-source you could program it to actuate the switch when it hears any sound. It also includes the ability to be wired in to a home automation system as well.

If the reason you’ve stayed out of the home automation game is that you live in a rental and can’t make the necessary modifications to your home, [Robin]’s Clapper might be just the thing you need to finally automate your living space. All the files are available on the project site, including the 3D printing plans and the project code. Once you get started in home automation, though, there’s a lot more you can do with it.

Continue reading “Give The Clapper A Hand”