IKEA Lamp With Raspberry Pi As The Smartest Bulb In The House

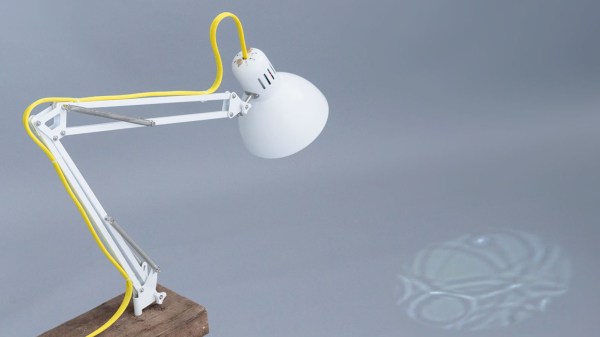
We love to hack IKEA products, marvel at Raspberry Pi creations, and bask in the glow of video projection. [Nord Projects] combined these favorite things of ours into Lantern, a name as minimalist as the IKEA lamp it uses. But the result is nearly magic.

The key component in this build is a compact laser-illuminated video projector whose image is always in focus. Lantern’s primary user interface is moving the lamp around to switch between different channels of information projected on different surfaces. It would be a hassle if the user had to refocus after every move, but the focus-free laser projector eliminates that friction.

A user physically changing the lamp’s orientation is detected by Lantern’s software via an accelerometer. Certain channels project an information overlay on top of a real world object. Rather than expecting its human user to perform precise alignment, Lantern gets feedback from a Raspberry Pi camera to position the overlay.

Speaking of software, Lantern as presented by [Nord Projects] is a showcase project under Google’s Android Things umbrella that we’ve mentioned before. But there is nothing tying the hardware directly to Google. Since the project is open source with information on Hackster.io and GitHub, the choice is yours. Build one with Google as they did, or write your own software to tie into a different infrastructure (MQTT?), or a standalone unit with no connectivity at all.

Continue reading “IKEA Lamp With Raspberry Pi As The Smartest Bulb In The House”

Flite Test Puts A Chair In The Air

The Flite Test crew is well known for putting some crazy flying contraptions together. They’ve outdone themselves this time with a flying IKEA chair. This build began with [Josh] issuing a challenge to [Stefan]. Take a standard IKEA ladderback chair and make it fly– in less than six hours. With such a tight schedule, measuring twice and cutting once was right out the window. This was a hackathon-style “throw it together and hope it works” build.

The chair was plenty sturdy, so it became the core of the fuselage. [Stefan] grabbed the wing from a previous plane and placed it on the seat of the chair. Two carbon fiber rods drilled into the seat frame formed a tail boom. The tailfeathers were built from Flite Test foam – paper coated foam-core board.

With the structure complete, [Stefan] and his team added servos for control, a beefy motor for power, and some big LiPo batteries. The batteries hung from the bottom of the chair to keep the center of gravity reasonable.

When the time came for the maiden flight, everyone was expecting a spectacular failure. The chair defied logic and leaped into the air. It flew stable enough for [Josh] to take his fingers off the sticks. The pure excitement of seeing a crazy build that works is on full display as the entire Flite Test crew literally jumps for joy. [Alex] even throws in a cartwheel. This is the kind of story we love to cover here at Hackaday – watching a completely nutty build come together and perform better than anyone expected.

Continue reading “Flite Test Puts A Chair In The Air”

Robotic Wood Shop Has Ambitions To Challenge IKEA

Many people got their start with 3D printing by downloading designs from Thingiverse, and some of these designs could be modified in the browser using the Thingiverse Customizer. The mechanism behind this powerful feature is OpenSCAD’s parametric design capability, which offers great flexibility but is still limited by 3D printer size. In the interest of going bigger, a team at MIT built a system to adopt parametric design idea to woodworking.

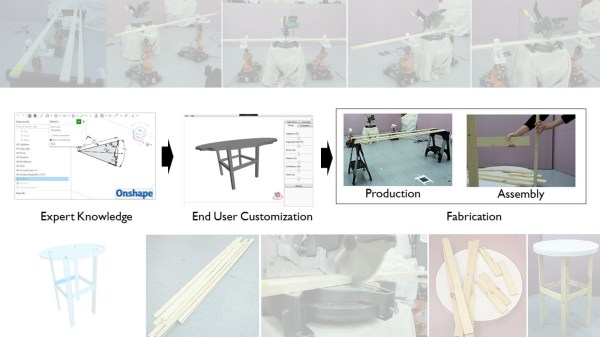
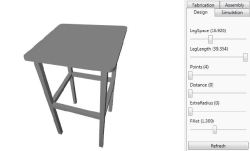
The “AutoSaw” has software and hardware components. The software side is built on web-based CAD software Onshape. First the expert user builds a flexible design with parameters that could be customized, followed by one or more end users who specify their own custom configuration.

Once the configuration is approved, the robots go to work. AutoSaw has two robotic woodworking systems: The simpler one is a Roomba mounted jigsaw to cut patterns out of flat sheets. The more complex system involves two robot arms on wheels (Kuka youBot) working with a chop saw to cut wood beams to length. These wood pieces are then assembled by the end-user using dowel pegs.

AutoSaw is a fun proof of concept and a glimpse at a potential future: One where a robotic wood shop is part of your local home improvement store’s lumber department. Ready to cut/drill/route pieces for you to take home and assemble.

Continue reading “Robotic Wood Shop Has Ambitions To Challenge IKEA”

Keep Track Of Your Weight While Sleeping

When the average person looks at a bed, they think about sleeping. Because that’s what beds are for. You cover them with soft, warm cloths and fluffy pillows and you sleep on them. [Peter] is not your average person. He’s a maker. And when he looks at a bed, he thinks about giving it the ability to track his weight.

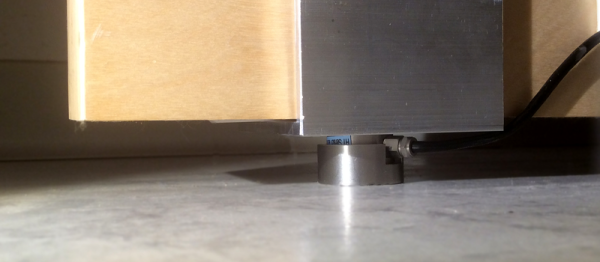
The IKEA bed has four Chinese-made TS-606 load cells under each foot with custom aluminum enclosures. Each one goes to an HX711 analog-to-digital converter, which offers a 24 bit resolution. These feed an Arduino Nano which in turns connects to a Raspberry Pi via USB to UART bridge. Connecting to the Pi allows [Peter] to get the data onto his home network, where he plots the data to gnuplot.

This smart bed doesn’t just track [Peter’s] weight. It can also track the weight of other people in the house, including his pets. Be sure to check his GitHub for full source code.

Hacking The IKEA Trådfri Light Bulb

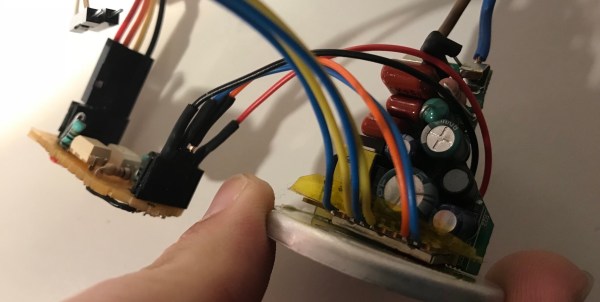
[BasilFX] wanted to shoehorn custom firmware onto his IKEA Trådfri light bulb. The product consists of a GU10-size light bulb with a LED driver as well as IKEA’s custom ZigBee module controlling it all. A diffuser, enclosure shell, and Edison-screw base give the whole thing the same form factor as a standard A-series bulb. The Trådfri module, which ties together IKEA’s home automation products, consists of an ARM Cortex M4 MCU with integrated 2.4Ghz radio and 256 Kb of flash — not bad for 7 euros!

Coincidentally, [BasilFX] had just contributed EFM32 support to RIOT-OS (“the friendly OS for IoT”) so he was already halfway there. He used a JTAG/SWD-compatible debugger to flash the chip on the light bulb while the chip was still attached.

[BasilFX] admits the whole project is a proof of concept with no real use yet, though he has turned his eye toward getting the radio to work, with a goal of creating a network of light bulbs. You can find more info on his code repository.

We ran a post on Trådfri hacking earlier this year, as well as one on the reverse-engineering process used to suss out the bulb’s secrets.

Continue reading “Hacking The IKEA Trådfri Light Bulb”

Ikea Tradfri Hacking

Smart lighting is all the rage right now. Sure, Phillips Hue is the giant player in the market, but there are plenty of ZigBee, Bluetooth, and WiFi light bulbs out there. Ikea–known for cheap furniture, meatballs, and waffles–is a recent addition to the field with their Tradfri system. Like most things from Ikea, they are effective and inexpensive. [Andreas] takes a Dremel to the controller and shows how to hack the system to use MQTT. You can check out the video below.

Once he had the device opened, the used the German Make magazine article we talked about earlier, to help understand what he had. Armed with the pinout, he was able to solder a wiring harness to the controller. He then connected a WeMos board. A little Arduino code later, and he was controlling the light with MQTT.

Continue reading “Ikea Tradfri Hacking”

Hackaday Prize Entry: Modular Rail Lighting

When operating any kind of hydroponic farming, there are a number of lighting solutions — few of them inexpensive. Originally looking for an alternative to the lighting of IKEA’s expensive hydroponics system, [Professor Fartsparkle] and their colleague prototyped a rail system that allows clip-on LED boards for variable lighting options.

Taking inspiration from wire and track lighting systems, the key was the 5mm fuse holders mounted on the bottom of the LED boards. Snipping off their stopping clip makes them easy to install and remove from the mounting rails. The rails themselves double as power conduits for the LED boards, but keeping them out of the way is easily done with the variety of 3D printed hangers [Professor Fartsparkle] has devised. Lighting is controlled by a potentiometer on the power injection board, as well as any home automation control via an ESP8266.

[Professor Fartsparkle] asserts that the boards can be slid along the rails without any noticeable flickering, but they do suffer from heat dissipation issues. That aside, the prototype works well enough that the 3W LEDs can be run at half power.

This is an ingenious — and cheap — workaround for when sunlight isn’t an option, but you are still looking for a solution capable of automation.