Hackaday Links: February 26, 2017

The MeArm Pi is a fantastic little robot kit that was the first place winner of the Enlightened Pi contest here on Hackaday. It’s crushing the Shitty Robots subreddit, and compared to the old MeArm kit, it’s much, much simpler to assemble. Ask me how I know. Now the MeArm Pi is a Kickstarter. This tiny robot arm is programmable in everything from Scratch to Perl. It’s highly recommended for children ages 8 to those wanting to recreate the opening scene of Pee Wee’s Big Adventure.

Almost a year ago, Lulzbot unveiled their latest 3D printer at the Midwest RepRap Festival. The Taz 6 is a great printer, but it’s a bit of a departure from their previous designs. The biggest change was the ‘brain box’, the controller box that encases the power supply, stepper drivers, and other associated electronics. Last year, Lulzbot said they would be selling this brain box by itself. It’s out now, ready for integration into your own self-built Taz, or a 3D printer of your own design.

Speaking of the Midwest RepRap Festival, it’s only a month away. It’s scheduled for March 25-26th at the Elkhart County 4-H Fairgrounds in Goshen, Indiana. Why the middle of nowhere? It ensures only the cool kids make it. For one weekend a year, Goshen, Indiana turns into the nexus of all things 3D printing. Don’t ask questions, just come. It’s free, although it would be cool if you kicked a few bucks over to the organizers.

[Clickspring] — the guy who built a fantastic clock in his home shop – is working on his second project. It’s an Antikythera Mechanism, and the latest episode is about building a gigantic gear. This is a unique approach to building an Antikythera Mechanism. [Clickspring] is still using modern tools, but he’s figuring out how this machine was built with tools available 2000 years ago.

Ogopogo, defeated by the Travelling Hacker Box.

Ogopogo. Champ is a picture of a log and Nessie is a toy submarine with a head made out of plastic wood. Ogopogo is a plesiosaur. Are you going to tell me a log – or at best a beaver – can kick the ass of a plesiosaur? Ogo. Pogo. Plesiosaur. The Travelling Hacker Box has conquered Ogopogo.

The ESP32 is quickly becoming the coolest microcontroller platform out there. You know what that means – Kickstarters! The FluoWiFi is Arduino-derived dev board featuring the ESP32 for WiFi, Bluetooth, and all the cool wireless goodies. This board also features an ATMega644p — basically the little sister to the ATMega1284p – for all your standard microcontroller Arduino stuff. It’s £25 for a board, which makes it pretty inexpensive for what you’re getting.

How’d They Do It: Levitating Orb Clock

It’s time for everyone’s favorite game: speculative engineering! An anonymous reader wrote to our tips line asking how the levitation system of the STORY clock is accomplished. We took a look and can tell you right now… that’s a really good question!

STORY: The Levitating Timepiece has more than a month left on its crowdfunding campaign but it’s reached more than 6x its $80k goal. The wooden disk has a digital time display in the center which is simply an LED matrix just below the wood’s surface. We know how that’s done: wooden veneer with a grid of holes behind to contain the LED light in a perfect circle. Continue reading “How’d They Do It: Levitating Orb Clock”

First Look: Macchina M2

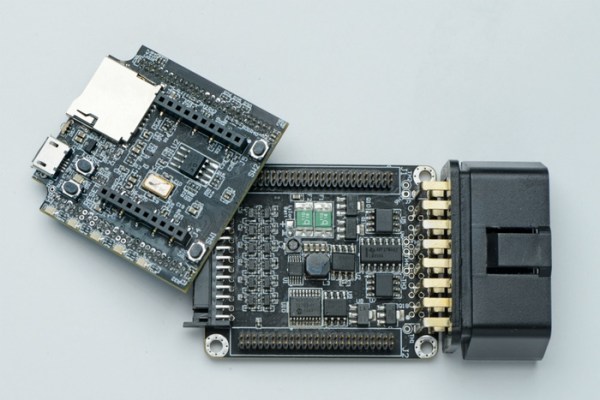
In the past few years, we’ve seen a growth in car hacking. Newer tools are being released, which makes it faster and cheaper to get into automotive tinkering. Today we’re taking a first look at the M2, a new device from the folks at Macchina.

The Macchina M1 was the first release of a hacker friendly automotive device from the company. This was an Arduino compatible board, which kept the Arduino form factor but added interface hardware for the protocols most commonly found in cars. This allowed for anyone familiar with Arduino to start tinkering with cars in a familiar fashion. The form factor was convenient for adding standard shields, but was a bit large for using as a device connected to the industry standard OBD-II connector under the dash.

The Macchina M2 is a redesign that crams the M1’s feature set into a smaller form factor, modularizes the design, and adds some new features. With their Kickstarter launching today, they sent us a developer kit to review. Here’s our first look at the device.

Continue reading “First Look: Macchina M2”

The Story Of Kickstarting The OpenMV

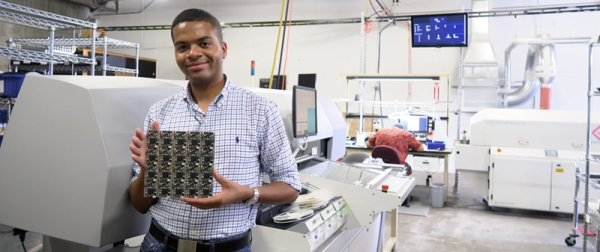
Robots are the ‘it’ thing right now, computer vision is a hot topic, and microcontrollers have never been faster. These facts lead inexorably to the OpenMV, an embedded computer vision module that bills itself as the ‘Arduino of Machine Vision.’

The original OpenMV was an entry for the first Hackaday Prize, and since then the project has had a lot of success. There are tons of followers, plenty of users, and the project even had a successful Kickstarter. That last bit of info is fairly contentious — while the Kickstarter did meet the minimum funding level, there were a lot of problems bringing this very cool product to market. Issues with suppliers and community management were the biggest problems, but the team behind OpenMV eventually pulled it off.

At the 2016 Hackaday SuperConference, Kwabena Agyeman, one of the project leads for the OpenMV, told the story about bringing the OpenMV to market:

Continue reading “The Story Of Kickstarting The OpenMV”

Gecho Pocket Synth Looper

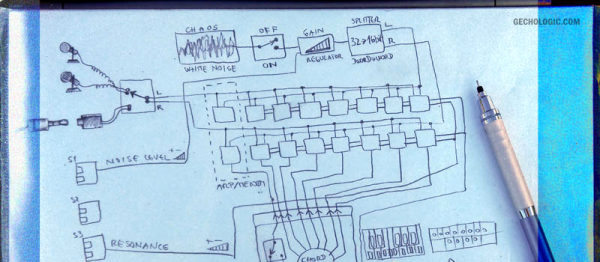
[Mario] wrote us with his synthesizer project that’s currently up on Kickstarter. It looks like a good amount of fun to play with, as you can see in the video on the Kickstarter page. But it’s also built to be easily hackable.

On the hardware front, it’s a tiny four-layer board that’s crammed with parts. At the core is an STM32F4 microcontroller and a DAC. Indeed, the build was inspired by other folks’ work on the STM32F4 Discovery dev kit that has been used to make some pretty interesting synthesizer devices. [Mario]’s version adds two stereo headphone outputs, two microphone inputs, two IR reflective distance sensors used as control inputs, some buttons, and a ton of LEDs. And then it makes good use of all of them.

The firmware isn’t open source yet (poke! poke!) but it looks like it’s going to be. On his blog, [Mario] works through an example of adding a drum machine into the existing firmware, so it looks like it’ll be hackable.

Squeezing a lot of DSP functionality out of a single microcontroller is a feat. On a similar chip from a different manufacturer, [Paul Stoffregen]’s Teensy Audio Library could also be made to do a lot of the same things. But the real beauty of the Gecho project is that it has some interesting hardware features already built in and ready to go. It wouldn’t be a bad launching pad for your own musical or audio explorations.

From Project To Kit: The Final Furlong

This article is the fifth in a series looking at the process of bringing an electronic kit to market from a personal project. We’ve looked at market research, we’ve discussed making a product from your project and writing the best instructions possible before stuffing your first kits ready for sale. In this article we’ll tackle the different means of putting your kits out there for sale.

Given a box of ready-to-sell kits, what next? You have to find some means of selling them, getting them in front of your customer, making the sale, sending them to the purchaser, and safely collecting their money. A few years ago this was an expensive and risky process involving adverts in print magazines and a lot of waiting, but we are fortunate. The Internet has delivered us all the tools we need to market and sell a product like an electronic kit, and in a way that needn’t cost a fortune. We’ll now run through a few of those options for selling your kits, before looking at shipping, marketing, and post-sales support in the final article in the series.

Continue reading “From Project To Kit: The Final Furlong”

Hackaday Prize Entry: A CNC Scribe For Making Circuit Boards

We’re interested in any device that can make a PCB out of a copper-clad board, and this entry for the Hackaday Prize might be the simplest machine for PCB fabrication yet. It’s called the Projecta, and it’s a simple way to turn Eagle and KiCad files into a real circuit board.

For the home PCB fabricator, there are two ways to go about the process of turning a copper clad board into a real circuit board. The first is a CNC machine. Drop a piece of FR4 under a cutter, and you’ll get a circuit board and a lot of fiberglass dust. The Othermill is great for this, but it is a bit pricey for all but the most ambitious weekend warrior.

The second method of home PCB fabrication chemically etches the copper away. The etch resist mask can be laid down with dry film resist, or with the ever-popular laser printer, magazine, and laminator trick. Either way, the result is an acid-proof covering over the copper you don’t want to get rid of.

While the Projecta looks and sounds like a miniature CNC machine, it doesn’t chew through copper and produce a ton of fiberglass dust. The Projecta scribes the pattern of a circuit board after the copper has been masked off with a sharpie, marker, or other ink-based resist. When the board comes out of the Projecta, there’s a perfect pattern of circuits on a board, ready for the etch tank.

This technique of putting a copper clad board into a CNC machine and etching it later is something we haven’t seen before. There’s a good reason for that – if you’re putting a board under a cutter already, you might as well just chew away the copper while you’re at it.

Just because we haven’t seen this technique before doesn’t mean it’s a bad idea. Because the Projecta is only scribing a bit of ink off a board, the CNC mechanism doesn’t need to be that complex. It doesn’t need to throw a spindle around, and the Projecta can be built down to a price rather easily.

The Projecta is on Kickstarter right now, with the Kickstarter non-early bird price of $600. You can check out the video demo of the Projecta in action below.

Continue reading “Hackaday Prize Entry: A CNC Scribe For Making Circuit Boards”