Improve Your Front Panels

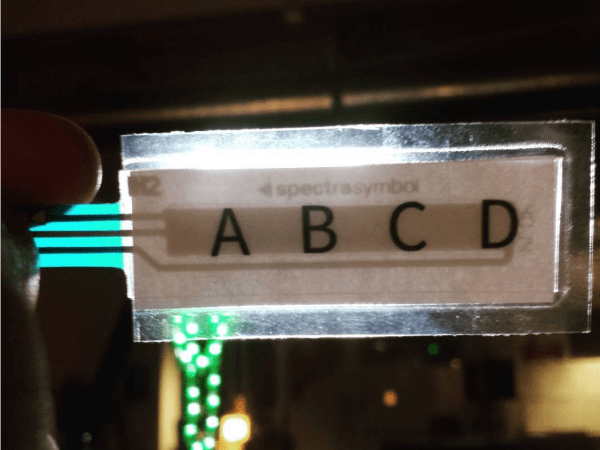
For many of us, the bane of electronic projects is making a professional-looking enclosure. Sure, 3D printing has made it easier to make the actual enclosure, but there’s still the problem of labeling it. [Richard Langner] has the answer with something he calls easy front panels. You can read about it or watch the tutorial video below.

The concept is easy enough. You create your beautiful artwork in your choice of graphics programs. The example uses Inkscape, but you could do it in anything, even PowerPoint. You print it out and cut it to size. You could, of course, print it in color or — as the example does — color it in by hand.

Continue reading “Improve Your Front Panels”

DIY Smartwatch Based On ESP8266 Needs Classification

Building your own smartwatch is a fun challenge for the DIY hobbyist. You need to downsize your electronics, work with SMD components, etch your own PCBs and eventually squeeze it all into a cool enclosure. [Igor] has built his own ESP8266-based smartwatch, and even though he calls it a wrist display – we think the result totally sells as a smartwatch.

His design is based on a PCB for a wireless display notifier he designed earlier this year. The design uses the ESP-12E module and features an OLED display, LEDs, tactile switches and an FT232R USB/UART interface. Our beloved TP4056 charging regulator takes care of the Lithium-ion cell and a voltage divider lets the ESP8266’s ADC read back the battery voltage. [Igor] makes his own PCBs using the toner transfer method, and he’s getting impressive results from his hacked laminator.

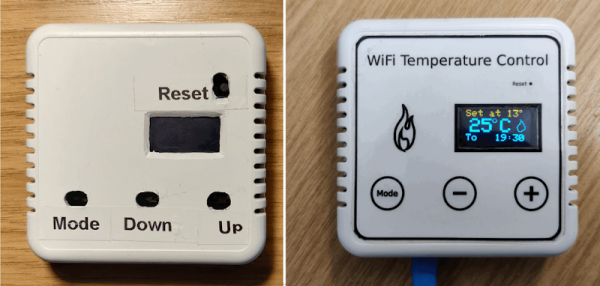
Together with a hand-made plastic front, everything fits perfectly into the rubber enclosure from a Jelly Watch. A few bits of Lua later, the watch happily connects to a WiFi network and displays its IP configuration. Why wouldn’t this be a watch? Well, it lacks the mandatory RTC, although that’s easy to make up for by polling an NTP time server once in a while. How would our readers classify this well-done DIY build? Let us know in the comments!

PCB Laminator Is Its Own Project

One of the easiest ways to make PC boards at home is to use the toner transfer method. The idea is simple: print the artwork using a laser printer and then use a clothes iron to transfer the toner from the paper to a clean copper clad board. The toner is essentially plastic, so it will melt and stick to the board, and it will also resist etchant.

There are several things you can do to make things easier. The first is the choice of paper. However, the other highly variable part of the process is the clothes iron. You have to arrange for the right amount of heat and pressure. If you don’t do a lot of boards, you’ll probably have to make several passes at getting this right, scrubbing the reject boards with acetone and scouring pads to clean them again.

[Igor] had enough of the clothes iron and knew that other people have used lamination machines to get the toner off the paper and on the blank board. He started with a commercial laminator but hacked it for PID control of the temperature and made other improvements.

Continue reading “PCB Laminator Is Its Own Project”

Upgrading A Laminator For Toner Transfer PCBs

If you need a circuit board now, you’re probably looking at a toner transfer process; all you need to make a PCB is a copper clad board, a laser printer, some special paper, and the usual etching chemicals. The quality of these boards is highly dependant on the quality of transferring toner to the copper, and getting the process right is as much an art as it is a science. A clothes iron is the easy way of transferring the toner to the board, but if you’re looking for repeatability, you’ll probably want a laminator.

Laminators, too, also vary in quality. The king of toner transfer laminators is the Apache AL13P. With four heated rollers and a steel chassis, it’s enough to do some serious heating. [mosaicmerc] came up with an amazing mod for his Apache laminator that takes all the guesswork out of the settings, and does it all in one pass for maximum repeatability and PCB quality.

The Apache laminator in question is a beast of a machine that drives four rollers with a synchronous motor and also has a ‘reverse’ button that sends the laminations out the front end of the printer. Stock, a toner transfer PCB would require dozens of passes through the Apache, but [merc]’s mod takes care of everything for you.

The addition that makes this possible is a small board with a PIC12 microcontroller. This microcontroller connects the motor driver board and the display interface together, triggering the reverse button to move the board 5/8″ forward and 1/2″ back, giving the laminator an effective speed reduction of 12:1. This method also has the bonus of not tampering with the motor or control circuitry, and allows for multiple passes in the same run.

With this modification, the Apache AL13P becomes the perfect solution to transferring toner to a piece of copper, with the ability to transfer 10mil traces on 1oz copper. The board also offers some other features like thermal sensor failure shutdown and a cool-down mode that overrides the heater. If you’re looking for an easy way to step up your toner transfer PCBs, you can’t do much better than this mod.

Hackaday Links: February 23, 2014

hackaday-links-chain

You can pick up a tiny laser pointer on the cheap if you know where to look. But when it comes time to replace the multiple button cells that power it be prepared to clean our your wallet. [KB3WZZ] got around that with the cap from a ball-point pen. He drilled holes in the end plug of the pointer, and used wire and a plastic pen cap as a battery adapter. He’s powering it from USB, but now that you have wires exiting the case you can use any source you wish.

[Gerben] tipped us off about the trinket clone he built himself. It’s a tiny sliver of a PCB which he etched, populated with through-hole parts only, and finished off with some finger nail varnish to prevent shorting and corrosion. The solder-covered edge connector for USB was left unvarnished of course.

If you live in a college town you are probably quite used to seeing futon pads and frames on the curb waiting for the garbage collector. A little bit of ingenuity, and some added lumber, will turn a futon frame into a respectable shelving unit. [Thanks Martin]

Complicated bench equipment + good lighting + a great camera = an awesome teardown. This time around it’s the guts of a Keithly 2002 8.5 digit mulitimeter laid bare. [Thanks David]

Here’s a PCB laminator hack that is definitely worth a look. The original unit was acquired on eBay for about $25 and had a thermostat whose performance wasn’t optimal. A bit of alteration for the thickness of the substrate, and you’ll never hand iron a toner transfer board again! [Thanks William]

Last summer we heard about Scout, an ocean-going drone trying to cross the Atlantic. We just checked the live tracking and the craft is still at sea. But a much smaller 5ft vessel made it from New Jersey to Guernsey (an island between the UK and France) after traveling for about 14 months. [Thanks Rob]

Toner Transfer PCBs, Double Sided, With Color Silkscreen

Silk

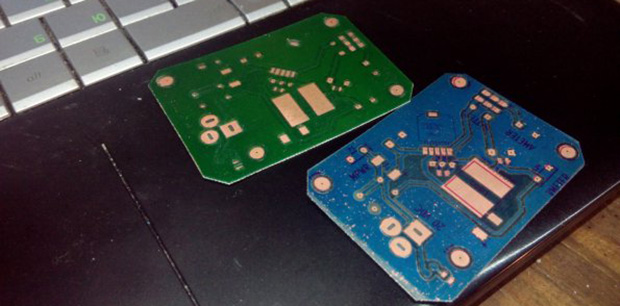
Making a few PCBs with the toner transfer method is a well-known technique in the hacker and maker circles. Double-sided PCBs are a little rarer, but still use the same process as their single-sided cousins. [Necromancer] is taking things up a notch and doing something we’ve never seen before – double-sided PCBs made at home, with color silkscreens, all make with a laser printer.

For laying down an etch mask, [Necro] is using a Samsung ML-2167 laser printer and the usual toner transfer process; print out the board art and laminate it to some copper board.

The soldermasks use a similar process that’s head-slappingly similar and produces great results: once the board is etched, he prints out the solder mask layer of his board, laminates it, and peels off the paper. It’s so simple the only thing we’re left wondering is why no one thought of it before.

Apart from the potential alignment issues for multiple layers, the only thing missing from this fabrication technique is the ability to do plated through holes. Still, with a laser printer, a laminator, and a little bit of ferric or copper chloride you too can make some very nice boards at home.