GPS Lap Timer From Secondhand Parts

gps_racing_lap_timer

Hackaday forum member [nes] was training for an endurance race, and rather than having someone verbally call out his lap times, he wanted something he could keep in-vehicle to help keep track of his performance. With the race budget running dry, he and his teammates needed something cheap, if not free, to get the job done.

He scored a “broken” GPS receiver on eBay for a measly £4 and found that the receiver worked, but corrupted software prevented the unit from mapping routes. Since he didn’t require routing functions to keep track of his lap times, he splayed the GPS receiver open and started hunting around for a serial bit stream. He found what he was looking for after a bit of probing and hooked it up to his computer to see if the data contained NMEA sentences.

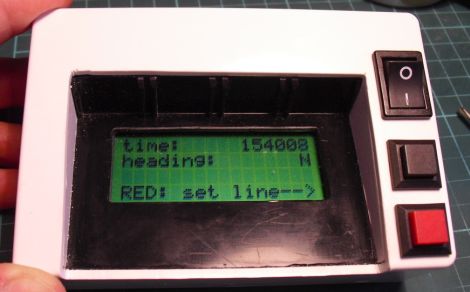
He cut the receiver down to the necessary parts and then started work on the lap timer itself. The timer uses an ATMega32 to run the show, displaying relevant time and location information on an LCD panel he scavenged from the trash bin.

He admits that the wiring is a bit questionable, but says that after about seven hours of rough use, everything is still intact and working great.

External Text Display For Nexus One

Nexus One External Display

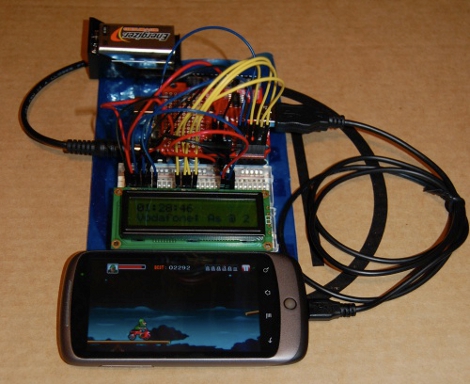
[follower] prototyped a 2-line external display for his Nexus One using an Arduino with a USB Host Shield, and the Android Open Accessory Protocol. There are two basic software pieces at work: an Arduino sketch that handles displaying data sent from the phone, and a lightweight android app to detect the presence of the external screen and send data to it. As shown here, it diplays the time and the beginning of the most recently received SMS message.

This project coalesced from several other things [follower] had been working on with regards to USB accessories, background services, interfacing with the Arduino and handling SMS messages, so it’s modular and open-source.  If you’re interested in mashing up microcontroller projects and your android phone, there’s plenty of stuff in this project to help you get off the ground.

As hacks go, this is very much a “because you can” sort of deal that’s designed to tie a bunch of cool things together. You’re unlikely to catch us carrying an LCD and breadboard around in our pockets any time soon, but it paves the way for some potentially fun phone accessories.

ATtiny13 Powered Handheld Helicopter Game

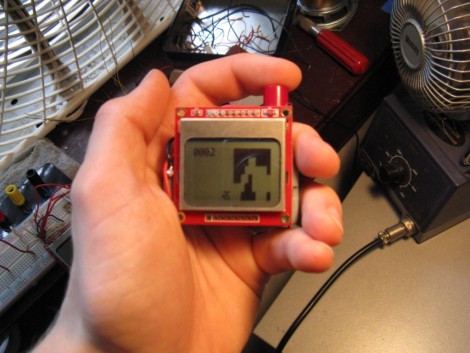
[Owen] just finished putting together a portable helicopter game. It’s pretty impressive, especially since he used an ATtiny13 microcontroller. That chip uses an 8-pin dip package, offering only five I/O pins (six if you use the reset pin) and 1k of programming space.

The game runs on a small cellphone-type LCD screen. The helicopter remains somewhere in the center column of the screen as the maze that makes up the game board approaches one step at a time. The single button that controls the helicopter will raise it with each step of the maze when held down, or allow it to fall when released. The player’s progress is shown as a hex value in the upper left corner of the screen. When you hit a wall, your score will be shown next to the high score for the game and will be saved in EEPROM if it’s a new record. As the game progresses, the maze gets harder based on the score. Check it out in a video clip after the break.

Continue reading “ATtiny13 Powered Handheld Helicopter Game”

ChipKIT Uno32: First Impressions And Benchmarks

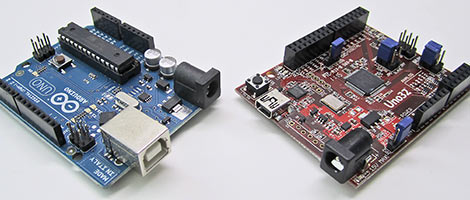
Following Maker Faire, we’ve had a few days to poke around with Digilent’s 32-bit Arduino-compatible chipKIT boards and compiler. We have some initial performance figures to report, along with impressions of the hardware and software.

Continue reading “ChipKIT Uno32: First Impressions And Benchmarks”

USB Minecraft Portal

[Sprite_tm] had heard some time ago that middle of the road Nokia phones had some really interesting LCDs, they are 2.4 inch TFT’s with 320×240 resolution. He immediately got 3 beccause they are pretty low cost as well, and started working with them. Apparently these LCDs are self contained, meaning they have all the driver chips and memory on board, you just need to know the pins and commands. This too is fairly easy as they are somewhat standard setups and datasheets for similar models work in a pinch.

Once the things were working, what do you do with them? [Sprite_tm] decided to make a desktop minecraft portal. Since the animation is a bit complex in micro controller worlds, he grabbed one of the STM32F101CBs for their beefy cpu and got to work. Getting the texture from minecraft proved to be a bit of a bear as they are not static images, but are calculated on startup. A bit of C code on the PC quickly generates an appropriate pattern and is exported to the micro controller for display in its final home.

The case is made out of wood and once finished looks just like the “real” thing giving a presentation any “blockhead” would love to have on their desk.

Blackberry LCD Reverse Engineering

blackberry_lcd

[Scott] was looking to source some LCD screens for an upcoming project, and was considering buying them from SparkFun. While the Nokia panels they sell are not expensive, they aren’t necessarily the cheapest option either – especially when building in volume.

He searched around for something he could use instead, and settled on Blackberry screens. Old Blackberry models were even more durable than the current offerings, plus companies are trying to get rid of old handsets by the truckload. The only problem was that he could not find any information online that would show him how to write to the screens.

It took a bit of digging, but he eventually determined which ICs were used to drive the LCD screen. He had no luck finding screen pinout information online, so after spending a few hours testing things with his multimeter, he came up with a full listing on his own.

He wired up a connector so that he could use the screen on a breadboard, then got busy writing code to display some text on the screen. Everything came together nicely as you can see in the video below, and he has released his code in case anyone else is looking to repurpose some old Blackberry screens.

All we want to know is what sort of project all these screens are going to be used in.

Continue reading “Blackberry LCD Reverse Engineering”

Shift Register Is All It Takes To Make A 3-wire Serial LCD

This hack is a bit older, but one aspect of the setup makes it worth sharing. Shift registers are a common component to include in a project when you need to increase the number of I/O pins available. We’ve used them to drive LCD screens before, but we never realize you could use a 595 chip to make a 3-wire serial LCD interface. That’s because we’ve always thought of shift registers as having three control pins which must be addressed: data, clock, and latch. But it seems that’s not the case. This hack gangs the pins for clock and latch (called the storage register clock input on this chip) together. This causes the shifted data to be latched to output register one clock cycle after it is shifted into the chip.

This means you can operate the 595 chip with just two pins, but alas, you do need one more connection to drive the LCD properly. This is an HD44780 compliant display. It is being used in 4-bit mode; four of the shift register pins provide that data, while a fifth controls the Register Select pin. Since the shifted data from the 595 appears on the pins after each clock strobe, you must control the Enable pin on the LCD separately or it will behave sporadically.

So there you have it, control an HD44780 display with just 3-pins by using a $0.42 part. Are we going a little too fast for you? Check out this 595 tutorial and give the shift register simulator a try. That should bring you up to speed.

[Thanks Rajendra]