It’s a cliche that the only machine tool that can make copies of itself is the lathe. It’s not exactly true, but it’s a useful adage in that it points out that the ability to make big round things into smaller round things, and to make unround things into round things, is a critical process in so many precision operations. That said, making a lathe primarily out of wood presents some unique challenges in the precision department
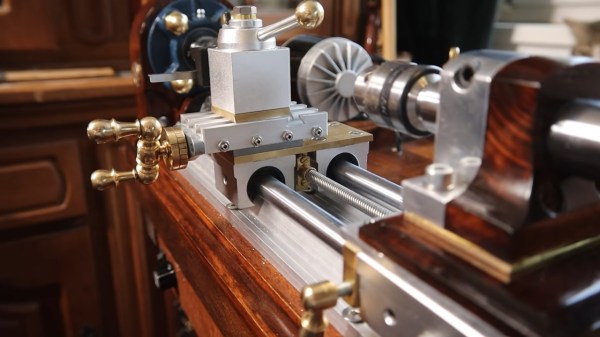
This isn’t [Uri Tuchman]’s first foray into lathe-building. Readers may recall the quirky creator’s hybrid treadle-powered and electric lathe, also primarily an exercise in woodworking. That lathe has seen plenty of use in [Uri]’s projects, turning both wood and metal stock into parts for his builds. It wasn’t really optimal for traditional metal turning, though, so Mini-Lathe 2 was undertaken. While the bed, headstock, and tailstock “castings” are wood — gorgeously hand-detailed and finished, of course — the important bits, like the linear slides for the carriage and the bearings in the headstock, are all metal. There’s a cross-slide, a quick-change tool post, and a manual lead screw for the carriage. We love the finely detailed brass handcranks, which were made on the old lathe, and all of the lovely details [Uri] always builds into his projects.
Sadly, at the end of the video below we see that the lathe suffers from a fair amount of chatter when turning brass. That’s probably not unexpected — there’s not much substitute for sheer mass whenit comes to dampening vibration. We expect that [Uri] will be making improvements to the lathe in the coming months — he’s not exactly one to leave a job unfinished.
Continue reading “Gorgeous Mini-Lathe Makes The Most Out Of Wood And Metal”