Repairing The Blue Canary In The Outlet By The Light Switch

blue_canary_in_the_outlet_by_the_lightswitch

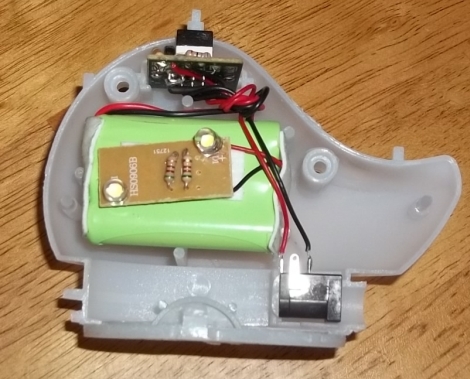
[Vince] and his wife are big fans of [They Might be Giants], so when they were perusing their local Target one evening and stumbled upon a blue canary nightlight, they bought it immediately. While the nightlight was easy for his toddler to use, the LEDs inside started to dim after about a month, and eventually they started flickering like mad as you can see in the video below. A battery swap didn’t remedy the problem, and instead of returning it, [Vince] decided to try fixing it himself.

After poring over the device’s simple circuit, he couldn’t figure out any reason why the nightlight would start behaving like it did. He did notice that a resistor was left out of the device, likely as a cost-cutting measure, so he added one in before replacing both of the nightlight’s LEDs.

With his simple tweak, the nightlight was better than new, saving him from what would likely be a string of annoying merchandise exchanges.

Continue reading “Repairing The Blue Canary In The Outlet By The Light Switch”
Amazing RGB POV Clock

rgb_pov_propeller_clock

We’re no strangers to POV time pieces around here, but something about them never gets old. Whether they use a ring of LEDs to draw clock hands, or an intricately cut HDD platter to replicate LCD segments, we love seeing them. [David] sent in this hard drive POV clock built by a fellow named [Kly], and it’s just beautiful.

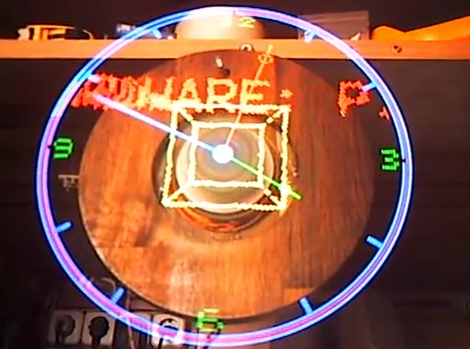
[Kly’s] “Propeller” POV clock is named as such due to the design of the circuit board. The board is mounted on the HDD spindle, rotating much like an airplane’s propeller. The construction details are sparse, but from what we can find, it is based around a PIC32MX microcontroller, which is used to control the 66 SMD RGB LEDs mounted on the circuit board.

As you can see in the video below, the tightly packed LEDs result in some pretty amazing visuals.

Aside from watching the video below, be sure to swing by his Youtube channel for a handful of videos showing RGB POV clock in action.

Continue reading “Amazing RGB POV Clock”

Interfacing With A PS/2 Keyboard

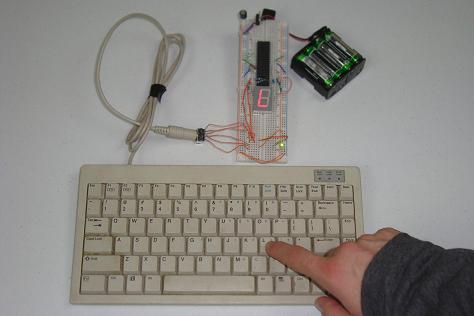
Anyone reading this post has undoubtedly used a keyboard. How they work, however, is a bit more complicated than “one button, one input.”  [PyroElectro] has a great tutorial about building a PS/2 keyboard interface with a 7-segment LED display (video after the break). The tutorial also includes quite a bit of theory behind it.

The system displayed below uses a PIC controller to display the letter or number pressed. A schematic of the whole project is given here as well as a detailed bill of materials.

As for how the PS/2 keyboard works, each keystroke is encoded into a binary number or “scan code”. Most of these codes are 8-bit, but some special symbols use a longer code. Although the article doesn’t fully address it, a very similar method can be used to send data back to the keyboard for such purposes as tuning on a “capslock” or “numlock” key. Although turning on a light is fun, we could see this being used as an expedient method to control a relay for automation purposes.

Continue reading “Interfacing With A PS/2 Keyboard”

ATtiny Hacks: DIY High-speed Photography LED Lighting Rig

ATtiny Hacks Theme Banner

diy_high_speed_photography_led_lighting

[Tom] wanted to try his hand at high-speed photography and needed some equipment to get things rolling. Not wanting to spend a ton of money on a lighting rig or trigger mechanism, he decided to build his own. In a three part series on his blog, he details the construction and testing of his high-speed setup along with the improvements and lessons learned along the way.

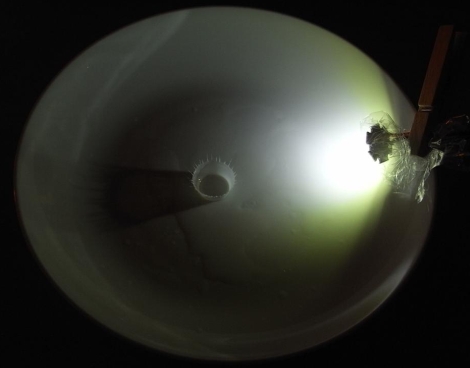
His adventures started out with a small off-brand Cree LED clone and an ATiny15L that was collecting dust in his workshop. He built a simple circuit that would trigger the LED to light his subject, which in [Tom’s] case was a bowl of milk. Rather than using a motion or sound trigger, he opted to mount a small piezo to the bottom bowl, firing the LED any time a droplet hits the bowl’s surface.

The pictures he took were decent, but he knew he could get better results. He purchased a new, more powerful Cree LED, and wrote a small terminal program that allows him to tweak his flash parameters using his laptop. The results he gets now are far better – in fact, he has a whole gallery of pictures you can check out.

If you want to delve into high-speed photography as well, all of the schematics and code can be found on his blog.

A Light-Following Pong Game

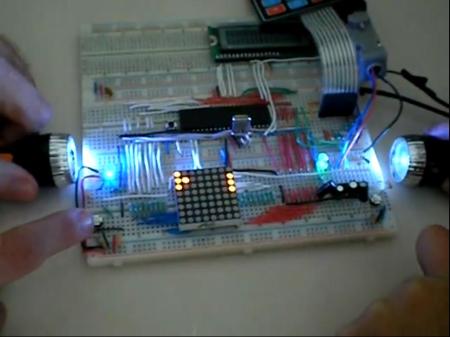
Although not everyone has the ability to make a hacked Pong game Like [Marcelo], even fewer have the ability or the creativity to come up with the elaborate hack that he did. The basic premise of his game is a version of pong played on a breadboard with a 8×8 matrix of LEDs. The controls are really what sets this hack apart. Instead of using a paddle controller or normal switches, small flashlights are used to control the on-screen (on-LED matrix) paddle. This is accomplished using a series of photoresistors and a PIC processor.

Innovative as this would be by itself, [Marcelo] decided to make a program in Flash to display the action on a computer.  Communication is done serially, and C# is used to translate everything as Flash doesn’t natively work with a serial connection.

Another innovation is that there are two LEDs connected on either side powered via pulse width modulation. The lights get dimmer as one player is about to lose. Check out [Marcelo’s] pong game after the break!

Continue reading “A Light-Following Pong Game”

Spinning UV Light Writer

uv_light_writer_ring

[David] has always wanted use UV LEDs to write on a phosphorescent surface ever since saw an article about it on Make. He accidentally purchased UV LEDs when he meant to buy purple ones, so he figured that his mistake was all the reason he needed to give UV light writing a try.

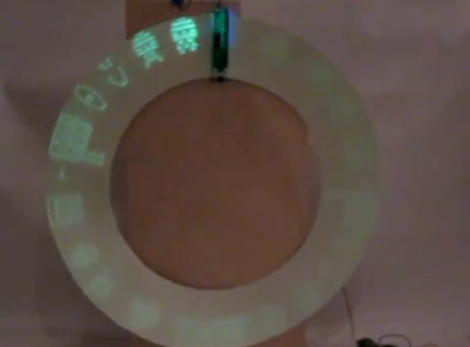
He built a PIC16F628 UV POV board using the LEDs, and while manually swiping the writer across various glow in the dark surfaces was cool, he wanted to keep the POV board stationary, moving the writing medium instead. He bought some phosphorescent vinyl, but found that it wasn’t too flexible, meaning he could not use a conveyor belt approach for his display. One day it dawned on him that a vinyl ring might work pretty well, and using a motor from an old cassette player, he constructed the UV writer you see above.

It seems to work pretty well despite a small flaw in the UV ring, and while [David] is happy with the results, he already has plenty of ideas in mind for the second revision.

Check out the video of his UV light ring in action after the jump.

[Thanks, Riley]

Continue reading “Spinning UV Light Writer”

Playing Snake With A TV Remote

[vinod] sent in his replica of a Snake game, the game to play on old Nokia dumb phones.

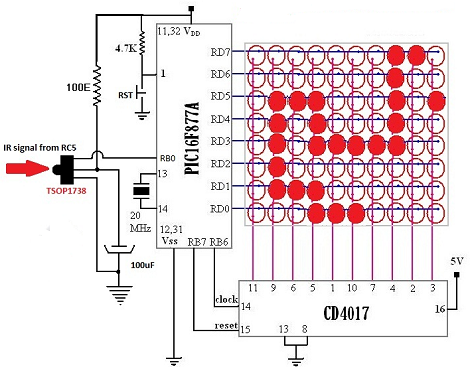
The build is based on a PIC16F877 microcontroller just like previous Snake builds we’ve seen, but [vinod] didn’t use physical buttons in his build. Instead, he used a Philips infrared TV remote to control the game. The infrared controller only takes up one pin on the microcontroller, as opposed to the 4 pins of the easiest four button setup. [vinod] also threw in a simple one-transistor level converter so Snake can be played with a PC via RS-232. With the PIC code included in the build, it’s a great build that reminds us of a more civilized age.

The video of [vinod]’s snake game in action is posted after the break, but we noticed that the snake is allowed to ‘warp around’ the sides of the LED matrix. Some people might consider that cheating but that can be fixed by changing a few lines of code.

Continue reading “Playing Snake With A TV Remote”