Old School LED Light Show

programmable_lightshow

Building LED arrays that can display all sorts of different patterns is pretty easy these days. Hook up an Arduino, do some charlieplexing, and off you go. When [Viktor] was younger he didn’t have all those fancy schmancy microcontrollers and circuit simulation software you kids have these days. In fact, last we heard, he had to walk to school uphill both ways – in the snow.

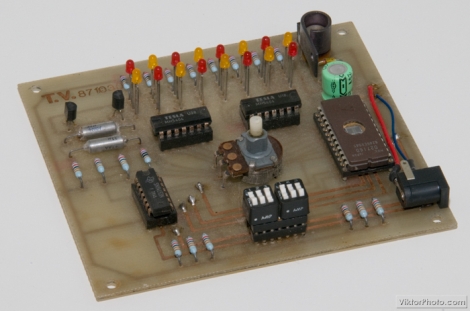
That didn’t stop him from building this gem of a project back in 1987. His LED chaser/light show does not use any microcontrollers at all, rather it relies on an EPROM to store predefined display programs. A series of switches are installed on the front of the flasher, allowing him to easily switch between the programs, and a pot is mounted to the front of the device to control the speed of the LEDs.

His light show is pretty slick, even for a project built over 20 years ago. Sometimes you just can’t beat a good, old-school hack.

Continue reading for a video demonstration of [Viktor’s] programmable light show.
Continue reading “Old School LED Light Show” →

Endless Fun With LED Dominoes

le_dominoux

Toppling dominoes is great fun for about 30 seconds at a time, when you are not busy setting them up for another run. [Randy] thought it was about time they got an electronic makeover to allow for constant, immediate gratification. Armed with a few simple electronic components, he has created Le Dominoux.

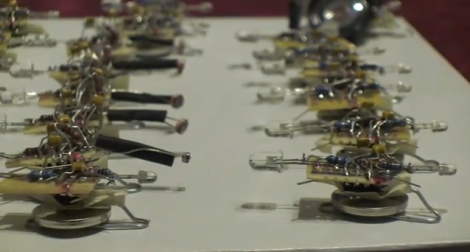
These LED-based electronic dominoes are actually quite simple to build. Each basic Le Dominoux is constructed on a small square of protoboard and consists of either a photo cell or phototransistor, a 555 timer, and an LED, all powered by a coin cell battery. The 555 timer, which is configured as a one-shot, is triggered when the photosensitive component on the back side of the domino is exposed to a bright enough light. The LED on the front end of the domino is then illuminated one time. This process is the electronic equivalent of a single domino toppling over.

He has constructed several variants of the Le Dominoux to act as flashing triggers, for outputting sound, as well as for turning tight corners. These variants allow the dominoes to be configured in many different ways, creating self-sustaining light shows. If anyone is looking for a fun project to introduce kids to electronics, this would definitely be it. Stick around to see a video of Le Dominoux in action – we bet you can’t stop watching it.

This is of course [Randy’s] entry in the 555 Design Contest, which ends tonight at midnight EST.

[Thanks Jeri]

Continue reading “Endless Fun With LED Dominoes” →

Building A Dead Mouse’s Switch

building_a_better_mousetrap

[Ned] had a mouse problem in a very uncomfortable place.

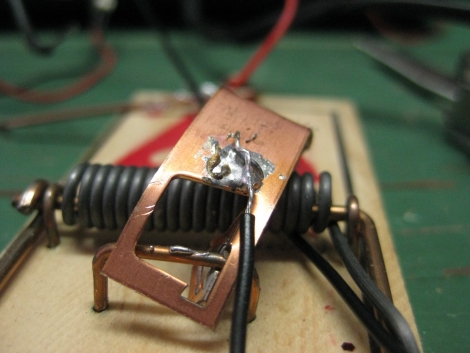
No, not like the back of a Volkswagen, in his ceiling. He wanted to put a mouse trap up there to take care of the critter, but knowing how nasty a tripped trap can be after a few days, he was hesitant. He recalled a project he saw online where a mouse trap was wired like a dead man’s switch and he got to work putting together a trap of his own.

He scavenged some parts from around the house and wired up the mouse trap so that a pair of LEDs were lit so long as the trap had not been sprung on an unsuspecting mouse. Once a mouse is caught in the trap, his circuit is broken, and the LEDs go off, letting [Ned] know it’s time to poke his head back up into the ceiling and clean things up.

While his trap is decidedly low-tech, we always enjoy seeing a cheap and easy solution to annoying, everyday problems.

Radio-controlled LED Light Show

HL1606_radio_controlled_light_show

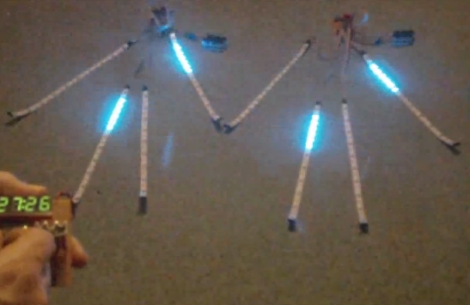
[Alan] was commissioned to make some wearable, radio-controlled LED strips for the Travelling Light Circus. It has taken some time, but he has recently finished some prototypes, and thought it was a good time to do a writeup on the project. The system is managed by a single controller unit, which communicates with any number of LED driver units, each controlling 4 HL1606 LED strips. The light displays are synchronized across all of the LED driver units via a 2.4 GHz radio, with each driver falling into synch almost immediately after being powered on. While some might be turned off to the fact that he uses Arduino Pro Minis to control the LEDs, this is far from a simple project.

[Alan’s] blog contains several posts about this project, with everything documented in detail. He spends quite a bit of time talking about the project’s software, as well as hardware issues he ran into along the way.

His blog is a must read, but even more so, it is a must see. The lighting effects are mesmerizing, as there are a ton of different light patterns these units can generate, so be sure to check out the following video of the lights in action.

Continue reading “Radio-controlled LED Light Show” →

LED Dog Collar, Christmas Edition

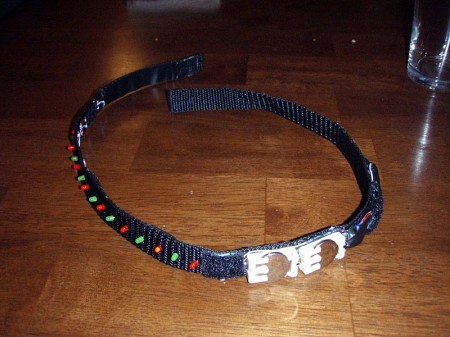
[Aaron] says in our comments that he also made an LED dog collar. This Christmas themed dog collar uses an ATTiny13a and a hand full of red and green LEDs (28?). While the animations aren’t as complex as the collar we posted earlier today, we though you might enjoy this one as well. From the description, we think that the LEDs simply fade back and forth between red and green.  We think that [Aaron] did a great job. He has included the source code and schematic on his site, but sadly there’s no video of this collar in action.

Today’s Arduino Minute

Sometimes projects are vast, complicated, and complex. Other times projects are a bit more on the simple. Today we thought we would share a couple projects with something in common that may be familiar sounding to the more experienced crowd, but may inspire a few readers new to the world of microcontrollers.

Continue reading “Today’s Arduino Minute” →

RGB “Tilty Cube”

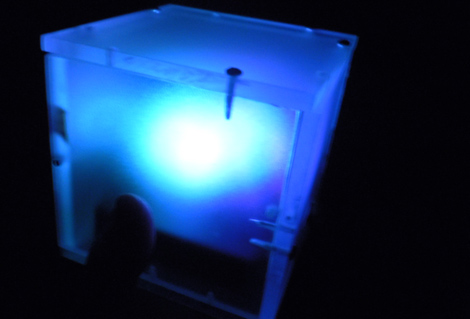
[Ben’s] introduction to microcontrollers was this fun little gift he calls the “tilty cube”. It is an acrylic box with 3 LEDs mounted inside that changes color based off of how you tilt it. Sounds like a fun toy, and a good project to learn with. [Ben] chose the PIC12F615 as the brains and laid it all out on a perfboard.  Since this was his first microcontroller experience he had to learn how to blink the LEDs, then figure out PWM etc. Though there is no video of the project in its finished state, since it was given away as a gift, we assume he figured it out pretty well.  He does state that the LEDs are dimmer than he had hoped and offers some thoughts on how he would do the entire project better next time.