Giant Space Invaders With Road Barriers And No Moving Parts

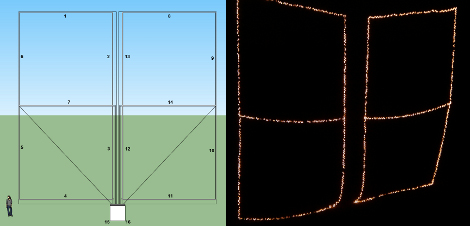
This is space invaders on the large-scale. To give you an idea of just how big this is, that’s a street lamp to the left. It’s being played on the side of a building, but it’s not really done the easy way. We’ve seen gaming on the sides of buildings by using projectors, but this one is more like a classic LCD handheld game… just really really big.

Each of the game pieces is hung in place on a black backdrop. The invaders themselves are molded-plastic road construction barricades. The shield area on the bottom is made op of center-lane dividers. All of the pieces are wired with lights that can be addressed by a central controller. As you can see after the break, just one button gets the action under way.

This is along the same line as the Christmas Light game we saw several years back. If you’ve got some extra strings of lights and don’t mind building a controller we think you should add a little fun to the neighborhood with your own giant installation. Just don’t forget to send in some pictures.

Continue reading “Giant Space Invaders With Road Barriers And No Moving Parts”

Troubleshooting Household Light Timers

timer-repair

When [Todd Harrison’s] Christmas lights stayed on well past the pre-defined shut off time, he knew there was something wrong with the timer. He took the device into his workshop and spent some time diagnosing and repairing the device, a process he recorded for all to see.

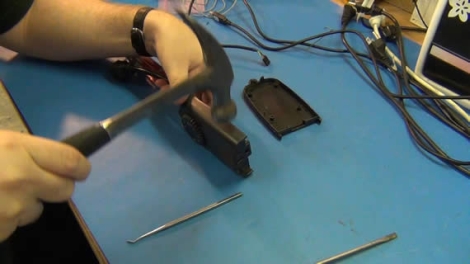
After busting the screw-less timer open with a hammer, he inspected the PCB for any apparent signs of damage. After seeing what looked like a damaged transistor, he desoldered it from the board for testing. After the transistor passed his tests with flying colors, [Todd] assumed that the fault had to be in the relay which the transistor was responsible for switching.

Sure enough, the relay had shorted out, and upon cutting it open he found that the contact points were fused together. He separated and sanded the contacts down, enabling him to get the timer working – at least for the time being.

Part of [Todd’s] goal with this video was to show off different methods of desoldering, including a manual solder sucker (my favorite), desoldering braid, and a purpose built desoldering iron. If you’re in the market for some desoldering tools, but don’t know what to buy, [Todd] is more than happy to offer his advice.

Continue reading to see a video of [Todd’s] troubleshooting process.

Continue reading “Troubleshooting Household Light Timers”

Children’s Light Up Toy Is An Easy Hand-made Gift

light-and-switch-toy

While this year’s Christmas lists are dominated by electronic gadgets and other mass-produced toys, it wasn’t always like that. We’re not trying to sound like the old man yelling at the neighborhood kids to get off his lawn, but many of today’s gifts lack the personal touch found in old, hand-made toys.

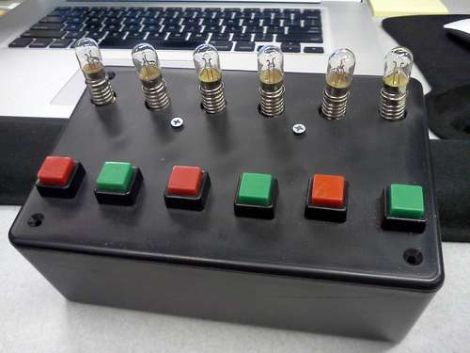
[henlij’s] son is a budding electronics geek who loves playing with switches and lights, so he was inspired to build him a fun toy to pass the time. He constructed a simple box full of lights and switches that his son could toggle on and off to his heart’s content.

While there’s not a ton going on inside the box, we think that the idea is fantastic. With just a few dollars worth of simple components, anyone who knows their way around a soldering station can build something that will keep a child fascinated for hours.

There’s no reason to stop at buttons and lights either. If we were to build one, we would swap the bulbs out for LEDs, then add a wide variety of switches and dials along with speakers and any other components we could get our hands on.

The options are pretty limitless, so if you happen to know a child that gets a kick out of playing with buttons and switches, why not make him or her something special this year, much like [henlij] did for his son?

DIY LED Photography Lights

led-light-box

[Markus] had been drooling over some LED panels to use as a soft light source for photography, but being a hobbyist, he didn’t want to spend a ton of money to buy them. He figured that he had enough electronics know-how to build his own panels, while saving a boatload of cash in the process.

He hoped to keep the total cost under £100, so along with new items like LED light strips, he would have to use some stuff he had sitting around, like the metal cooking containers that make up the body of the lights. While originally planned for use in a different project, it turns out that the cooking containers were ideal for his lighting setup, since they are both durable and great heatsink material.

The remainder of the build is pretty straightforward. [Markus] used a pre-made LED dimmer to control the panel’s brightness, along with some tinted plexiglas to diffuse the light while bringing the color temperature into a more usable range.

While he missed his £100 mark, the lights look great – we just might have to build a few of them ourselves.

Looking Toward Christmas Decor By Learning About DMX

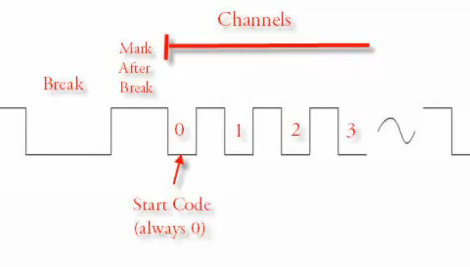
So Halloween finally arrived, we hope you had enough time to pull off your frightening feats in the way you had originally envisioned. Now it’s time again to look to the future and start planning this year’s Christmas decorations. Lights are always a popular theme, and this year you might want to look into DMX lighting controls and decide if that’s a route you want to take. [Akiba] has your back, he just put together a set of videos explaining the DMX lighting protocol and how to use it with an Arduino.

The thought here is that the Arduino can be used as a sort of DMX hub that is connected directly to a computer running open source controller hardware. It can send commands which the Arduino decodes, deciding whether to just pass them on to DMX compatible devices, or to do what it does best and control other hardware that is not normally accessible through the lighting command protocol. To the control program your four-dollar strand of LED lights looks no different from a thousand dollar stage light, making it cheap and easy to build your own entertaining holiday show right in your front yard. See the second video in this series after the break where [Akibo] details the hardware setup for his system. The other parts are available at the link above.

Be careful, this can be a consuming endeavor. Don’t believe us? Just look around and you’ll find no shortage of large DMX builds just for Christmas lights.

Continue reading “Looking Toward Christmas Decor By Learning About DMX”

Jumbo Size New Years Countdown

New Years celebrations tend to get bigger and bigger every year for most people, and [Brian] takes no exception. In order to top his lighted tree of a few years ago, he has concocted a 40’x40′ set of Seven-Segment displays made out of Christmas lights, hung from nearby trees. These displays would start counting down the minutes an hour before the ball drop, and be synchronized with music. Also in the spirit of a New Years party, the music he has chosen is in the form of a Power hour. The control board [Brian] is using also comes with two extra outputs, which he plans to use for the most exciting possible additions: Fireworks and Flamethrowers.

Be sure to check back after New Years to see a video of the device in action. Be sure to Hack, Drink, and Party Responsibly out there.

Woot Lights And Mice Transplants

[Nathan Long] sent in two fairly simple mods he’s been working on. The first is the control of Woot-off Lights via LPT port. A computer checks Woot for the Woot-off logo, and if the logo is spotted, on go the lights. It’s really just a twist on the LED/Arduino email message system, but the creativity is nice.

His other modification is the stuffing of a Microsoft Intellimouse inside of a Logitech Wingman. With the goal of giving the old PS/2 mouse USB capabilities and removing the terrible ball. For those that are asking themselves “why bother? Terrible ergonomics, no scroll wheel, etc.” [Nathan] claims it’s for Quake 2 nostalgia, to each their own we suppose.