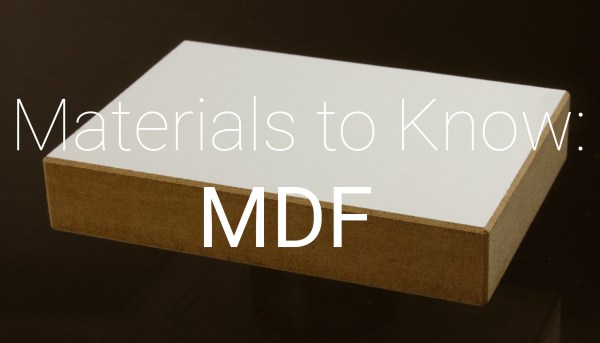
Simple Headphone Bracket Shows Off Carbon Fiber Basics

The carbon fiber look is a pretty hot design element for things these days. Even things that have no need for the strength and flexibility of carbon fiber, from phone cases to motorcycle fenders, are sporting that beautiful glossy black texture. Some of it only looks like the real stuff, though, so it’s refreshing to see actual carbon fiber used in a project, like this custom headphone rack.

True, this is one of those uses of carbon fiber that doesn’t really need it – it just looks cool. But more importantly, [quada03]’s build log takes us through the whole process, from design to mold construction to laying up the fiber mats and finishing, and shows us how specialized equipment is not needed to achieve a great result. A homemade CNC router carves the two-piece mold out of Styrofoam, which is then glued up and smoothed over with automotive body filler. The epoxy-soaked carbon fiber mats are layered into the mold with careful attention paid to the orientation of the fibers, and the mold goes into one of those clothes-packing vacuum bags for 24 hours of curing. A little trimming and sanding later and the finished bracket looks pretty snazzy.

We’ve discussed the basics of carbon fiber fabrication before, but what we like about [quada03]’s build is that it shows how approachable carbon fiber builds can be. Once you hone your skills, maybe you’ll be ready to tackle a carbon fiber violin.

[via r/DIY]

Turning A 3D Printer Into An Injection Molding Machine

Injection molding machines are able to form very detailed plastic parts, simply by squirting plastic into a mold. 3D printers squirt plastic. Why no one thought of using a 3D printer extruder to push plastic into a mold until now is something we’ll never know.

[bfk] has been working on a way to produce very small, very detailed parts for a while now, and realized the extruder of a 3D printer serves most of the functions of an injection molding machine. It takes plastic, melts it, and forces it through an orifice. Whether that plastic goes to a build platform or into a mold is beside the point; but with a simple silicone mold, anyone can replicate extremely small parts with a tool every hackerspace already has.

The tools required are RTV rubber, which is the most popular mold material around. Aside from that, it’s just silicone lubricant, dowels and LEGO to make sprues, and of course something to make a mold from. Once the mold is made, it’s a simple matter of holding the mold up to the nozzle of a printer and extruding a bit of plastic.

The resulting ‘print’ is as detailed as the best prints that will ever come off a resin printer. It’s great for making parts for very small models like [bfk]’s current project, but this technique could be expanded to anything that needs a lot of small plastic parts with tight tolerances.

Video of the process below.

Continue reading “Turning A 3D Printer Into An Injection Molding Machine”

Upgrading The Battery In A Wrist PDA

No, your eyes do not deceive you. That’s a wrist-mounted PDA. Specifically, a Fossil Wrist PDA, also known as an Abacus, that was sold from 2003 to about 2005. Yep, it’s running PalmOS. [mclien] has had this watch/PDA for a while now, and found the original 180mAh battery wasn’t cutting it anymore. He made a little modification to the watch to get a 650mAh battery in this PDA by molding a new back for it.

The original PDA used a round Lithium cell, but being ten years old, the battery technology in this smart watch is showing its years. [mclien] found two batteries (380mAh and 270mAh) that fit almost perfectly inside the battery.

The new batteries were about 3mm too thick for the existing case back, so [mclien] began by taking the old case, adding a few bits of aluminum and resin, and making a positive for a mold. Two or three layers of glass twill cloth were used to form the mold, resined up, and vacuum bagged.

After many, many attempts, [mclien] just about has the case back for this old smartwatch complete. The project build logs are actually a great read, showing exactly what doesn’t work, and are a great example of using hackaday.io as a build log, instead of just project presentation.

Lost PLA Casting With A Little Help From Your Microwave

lost-pla

[Julia and Mason] have been perfecting their microwave-based lost PLA casting technique over at Hackaday.io. As the name implies, lost PLA is similar to lost wax casting techniques. We’ve covered lost PLA before, but it always involved forges. [Julia and Mason] have moved the entire process over to a pair of microwaves.

Building on the work of the FOSScar project, the pair needed a way to burn the PLA out of a mold with a microwave. The trick is to use a susceptor. Susceptors convert the microwave’s RF energy into thermal energy exactly where it is needed. If you’ve ever nuked a hot pocket, the crisping sleeve is lined with susceptor material. After trying several materials, [Julia and Mason] settled on a mixture of silicon carbide, sugar, water, and alcohol for their susceptor.

The actual technique is pretty simple. A part printed in PLA is coated with susceptor. The part is then placed in a mold made of plaster of paris and perlite. The entire mold is cooked in an unmodified household microwave to burn out the PLA.

A second microwave with a top emitter is used to melt down aluminum, which is then poured into the prepared mold. When the metal cools, the mold is broken away to reveal a part ready to be machined.

We think this is a heck of a lot of work for a single part. Sometimes you really need a metal piece, though. Until metal 3D printing becomes cheap enough for everyone to do at home, this will work pretty well.

Molding Flexible Links

Flexible Links

Need a custom link that’s strong and flexible? [RobotGrrl] came up with a method of molding flexible links using 3D printed parts and Sugru.

The link consists of two 3D printed hubs, connected by a flexible material cast in a 3D printed mold. [RobotGrrl] recommends using Sugru to create the link, but you can use homemade Oogoo as a low cost substitute. Dish soap is used as a release agent, and prevents the Sugru from sticking to the mold.

The tutorial includes a detailed guide to modeling the parts in Autodesk Inventor, which serves as a quick introduction to the CAD tool. If you just want to make some links, the STL files are available for immediate 3D printing.

Why would you want DIY flexible links? [RobotGrrl]’s Baitbot is a good example. This tentacle robot uses the links as its core. Check out a video of the Baitbot wiggling and jiggling after the break.

Continue reading “Molding Flexible Links”

Portal Puppet Probably Won’t Kill Us

This incredibly detailed puppet of the Wheatley from Portal was sent into us, and we a so very happy that we’re not writing about a GLaDOS build right now.

Hewn from florist foam and covered Wonderflex and Apoxie Sculpt, Wheatley pretty much tows the line as far as cosplay and prop builds go. What makes Wheatley interesting is his movement mechanism – he’s actually a hand-controlled puppet. Portal quotes come a small sound module that plays 10 Wheatley quotes. The control system has ten buttons and allows for the display of a lot more emotion than we would expect from a talking sphere. We really like the completely manual solution to an articulated robot eyeball – a really great, simple solution to a complex problem.

Like the portal turret and the adorable and friendly companion cube, we’re really impressed with the build quality of Wheatley. Yet again we’re left wondering why Valve doesn’t license some awesome toys like their office sentry.

Check out the intelligence dampening sphere in action after the break.

Continue reading “Portal Puppet Probably Won’t Kill Us”

DIY Portal Turret Is… Looking Pretty Good.

[Ryan Palser] wrote in to tell us about his Portal Turret. [Ryan] set about making this Portal 1 style turret by first carving a Styrofoam form, bondo and waxing then casting molds of the various components. Anyone interested in mold making (like us) should check out all the pictures and comments in the stream. The turret’s camera lens style eye has some excellent detail including a laser cut aperture with text inlay. A couple LEDs behind the eye assembly provide the signature red glow and evidently [Ryan] also fitted the little guy with a red laser. An internal Arduino (Incident Resolution Chip?) takes ques from a PIR sensor mounted in one of the turret’s arms to play one of 17 sound clips through a sparkfun MP3 player shield. In order to fight repetition the sound module runs through a playlist of the 17 tracks then shuffles it before playing through again. Theme music can also be spammed by pressing a button in the back of the motion sensing arm. The turret can be battery powered or plugged into a wall socket for constant operation. All that’s missing are the Aperture-Brand Resolution Pellets. We would love to see this integrated with some similar turret projects previously featured here.

Are you still there? We have more Aperture Science stuff including a Sentry Turret, Weighted Companion Cube, and even a portal shirt. If you are interested in more model making check out the spectacular Daft Punk helmet build from a little while back.