You know, it feels as though it’s getting more and more difficult to compete for Father of the Year around here. And [Jon Petter Skagmo] just laid down a new gauntlet — the incredibly overly-engineered kids car.
 While the original plan was to build the entire car from scratch, [Jon] eventually opted to use an off-the-shelf car that had a dead battery.
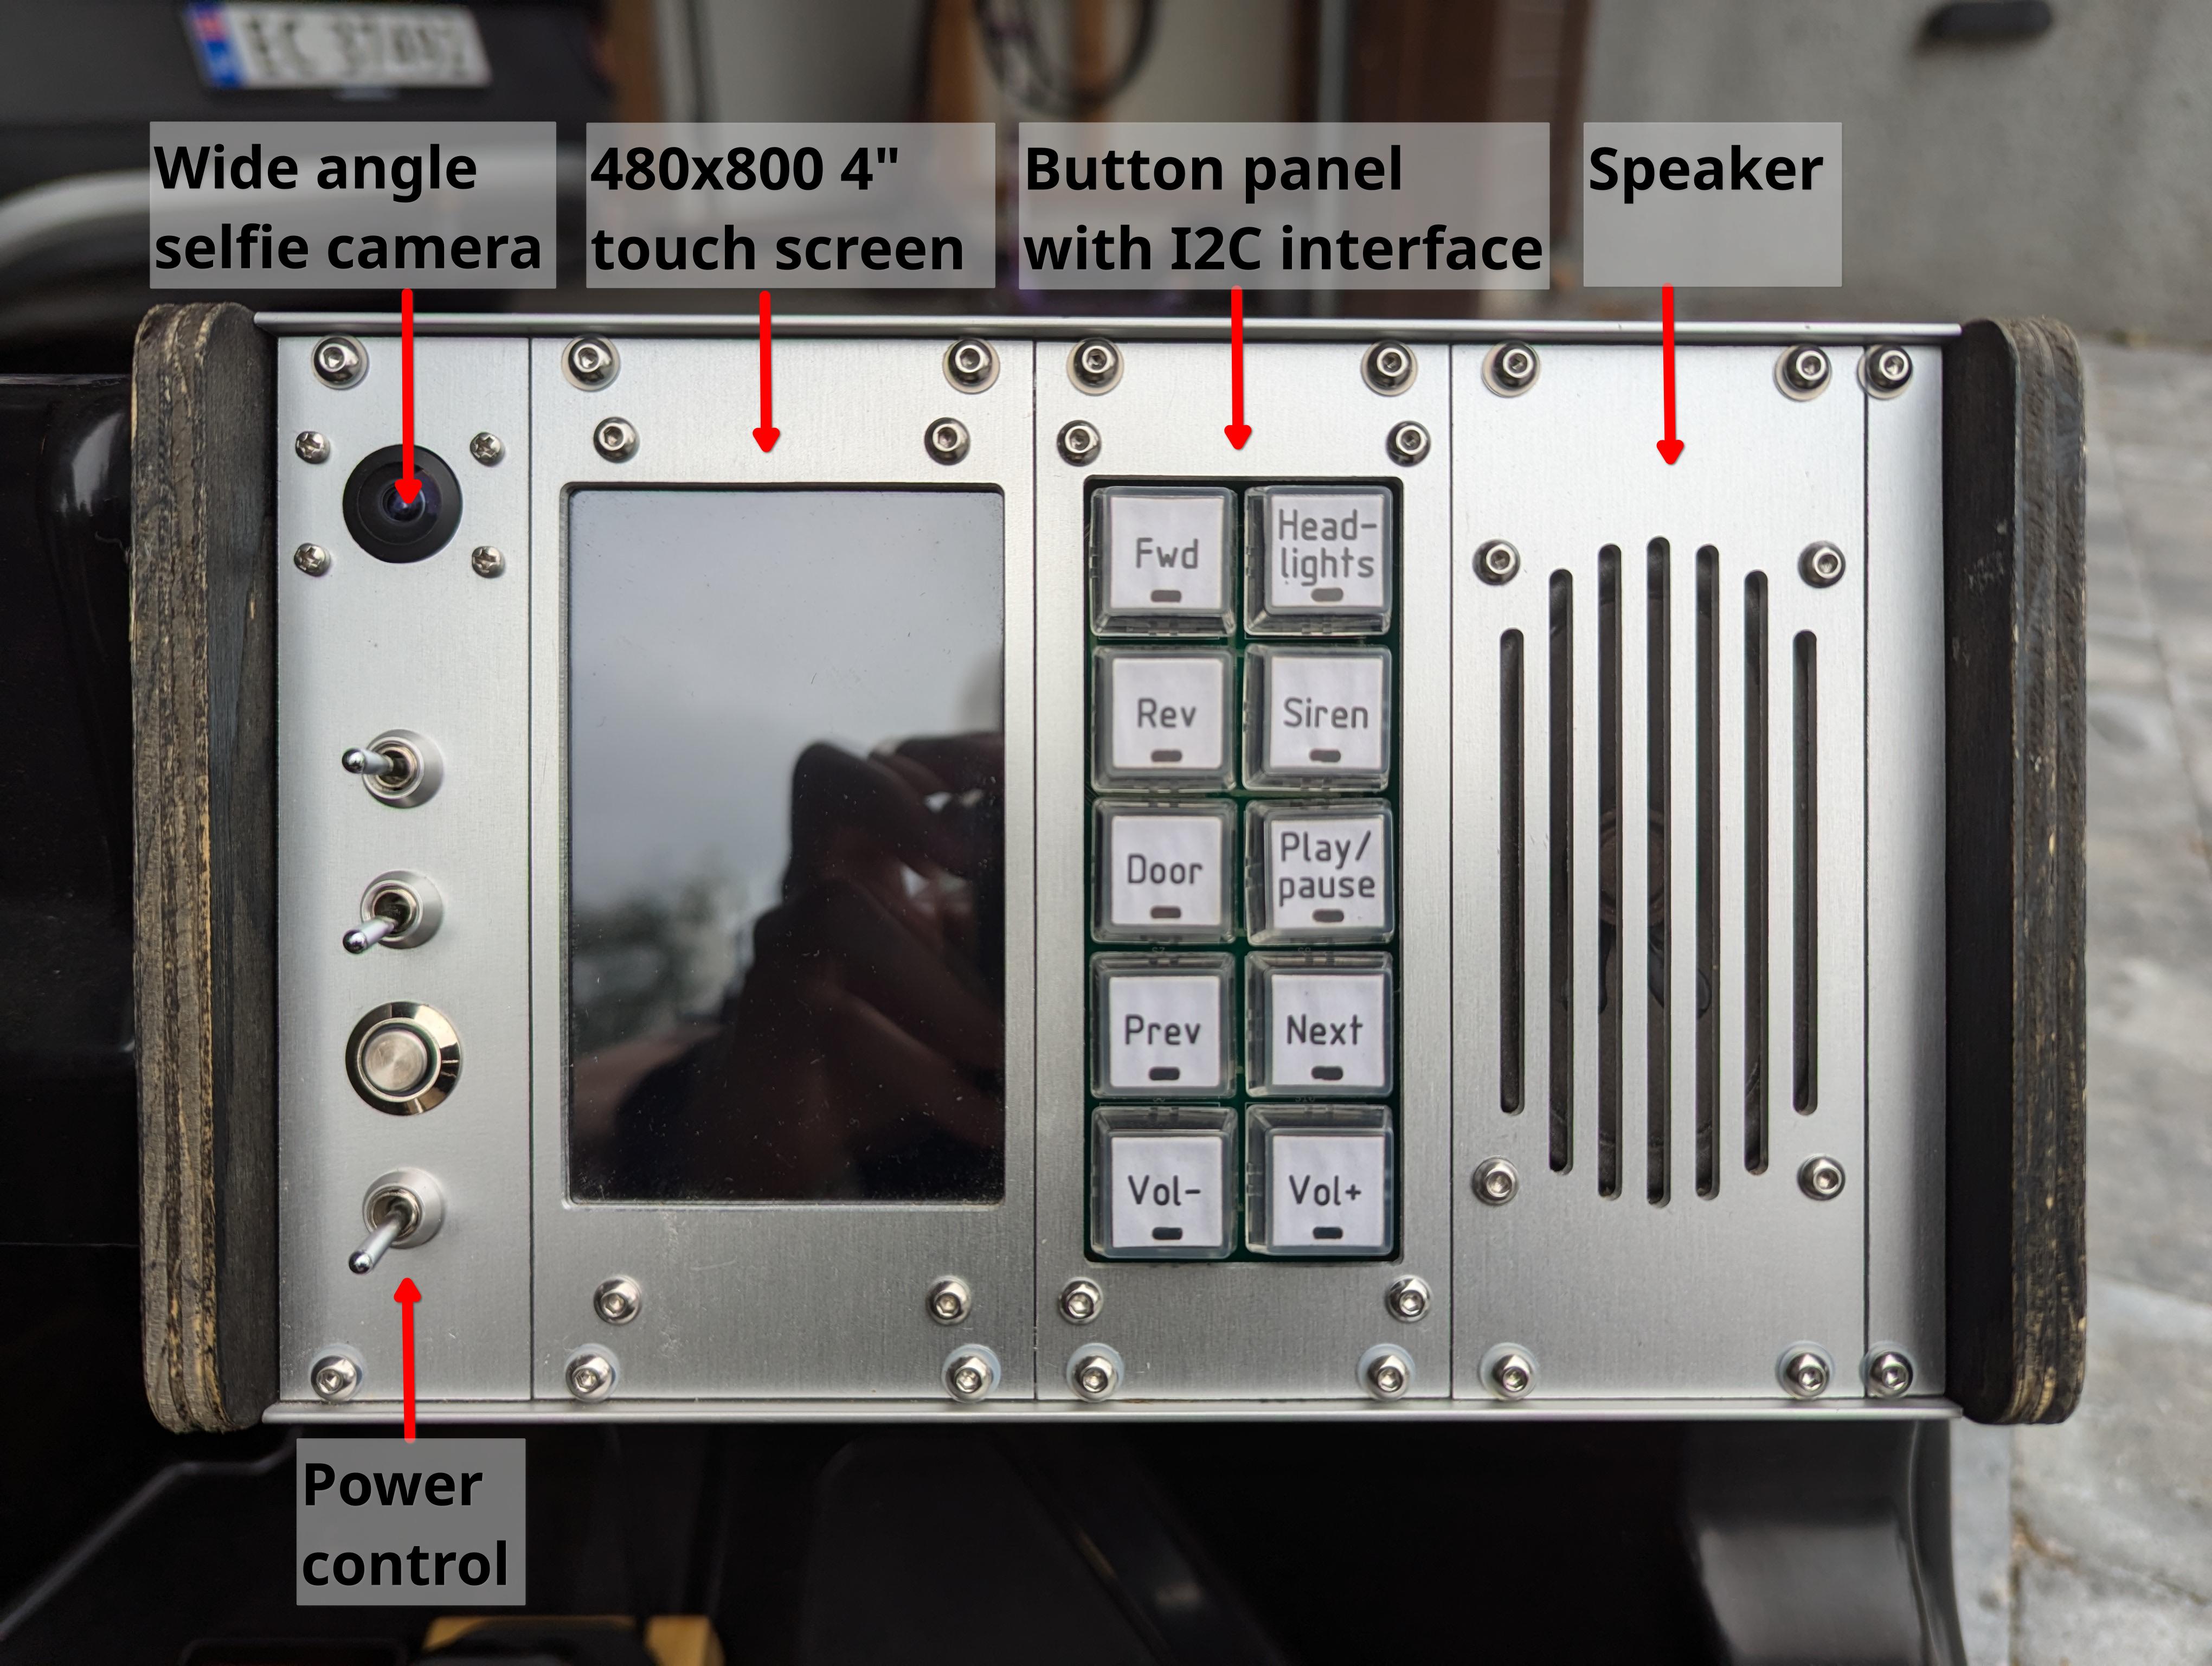
While the original architecture was quite simple, the new hardware has just about everything a kid could want in a tricked-out ride, most of which is accessible through the really cool dashboard.
We’re talking headlights, a music player, a siren, a selfie video cam that doubles as two-way communication with the driver, and even a garage door opener that uses an MQTT connection.
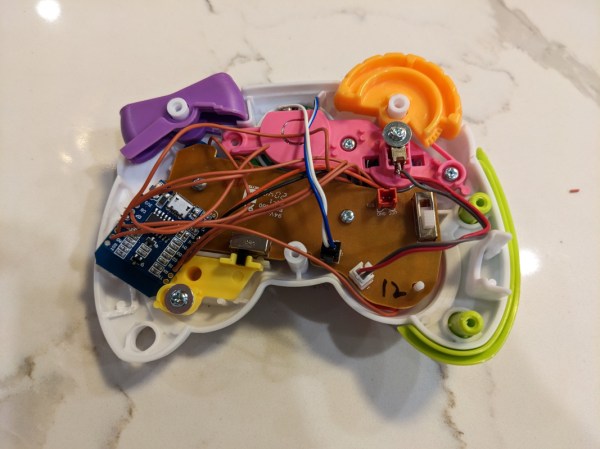
Under the cute little hood is where you’ll find most of the electronics. The car’s brain is a Raspberry Pi 3B, and there’s a custom daughter board that includes GPS/GNSS. This was originally meant to geofence [Baby Girl Skagmo] in, but Dad quickly realized that kids are gonna kid and disabled it pretty soon after.
This isn’t the first high-tech rebuild of a kiddie car that we’ve seen here at Hackaday. Makes us wish we were quite a bit smaller…