Share Your Clipboard Across Machines Using MQTT

Many of us regularly move from one computer to another for work, play, and hacking; every now and then finding yourself wishing you could copy something on one machine and paste on another without additional steps in between. [Ayan Pahwa] was well acquainted with this frustration, so he created AnywhereDoor, a cross-platform clipboard sharing utility that uses MQTT.

Some cloud-based solutions already exist to do this, but that means sending your private clipboard data to someone else’s server. Not keen on that idea, [Ayan]’s solution makes use of a MQTT broker that can run anywhere on the local network, and lightweight python clients to run on Mac, Windows and Linux. The client checks your clipboard at specified intervals, and publishes new data to a topic on the broker, to which all the clients are subscribed. The data is end-to-end encrypted using Fernet symmetrical key encryption, so the data won’t be readable to anyone else on the network. Currently, AnywhereDoor only supports copying text, but media is planned for a future version.

We like the relative simplicity of the utility, and see it being very handy for hackers bouncing between machines in the lab. Simple software utilities that solve a specific and real problem can are very useful, like a wiring documentation tool, or Kicad to isolation routing patchwork converter.

Simple MP3 Player Hides Home Automation Brilliance

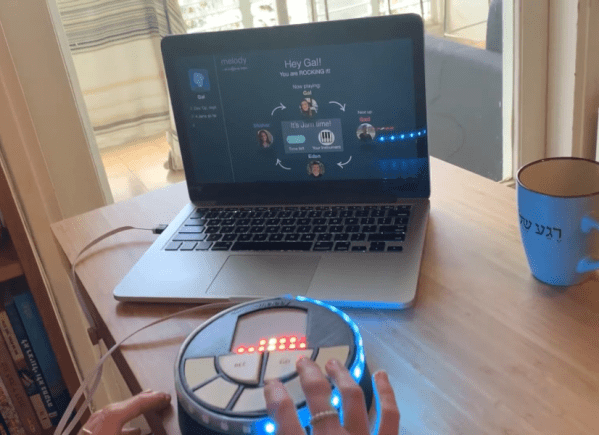
Like bubble wrap or the corkscrew, plenty of everyday objects have lost almost all ties to their original purpose. It could be that the original product had no market but was able to find one in an unexpected place, or simply that the original use case disappeared. We think that this MP3 player for children might arrive at a similar fate as a home automation controller thanks to a recent project by [Sebastian].

The MP3 player is known as a Jooki and works by using small figurines (and a few buttons) to control the device. Different figurines cause the MP3 player to change playlists, for example, but it turns out that the device is capable of communicating over MQTT. This means that [Sebastian] was able to use the MQTT messages from the Jooki to do all kinds of things beyond its intended use with openHAB, an open-source home automation system, such as dimming the lights and closing the blinds when he puts his son to bed.

This platform has considerable potential for hacking thanks to the lightweight communications system it uses under the hood. The Jooki is a little pricey, but if you happen to have one around, it’s an impressive tool that can go well beyond its original intended use.

Do You Know Where Your Children Are? Check The Weasley Clock

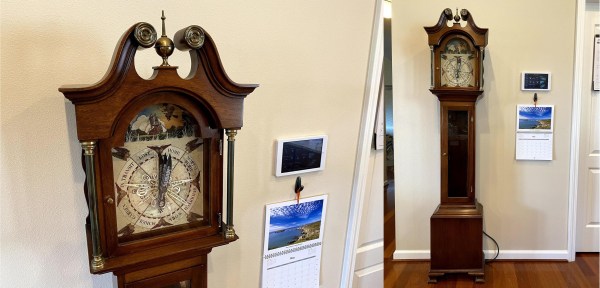
What’s the coolest thing you could build for a Harry Potter fan, aside from a working magic wand or Quidditch broomstick? We would have to say a Weasley clock that shows the whereabouts of everyone in the family is pretty high on the list, especially if that fan is a wife and mother.

Here’s how it works: they’ve set up geofences to define the boundaries of home, each person’s school or workplace, and so on. The family’s locations are tracked through their phones’ GPS using Home Assistant, which is hosted on a Raspberry Pi. Whenever someone’s location changes, the Pi alerts the clock over MQTT, and it moves the 3D-printed hands with servos.

The clock has some interesting granularity to it as well. As someone gets closer to home, their pointer’s distance reflects that in its proximity to the Home slice. And Home itself is divided into the main house and the shop and reflected by the pointer’s position.

We particularly like the attention to detail here, like the art poster used for the clock’s face that includes all the Weasley’s whereabouts in the background. It’s built into a thrift store grandmother clock, which is smaller than a grandfather clock but no less majestic. In the future there are plans to implement the clock’s chimes to announce that someone is back home.

No matter what you’re into, the whereabouts clock idea can probably fit that universe. For instance, here’s one that uses LEGO mini-fig heads to locate roommates.

Tiny Barcode Scanner Beeps Your Shopping List Together

Taking a paper list to the grocery store seems like a good idea, at least until you get there and try to use it. Did you remember to bring a pen? Great. How about a clipboard so you don’t punch through the paper when crossing something off? Apps are easier to use for this, especially the ones with checkboxes, but you’ll still have to enter everything manually. Wouldn’t it be easier (and way more fun) to just scan the barcodes of stuff you need into a list before you chuck the packaging?

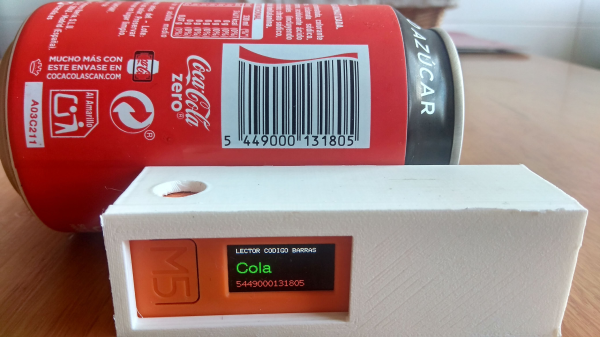
That’s exactly the idea behind [DavidE281]’s barcode scanner, which is designed to work with the Bring! app. All he has to do is scan a barcode, and the product ends up in a tidy list on his phone. It’s a simple build that’s based around the M5StickC, which is an ESP32 dev kit that has a small display and a 6-axis IMU along with some other goodies. [David] combined it with a 2D barcode scanner that has a serial port and designed a printed case that joins them together.

Here’s how it works: the M5Stick sends the barcode over MQTT to an external Raspberry Pi that’s running Home Assistant. The Pi does a lookup in a spreadsheet and sends the data to the Bring! app over a community-built API. At the same time, it sends the product name back to the M5Stick’s display to confirm that it was added to the list. Check out bite-sized demo video after the break.

Scanning barcodes is super fun. So why not use an IoT barcode scanner to keep track of everything you own?

Continue reading “Tiny Barcode Scanner Beeps Your Shopping List Together”

Flashing Sonoff Devices With Tasmota Gets Easier

Tasmota is an alternative firmware for ESP boards  that provides a wealth of handy features, and [Mat] has written up a guide to flashing with far greater ease by using Tasmotizer. Among other things, it makes it simple to return your ESP-based devices, like various Sonoff offerings, to factory settings, so hack away!

Tasmotizer is a front end that also makes common tasks like backing up existing firmware and setting configuration options like, WiFi credentials, effortless. Of course, one can’t really discuss Tasmotizer without bringing up Tasmota, the alternative firmware for a variety of ESP-based devices, so they should be considered together.

Hacks based on Sonoff devices are popular home automation projects, and [Mat] has also written all about what it was like to convert an old-style theromostat into a NEST-like device for about $5 by using Tasmota. A video on using Tasmotizer is embedded below, so give it a watch to get a head start on using it to hack some Sonoff devices.

Continue reading “Flashing Sonoff Devices With Tasmota Gets Easier”

MQTT And The Internet Of Conference Badges

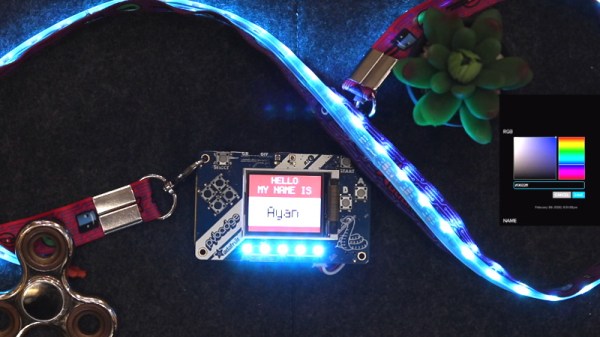
Today, nearly every modern consumer device wants to connect to the Internet for some reason. From your garage door opener to each individual smart bulb, the Internet of Things has arrived in full force. But the same can’t be said for most of our beloved conference badges. Wanting to explore the concept a bit, [Ayan Pahwa] set out to create his own MQTT-connected badge that he’s calling CloudBadge.

As this was more of a software experiment, all of the hardware is off-the-shelf. The badge itself is an Adafruit PyBadge, which doesn’t normally have any networking capabilities, but does feature a Feather-compatible header on the back. To that [Ayan] added a AirLift FeatherWing which allows him to use the ESP32 as a co-processor. He also added a strip of NeoPixel LEDs to the lanyard, though those could certainly be left off if you’re not looking to call quite so much attention to yourself.

The rest was just a matter of software. [Ayan] came up with some code that uses the combined hardware of the PyPadge and ESP32 to connect to Adafruit.io via MQTT. Once connected, the user is able to change the name that displays on the screen and the colors of the RGB LEDs through the cloud service. If you used something like this for an actual conference badge, the concept could easily be expanded to do things like flashing the badge’s LEDs when a talk the wearer wanted to see is about to start.

The modern conference badge has come a long way from simple blinking LEDs, offering challenges that you’ll likely still be working on long after the event wraps up. Concerns over security and the challenge of maintaining the necessary infrastructure during the event usually means they don’t include networking features, but projects like CloudBadge show the idea certainly has merit.

Continue reading “MQTT And The Internet Of Conference Badges”

Reverse Engineering Yokis Home Automation Devices

These days, it’s hard to keep track of all the companies that are trying to break into the home automation market. Whether they’re rebrands of somebody else’s product or completely new creations, it seems like every company has at least a few “smart” gadgets for you to choose from. We hadn’t heard of the Yokis devices that [Nicolas Maupu] has been working on before today, but thanks to his efforts to reverse engineer their protocol, we think they might become more popular with the hacking crowd.

Even if you don’t have a Yokis MTV500ER dimmer or MTR2000ER switch of your own, we think the detailed account of how [Nicolas] figured out how to talk to these devices is worth a read. His first step was to connect his oscilloscope directly to the SPI lines on the remote to see what it was sending out. With an idea of what he was looking for, he then used an nRF24L01+ radio connected to an ESP8266 to pull packets out of the air so he could analyze their structure. This might seem like a very specialized process, but in reality most of the techniques demonstrated could be applicable for any unknown communications protocol of which you’ve got a hex dump.

On the other hand, if you do have some of these devices (or plan to get them), then the software [Nicolas] has put together looks very compelling. Essentially it’s an interactive firmware for the ESP8266 that allows it to serve as a bridge between the proprietary Yokis wireless protocol and a standard MQTT home automation system. When the microcontroller is connected to the computer you get a basic terminal interface that allows you to scan and pair for devices as well as toggle them on and off.

This bridge could be used to allow controlling your Yokis hardware with a custom handheld remote, or you could follow the example of our very own [Mike Szczys], and pull everything together with a bit of Node-RED.