Tiptoe Through The Tulips In No Time With Ukule-LED

Take it from someone who has played at the guitar for over 20 years: reading sheet music can be a big stumbling block to musical enjoyment. Playing by ear is somewhat unreliable, tablature only works well if you’re already familiar with the tune and tempo, and pulling melody from chord charts is like weaving fiction from the dictionary. A lot can be said for knowing basic chord formations, but it can be difficult get your fingers to mimic what you see on the page, the screen, or someone else’s fretboard. Enter Ukule-LED, a learning tool and all-around cool project by [Raghav and Jeff] at Cornell.

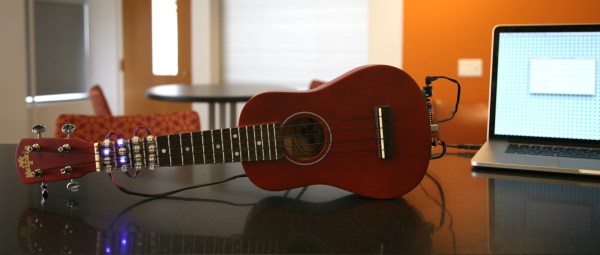
Ukule-LED uses 16 NeoPixels across the first four positions of the fretboard to teach chord positions. All 16 NeoPixels are connected in series to a single pin on an ATMega1284P, which sits on a board mounted to the bottom of the uke along with power and serial. [Raghav and Jeff] set the NeoPixels below the surface so as not to interrupt playability. The uke can operate in either of two modes, ‘play’, and ‘practice’. In ‘play’ mode, the user feeds it a text file representing a song’s chords, tempo, and time signature. The LEDs show the chord changes in real-time, like a karaoke teleprompter for fingers. In ‘practice’ mode, the user enters a chord through the CLI, and the lights hold steady until they get a new assignment. Knowing which fingers to use where is up to the user.

To add another layer of learning, major chords alight in green, minor chords in red, and 7th chords in blue. These are the currently supported chord types, but the project was built with open, highly extendable Python sorcery available for download and subsequent tinkering. Go on tour after the break.

Continue reading “Tiptoe Through The Tulips In No Time With Ukule-LED”

Deck The Halls With A Raspberry Pi Controlled Christmas Tree

You know the holiday season is getting close when the Christmas light projects start rolling in! [Osprey22] is getting a jump on his holiday decorations with his Christmas Tree light show controlled by a Raspberry Pi. Yes, we know he could have done it with an Arduino, or a 555, but the Raspi makes for a convenient platform. With a WiFi module, code changes can be made remotely. The Raspberry Pi’s built-in audio interface also makes it easy to sync music to flashing lights, though we’d probably drop in a higher quality USB audio interface.

[Osprey22’s] Raspberry Pi is running his own custom python sequencer software. It takes an mp3 file and a sequence file as inputs, then runs the entire show. When the music isn’t playing, the Pi loops through a set of pre-defined scenes, changing once per minute.

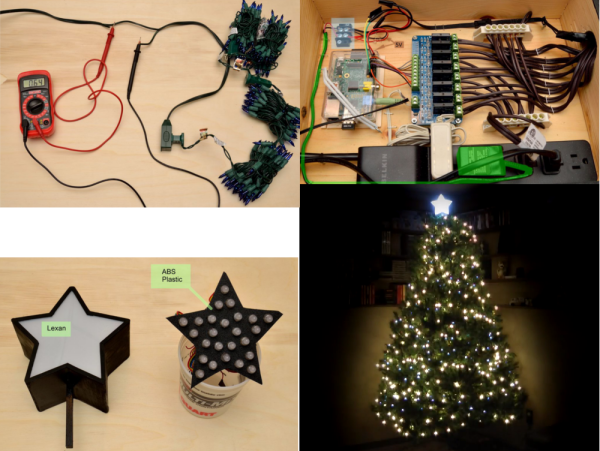
The hardware itself is pretty straightforward. The Raspberry Pi controls 8 solid state relays through its GPIO interface. 8 strings of lights are more than enough for the average tree. [Osprey22] topped the tree off with a star made of wood and illuminated by a string of 25 WS2801 RGB LED pixels.

Click past the break to see [Osprey22’s] tree in action!

Continue reading “Deck The Halls With A Raspberry Pi Controlled Christmas Tree”

Mood Lighting With LEDs And An Arduino

Regular candles can be awfully boring at times. They can only produce one color and the flicker is so… predictable. They can’t even be controlled by an infrared remote control, not to mention the obvious fire hazard. Now, however, [Jose] has come up with an LED candle that solves all of these problems. (Original link to the project in Spanish.)

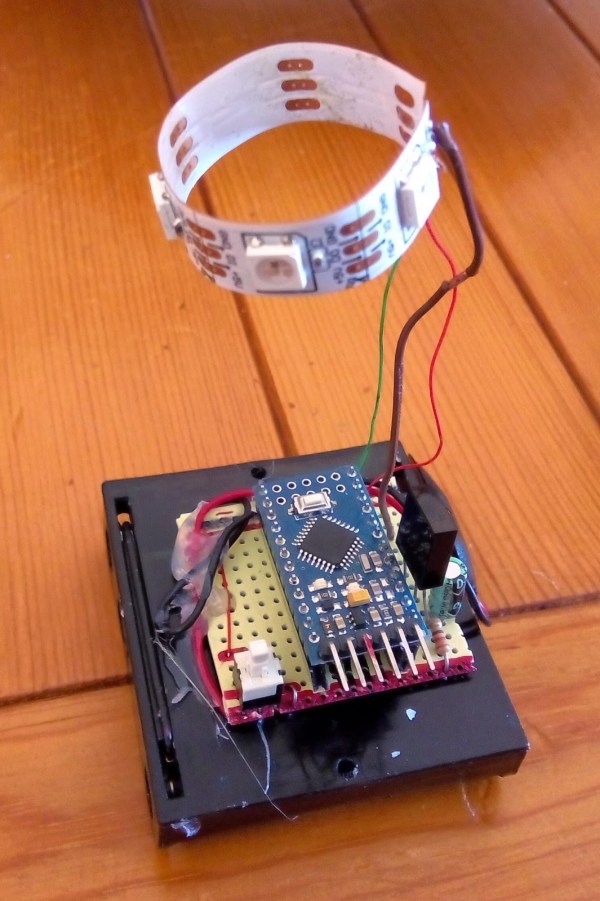
The heart of the project is an Arduino Pro Mini, which is especially suited for this project because of its size. [Jose] put the small form-factor microcontroller in the base of a homemade wax enclosure and wired it to a Neopixel WS2812b LED strip. The strip can produce any color, and has some programmed patterns including flicker, fade, rainbow, and fire.

The artificial candle is controlled with an infrared remote control, and all of the code for the project is available on the project site if you want to build your own. [Jose] has been featured here before for his innovative Arduino-driven RGB lighting projects, and this is another great project which builds on that theme!


3D Printing A Daft Punk Helmet

Thanks to the awesome people over at Adafruit, you can now print your very own Daft Punk helmet! It is designed with a hollowed out shell and translucent material which allows for colorful LEDs to be inserted into the mask, which can light up just about any room. This makes the headset great for Maker Faire, household parties, and underground EDM raves.

The epic costume was inspired by the infamous electronic music duo from France who is known for hiding their identities behind intricate and complex masks. This version, however, is perfect for the Do-It-Youself builder on a budget assuming you have access to a Taz 3D printer through your hackerspace or a friend.

The entire helmet is 3D printed as one piece using a semi-transparent PLA filament with NeoPixel strips (144 pixel per meter) laid inside. It takes about 3 days to complete the printing job (assuming no errors arise during the process). After everything is finished, glossy gold paint is applied and the polished outcome is enough to turn some heads. Plus, this mask makes a great addition to any builder’s homemade ‘trophy’ collection.

A natural next step would be to add sensors that can detect bass vibrations. This could be used to change the colors of the display based on the music that is being played nearby. We’ve seen this sort of thing before on a few Daft Punk helmet builds that are far superior to this one. Of course the difference here is that the Adafruit version can be build in a reasonable amount of time by a mere mortal. Those other examples were life commitments as far as projects go!

Don’t forget to check out the video of this one in action after the break.

Continue reading “3D Printing A Daft Punk Helmet”

Gemma-Powered NeoPixel Sound Reactive Drums

adafruit_products_drum-slide-out

This tutorial from Adafruit shows how to create a custom interactive drum set that lights up with sound. It uses a mic amp sensor that is connected to a miniature Arduino Gemma board to detect when the instrument is being hit by the sticks. Neopixels then illuminate into a range of colors creating a beautifully synced up music presentation.

The container that houses the electronics is 3D printed. The entire circuit is integrated into the snare, mid-tom, hi-tom and a drum kick. All the code and step-by-step instructions can be found on Adafruit’s website. Now imagine something like this being packed up in a suitcase and carried from venue to venue as an up-and-coming band travels from state to state on tour; especially at Drum n’ Bass raves or electronic based music festivals. A video of the kit being used is below.

Continue reading “Gemma-Powered NeoPixel Sound Reactive Drums”

Teaching The Word Clock Some New Tricks

wordclock2014

[Joakim] has built a clock that spells out the time in words. Wait a second – word clock, what is this, 2009? Word clocks are one of those projects that have become timeless. When we see a build that stands out, we make sure to write it up. [Joakim’s] clock is special for a number of reasons. The time is spelled out in Norwegian, and since the clock is a birthday gift for [Daniel], [Joakim] added the his full name to the clock’s repertoire.

One of the hard parts of word clock design is controlling light spill. [Joakim] used a simple 3D printed frame to box each LED in. This keeps the spill under control and makes everything easier to read. The RGB LED’s [Joakim] used are also a bit different from the norm. Rather than the WS2812 Neopixel, [Joakim] used LPD8806 LED strips. On the controller side [Joakim] may have gone a bit overboard in his choice of an Arduino Yun, but he does put the ATmega328 and Embedded Linux machine to good use.

The real magic happens at boot. [Daniel’s] name lights up in red, with various letters going green as each step completes. A green ‘D’ indicates an IP address was obtained from the router’s DHCP server. ‘N’ switches to green when four NTP servers have been contacted, and the Linux processor is reasonably sure it has the correct time. The last letter to change will be the ‘E’, which reports ambient light.

[Joakim] added a web interface to trigger his new features, such as a rainbow color palette, or the ability to show minutes by changing the color of the letters K,L,O,K. The final result is a slick package, which definitely brings a 2009 era design up to 2014 standards!

PIC Up A NeoPixel Ring And C What You Can Do Using This Tutorial

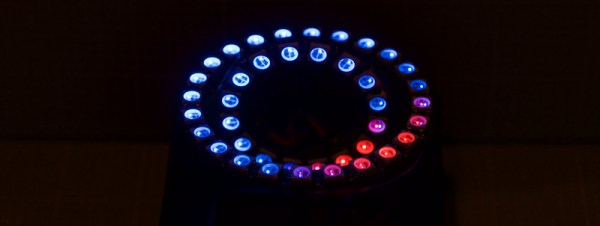
lit ringAs [Shahriar] points out in the introductory matter to his latest video at The Signal Path, Arduinos are a great way for a beginner to dig into all kinds of electronic excitement, but they do so at the cost of isolating that beginner from the nitty gritty of microcontrollers. Here, [Shahriar] gives a very thorough walkthrough of a 60-neopixel ring starting with the guts and glory of a single RGB LED. He then shows how that ring can easily be programmed using a PIC and some C.

[Shahriar]’s eval board is a simple setup that he’s used for other projects. It’s based on the PIC18F4550 which he’s programming with an ICD-U64. The PIC is powered through USB, but he’s using a separate switching supply to power the ring itself since he would need ~60mA per RGB to make them burn white at full brightness.

He’s written a simple header file that pulls in the 18F4550 library, sets the fuses, and defines some constants specific to the ring size. As he explains in the video, the PIC can create a 48MHz internal clock from a 20Mhz crystal and he sets up this delay in the header as well. The main code deals with waveform generation, and [Shahriar] does a great job explaining how this is handled with a single pin. Before he lights up the ring, he puts his scope on the assigned GPIO pin to show that although the datasheet is wrong about the un-delayed width of the low period for a zero bit, it still works to program the LEDs.

[Shahriar] has the code available on his site. He is also holding a giveaway open to US residents: simply comment on his blog post or on the video at YouTube and you could win either a TPI Scope Plus 440 with probes and a manual or a Tektronix TDS2232 with GPIB. He’ll even pay the shipping.

Continue reading “PIC Up A NeoPixel Ring And C What You Can Do Using This Tutorial”