Front and back of the replacement OLED module by Sir68k

Reviving A Piece Of Yesterday’s Tomorrow

To anyone who remembers Y2K, Sony’s MiniDisc format will probably always feel futuristic. That goes double for Sony’s MZ-RH1, the last MiniDisk recorder ever released, back in 2006. It’s barely larger than the diminutive disks, and its styling is impeccable. There’s a reason they’ve become highly collectible and sell for insane sums on e-Bay.

Unfortunately, they come with a ticking time-bomb of an Achilles heel: the first-generation OLED screens. Failure is not a question of if, but when, and many units have already succumbed. Fortunately enterprising hacker [Sir68k] has come up with replacement screen to keep these two-decade old bits of the future alive.

Replacement screens glowing brightly, and the custom firmware showing track info, something you’d never see on a stock RH1.

Previous revisions required some light surgery to get the twin OLED replacement screens to fit, but as of the latest incarnation (revision F+), it’s now a 100% drop-in replacement for the original Sony part. While it is a drop-in, don’t expect it to be easy. The internals are very densely packed, and fairly delicate — both in the name of miniaturization. You’ll need to break out the micro-screwdrivers for this one, and maybe some magnifiers if your eyes are as old as ours. At least Sony wasn’t gluing cases together back in 2006, and [Sir68k] does provide a very comprehensive repair guide.

He’s even working on new firmware, to make what many considered best MD recorder better than ever. It’s not ready yet, but when it is [Sir68k] promises to open-source the upgrade. The replacement screens are sadly not open source hardware, but they’re a fine hack nonetheless.

We may see more MiniDisc hacks as the format’s apparent revival continues. Things like adding Bluetooth to the famously-cramped internals, or allowing full data transfer — something Sony was unwilling to allow until the RH1, which is one of the reasons these units are so desirable.

2025 One Hertz Challenge: Valvano Clock Makes The Seconds Count

A man named [Jim Valvano] once said “There are 86,400 seconds in a day. It’s up to you to decide what to do with them.” — while we couldn’t tell you who [Jim Valvano] was without a google search*, his math checks out. The quote was sufficiently inspirational to inspire [danjovic] to create a clock count those seconds precisely.

It’s a simple project, both conceptually and electrically. All it does is keep time and count the seconds in the day– a button press switches between counting down, counting up, and HH:MM:SS. In every mode, though, the number displayed will change at one Hertz, which we appreciate as being in the spirit of the challenge. There are only four components:  an Arduino Nano, a DS3231 RTC module, a SSD1306 128×64 OLED module, and a momentary pushbutton. At the moment it appears this project is only on breadboard, which is a shame– we think it deserves to have a fancy enclosure and pride of place on the wall. Wouldn’t you be more productive if you could watch those 86,400 seconds ticking away in real time? We think it would be motivating.

Perhaps it will motivate you to create something for our One Hertz Challenge. Plenty of seconds to go until the deadline on August 19th, after all. If you’d rather while away the time reading, you can check out some of [danjovic]’s other projects, like this Cistertian-inspired clock, or this equally-inscruitable timekeeper that uses binary-coded octal.


*Following a google search, he was an American college basketball coach in the mid-20th century.

Building An IR Thermometer That Fits On Your Keychain

Non-contact infrared (IR) thermometers used to be something of an exotic tool, but thanks at least in part due to the COVID-19 pandemic, they’re now the sort of thing you see hanging up near the grocery store checkout as a cheap impulse buy. Demand pushed up production, and the economies of scale did the test. Now the devices, and the sensors within them, are cheap enough for us hackers to play with.

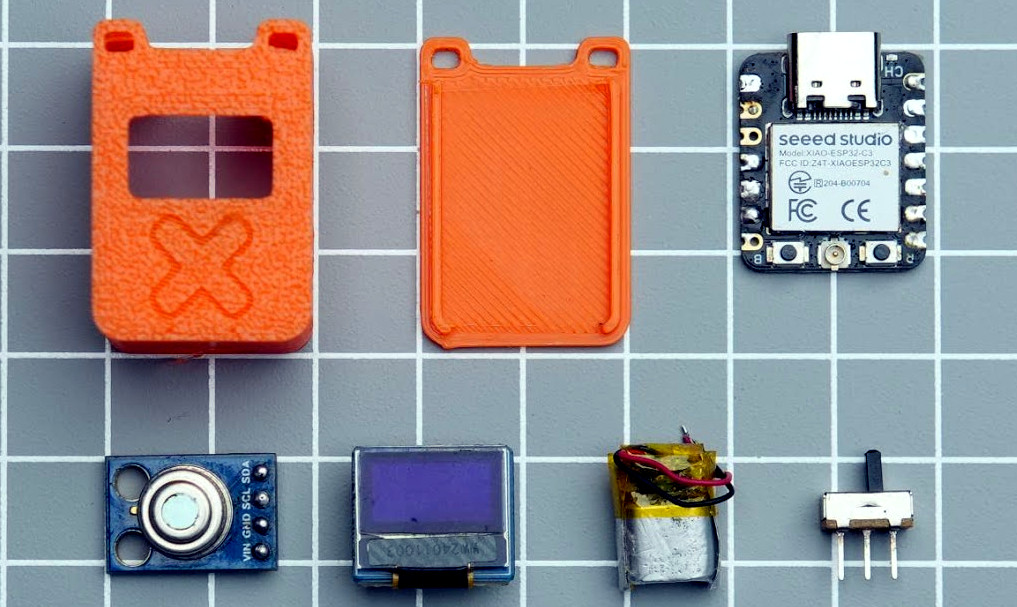
The end result is that we now have projects like this ultra compact IR thermometer from [gokux]. With just a handful of components, some code to glue it all together, and a 3D printed enclosure to wrap it all up, you’ve got a legitimately useful tool that’s small enough to replace that lucky rabbit’s foot you’ve got on your keys.

If this project looks familiar, it’s because the whole thing is closely related to the LiDAR rangefinder [gokux] put together last month. It shares the same Seeed Studio XIAO  ESP32-C3 microcontroller, 0.49 inch OLED display, and tiny 40 mAh LiPo battery. The only thing that’s really changed, aside from the adjustments necessary to the 3D printed enclosure, is that the LiDAR sensor was replaced with a MLX90614 IR temperature sensor.

[gokux] has put together some great documentation for this build, making it easy for others to recreate and remix on their own. Assembly is particularly straightforward thanks to the fact that both the display and temperature sensor communicate with the ESP32 over I2C, allowing them to be wired daisy chain style — there’s no need for even a scrap of perfboard inside the case, let alone a custom board.

Displays We Love Hacking: SPI And I2C

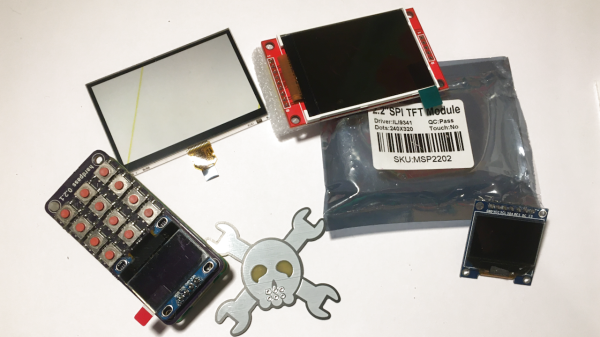
I’ve talked about HD44780 displays before – they’ve been a mainstay of microcontroller projects for literal decades. In the modern hobbyist world, there’s an elephant in the room – the sheer variety of I2C and SPI displays you can buy. They’re all so different, some are LCD and some are OLED, some have a touchscreen layer and some don’t, some come on breakouts and some are a bare panel. No matter which one you pick, there are things you deserve to know.

These displays are exceptionally microcontroller-friendly, they require hardly any GPIOs, or none extra if you already use I2C. They’re also unbelievably cheap, and so tiny that you can comfortably add one even if you’re hurting for space. Sure, they require more RAM and a more sophisticated software library than HD44780, but with modern microcontrollers, this is no problem at all. As a result, you will see them in almost every project under the sun.

What do you need for those? What are the requirements to operate one? What kind of tricks can you use with them? Let’s go through the main aspects.

Continue reading “Displays We Love Hacking: SPI And I2C”

OLED Display Kicks Knob Up Several Accurate Notches

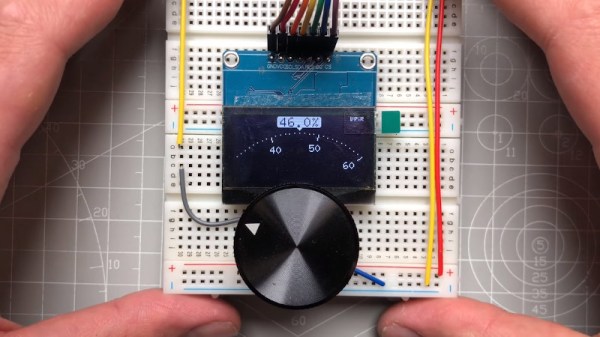
As far as input devices go, the potentiometer is pretty straightforward: turn it left, turn it right, and you’ve pretty much seen all there is to see. For many applications that’s all you need, but we can certainly improve on the experience with modern technology. Enter this promising project from [upir] that pairs a common potentiometer with a cheap OLED display to make for a considerably more engaging user experience.

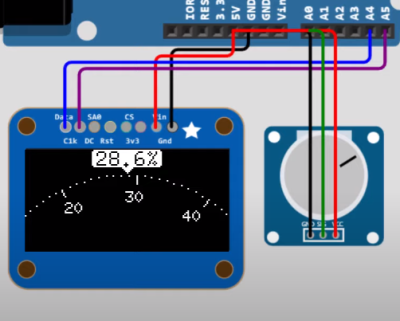
To save time, the code is fine tuned in a simulator.

The basic idea is to mount the display over the potentiometer knob so you can show useful information such a label that shows what it does, and a readout of the currently detected value. But you’ll likely want to show where the knob is currently set within the range of possible values as well, and that’s where things get interesting.

In the video after the break, [upir] spends a considerable amount of time explaining the math behind details like the scrolling tick marks. The nearly 45 minute long video wraps up with some optimization, as getting the display to move along with the knob in real-time on an Arduino UNO took a bit of extra effort. The final result looks great, and promises to be a relatively cheap way to add an elegant and functional bit of flair to an otherwise basic knob.

With the code and this extensive demonstration of how it all works, adding a similar capability to your next knob-equipped gadget shouldn’t be too much of a challenge. Perhaps it could even be combined with the OLED VU meters we’ve covered previously. Be sure to let us know if you end up using this technique, as we’d love to see it in action.

Continue reading “OLED Display Kicks Knob Up Several Accurate Notches”

An 128x64 OLED display with a weird image on it, showing a mouse cursor, date and time in the bottom right corner, and a whole lot of presumably dithered dots

Making Your Own Technically-HDMI OLED Monitor

One day, [mitxela] got bored and decided to build his own HDMI monitor – the unconventional way. HDMI has a few high-speed differential pairs, but it also has an I2C interface used for detecting the monitor’s resolution and issuing commands like brightness control. In fact, I2C is the backbone for a lot of side channels like these – it’s also one of our preferred interfaces for connecting to cool sensors, and in this case, an OLED display!

[mitxela] describes his journey from start to end, with all the pitfalls and detours. Going through the pinout with a broken hence sacrificial HDMI cable in hand, he figured out how to probe the I2C lines with Linux command-line tools and used those to verify that the display was recognized on the HDMI-exposed I2C bus. Then, he turned to Python and wrote a short library for the display using the smbus bindings – and, after stumbling upon an FPS limitation caused by SMBus standard restrictions, rewrote his code to directly talk to the I2C device node, raising FPS from 2 to 5-10.

From there, question arose – what’s the best software route to take? He tried making a custom X modeline on the HDMI port the display was technically attached to, but that didn’t work out. In the end, he successfully employed the Linux capability called “virtual monitors”, and found out about an interesting peculiarity – there was no mouse cursor to be seen. Turns out, they’re typically hardware-accelerated and overlaid by our GPUs, but in [mitxela]’s case, the GPU was not involved, so he added cursor support to the picture forwarding code, too.

With partial refresh, the display could be redrawn even faster, but that’s where [mitxela] decided he’s reached a satisfactory conclusion to this journey. The write-up is a great read, and if videos are more your forte, he also made a video about it all – embedded below.

We first covered the ability to get I2C from display ports 14 years ago, and every now and then, this fun under-explored opportunity has been popping up in hackers’ projects. We’ve even seen ready-to-go breakouts for getting I2C out of VGA ports quickly. And if you go a bit further, with your I2C hacking skills, you can even strip HDCP!

We thank [sellicott] and [leo60228] for sharing this with us!

Continue reading “Making Your Own Technically-HDMI OLED Monitor”