Zerowriter Promises Zero Distractions While Writing

As great as full-blown desktop computers may be for web surfing, gaming, and what have you, they are theaters of distraction when it comes time to write. And while there are machines out there purpose-built for writing, the price tags run awfully high for what they are, which is essentially a microprocessor handling a keyboard and an E-ink display.
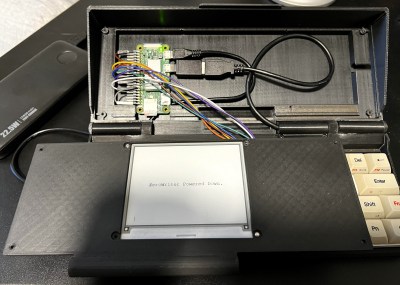
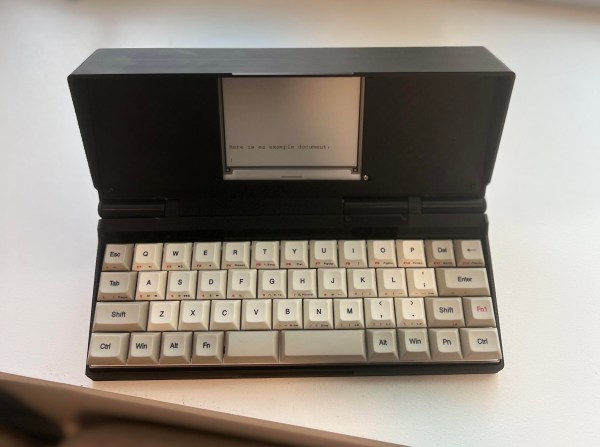
So, why not build one yourself, then? That’s the idea behind the Zerowriter, which, as you may have guessed, is based on the Raspberry Pi Zero. The Zero 2 W to be exact: [zerowriter]  says that the extra power over the original Zero is quite useful.

In addition, there’s a 4.2″ Waveshare E-ink display and the Vortex Core 40% keyboard inside the 3D-printed enclosure. The design is based on the Penkesu computer, although in the Zerowriter, the Pi sits behind the screen instead of underneath the keyboard. [zerowriter] built an application on top of the Waveshare demo program that’s easy to use and modify.

The price tag for this build comes in around $200, which is a fraction of similar commercial products. Most of the cost is in this particular keyboard, although 40%s are, broadly speaking, not cheap. We would love to see someone make a keyboard for this.

Looking to make something a bit bigger? Be sure to check out the MUSE.

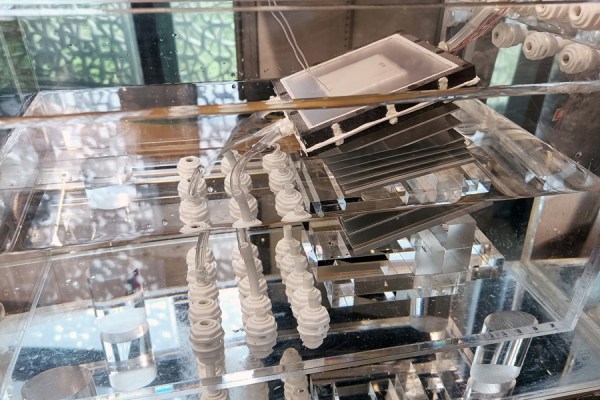
A series of plates and tubes sits in a tank of water. The plates are square with what looks to be a white coating.

Desalinating Water With The Sun

Getting fresh water from salt water can be difficult to do at any kind of scale. Researchers have developed a new method of desalinating water that significantly reduces its cost. [via Electrek]

By mimicking the thermohaline circulation of the ocean, the researchers from MIT and Shanghai Jiao Tong University were able to solve one of the primary issues with desalination systems, salt fouling. Using a series of evaporator/condenser stages, the seawater is separated into freshwater and salt using heat from the sun.

Evaporating water to separate it from salt isn’t new, but the researchers took it a step further by tilting the whole contraption and introducing a series of tubes to help move the water along and create eddy currents. These currents help the denser, saltier water move off of the apparatus and down deeper into the fluid where the salt doesn’t cause an issue with the device’s operation. The device should have a relatively long lifetime since it has no moving parts and doesn’t require any electricity to operate.

The researchers believe a small, suitcase-sized device could produce water for a family for less than the cost of tap water in the US. The (paywalled) paper is available from Joule.

If you’re curious about other drinking water hacks, check out this post on Re-Imagining the Water Supply or this previous work by the same researchers.

VU Meter Built With Neat Graphical VFD Display

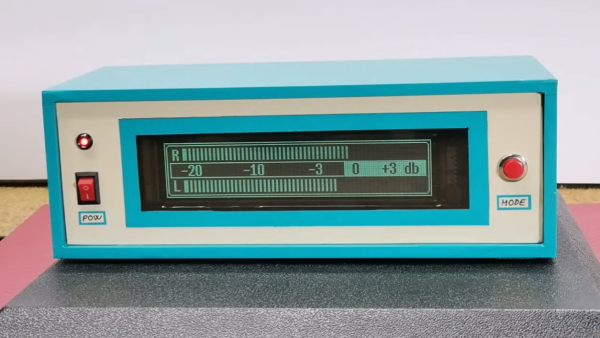
VFD displays are beloved for their eerie glow that sits somewhere just off what you’d call blue. [mircemk] used one of these displays to create an old-school VU meter that looks straight out of a 1970s laboratory. 

The build uses an Arduino Nano as the brains of the operation, which uses its analog inputs to process incoming audio into decibel levels for display on a VU meter. It’s then charged with driving a GP1287 VFD display. Unlike some VFDs that have preset segments that can be illuminated or switched off, this is a fully graphical dot matrix display that can be driven as desired. Thus, when it’s not acting as a bar graph VU meter, it can also emulate old-school moving-needle meters. Though, it bears noting, the slow updates the Arduino makes to the display means it’s kind of like those dodgy skeumorphic music apps of the 16-bit era; i.e. it’s quite visually jerky.

Overall, it’s a neat project that demonstrates how to work with audio, microcontrollers, and displays all in one. We’ve featured other projects from [mircemk] before, too, almost all of which appear in the same blue and grey project boxes. Video after the break.

Continue reading “VU Meter Built With Neat Graphical VFD Display”

Making A Guitar Go To Eleven, The Hard Way

At the end of the day, all it takes to make a guitar go to eleven is a new knob. Making the knob is another thing — that takes a shop full of machine tools, the expertise to use them, and a whole bunch of time. Then again, if you’re pressed for time, it looks like a 3D printer will do nicely too.

While the 3D printing route is clearly the easier option, it sure seems as if [Chronova Engineering] is more about the journey than the destination. In need of some knob bling for an electric guitar, he takes us through the lengthy process (nicely summarized in the video below) of crafting one from a bar of solid brass. Like all good machining projects, this one starts with making the tools necessary to start the actual build; in this case, it’s a tool to cut the splines needing to mate with the splines on the guitar’s potentiometer shaft. That side quest alone represents probably a third of the total effort on this project, and results in a tool that’s used for all of about 30 seconds.

Aside from spline cutting, there are a ton of interesting machining tidbits on display here. We particularly liked the use of a shaping technique to form the knurling on the knob, as opposed to a standard rotary method, which would have been difficult given the taper on the knob body. Also worth noting are the grinding step that puts a visually interesting pattern on the knob’s top surface, as well as the pantograph used to etch the knob’s markings.

Congrats to [Chronova Engineering] for a great-looking build, and the deep dive into the machinist’s ways. If you’re still interested in custom brass knobs but don’t have a machine shop, we can help with that.

Continue reading “Making A Guitar Go To Eleven, The Hard Way”

Bed Sensors Do More Than You’d Think

Bed sensors do sort of sound like a gimmick — after all, who cares whether someone is occupying the bed? But if you think about it, that information is quite useful from a home automation standpoint. A person could do all sorts of things in this state, from ensuring the overhead lights in the room can’t come on, to turning off other smart devices that are likely not being used while both occupants are sleeping.

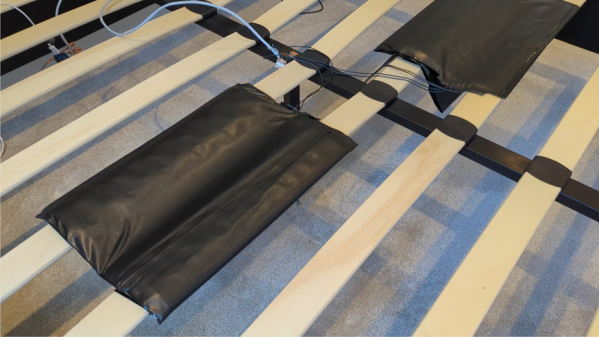
[The Home Automation Guy] presents a couple of ways of doing this, but both center around a fairly inexpensive pressure-sensing mat.

In the first method, he connects the pressure mat up to a Zigbee Aqara Leak Sensor, which conveniently has two terminals on the back to accept the wires from the pressure sensor. Then he simply connects it up to a Zigbee-compatible home assistant like the Aqara Hub.

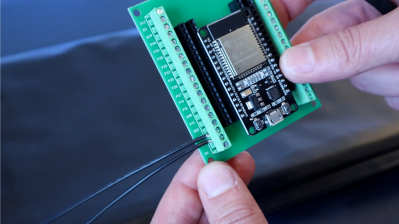
In slightly harder mode, he forgoes the Aqara Leak Sensor and connects the pressure mat up to an ESP32 using a nifty screw terminal dev board. Then he sets up the sensor and all the desired actions in ESPHome. Of course, with an ESP32, it’s easy to add a second pressure mat for [Mrs. The Home Automation Guy]’s side of the bed.

Now, once they’ve both gone off to bed, the house goes into night mode — all the smart plugs, Sonos devices, and other things are powered down, and the alarm system is put into night mode. Be sure to check out the build video after the break.

Continue reading “Bed Sensors Do More Than You’d Think”

Displays We Love Hacking: SPI And I2C

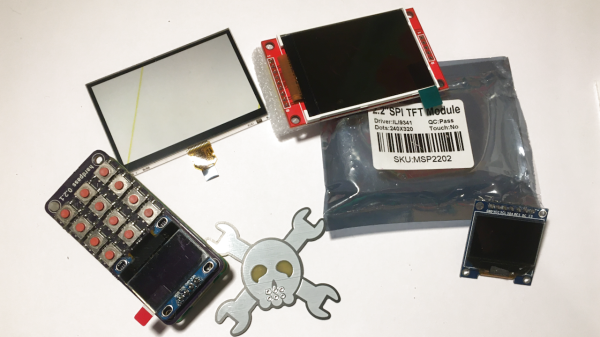
I’ve talked about HD44780 displays before – they’ve been a mainstay of microcontroller projects for literal decades. In the modern hobbyist world, there’s an elephant in the room – the sheer variety of I2C and SPI displays you can buy. They’re all so different, some are LCD and some are OLED, some have a touchscreen layer and some don’t, some come on breakouts and some are a bare panel. No matter which one you pick, there are things you deserve to know.

These displays are exceptionally microcontroller-friendly, they require hardly any GPIOs, or none extra if you already use I2C. They’re also unbelievably cheap, and so tiny that you can comfortably add one even if you’re hurting for space. Sure, they require more RAM and a more sophisticated software library than HD44780, but with modern microcontrollers, this is no problem at all. As a result, you will see them in almost every project under the sun.

What do you need for those? What are the requirements to operate one? What kind of tricks can you use with them? Let’s go through the main aspects.

Continue reading “Displays We Love Hacking: SPI And I2C”

Teardown Of FGM-148 Javelin Missile’s Guidance Computer

You know it’s a good teardown when [Michel] starts off by saying to not ask him where exactly he got the guidance section of an FGM-148 Javelin from. This shoulder-launched anti-tank guided missile (ATGM) is a true marvel of engineering that has shown its chops during recent world events. As a fire-and-forget type guided missile it is designed to use the internal IR tracker to maintain a constant lock on the target, using its guidance system to stay exactly on track.

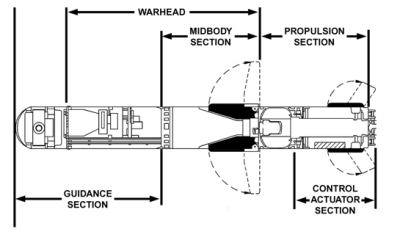
FGM-148 Javelin schematic overview. (Source: U.S. Army, FM 3-22.37)

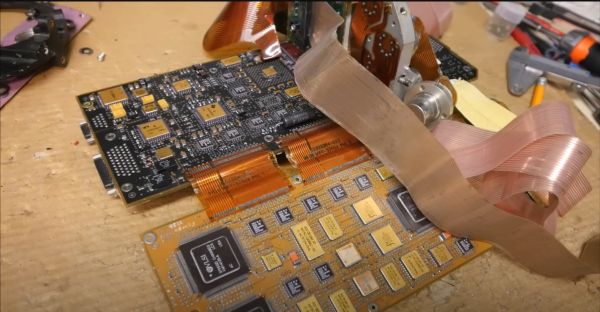
Initially designed in 1989 and introduced into service in 1996, it has all the ceramic-and-gold styling which one would expect from a military avionics package from the era. Tasked with processing the information from the IR sensor, and continuously adjusting the fins to keep it on course, the two sandwiched, 3 mm thick PCBs that form the main section of the guidance computer are complemented by what looks like a milled aluminium section which holds a sensor and a number of opamps, all retained within the carbon-fiber shell of the missile.

In the video [Michel] looks at the main components, finding datasheets for many commercially available parts, with the date codes on the parts confirming that it’s a late 80s to early 90s version, using presumably a TMS34010 as the main CPU on the DSP board for its additional graphics-related instructions. Even though current production FGM-148s are likely to use far more modern parts, this is a fun look at what was high-end military gear in the late 1980s and early 1990s.

Continue reading “Teardown Of FGM-148 Javelin Missile’s Guidance Computer”