Displays We Love Hacking: SPI And I2C

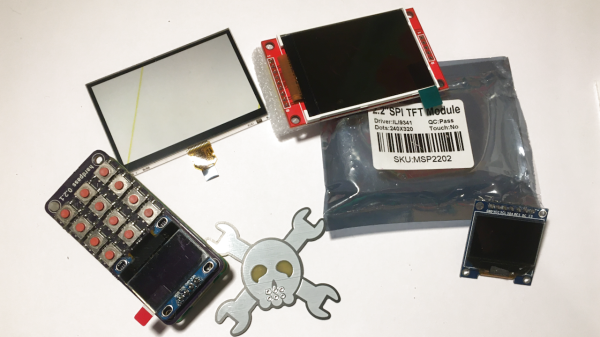
I’ve talked about HD44780 displays before – they’ve been a mainstay of microcontroller projects for literal decades. In the modern hobbyist world, there’s an elephant in the room – the sheer variety of I2C and SPI displays you can buy. They’re all so different, some are LCD and some are OLED, some have a touchscreen layer and some don’t, some come on breakouts and some are a bare panel. No matter which one you pick, there are things you deserve to know.

These displays are exceptionally microcontroller-friendly, they require hardly any GPIOs, or none extra if you already use I2C. They’re also unbelievably cheap, and so tiny that you can comfortably add one even if you’re hurting for space. Sure, they require more RAM and a more sophisticated software library than HD44780, but with modern microcontrollers, this is no problem at all. As a result, you will see them in almost every project under the sun.

What do you need for those? What are the requirements to operate one? What kind of tricks can you use with them? Let’s go through the main aspects.

Continue reading “Displays We Love Hacking: SPI And I2C”

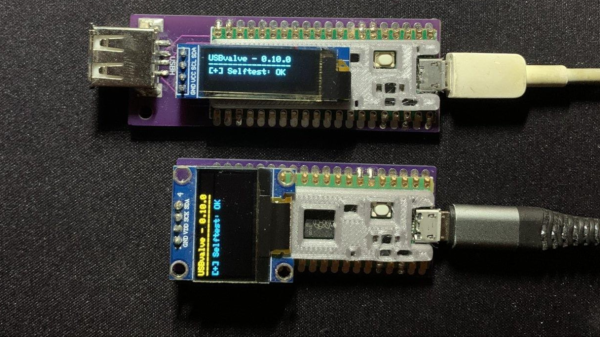
two USBValve devices on a table, both with a USB cable plugged in. The top one with a long narrow OLED display and the bottom one with a 128x64 OLED display.

Sleuth Untrusted USB Communication With USBValve

USB devices are now ubiquitous and, from an information security standpoint, this is a terrifying prospect as malicious software can potentially be injected into a system by plugging in a compromised USB stick. To help get some piece of mind, [Cesare Pizzi] created USBValve to help expose suspicious USB activity on the fly.

The idea behind USBValve is to have the onboard microcontroller advertise itself as a storage device, pretending to have a filesystem with some common files available. When an unknown USB device is first inserted into the USB port on the USBValve tool, USBValve displays usage information, via the attached OLED screen, on whether the USB device is accessing files it shouldn’t be or immediately trying to write to the filesystem, which is a clear sign of malicious behavior.

The USBValve hardware is a straight forward composition of a Raspberry Pi Pico, an tiny I2C OLED screen and an optional PCB carrier board with a 3D printed spacer. The software uses Adafruit’s Tiny USB library along with the SSD1306AsciiWire library to drive the OLED display. And it’s all open source, including the code and PCB design files.

There’s a lot of security fun to be had with USB, from DIY dirt cheap Rubber Duckies to open source hardware Rubber Duckies, to discussions on the BadUSB exploits. The simplicity of the USBValve project allows it to be low cost, easy to use and can provide concise, critical information for a variety of real world threats.

After the break, be sure to check out [Cesare Pizzi]’s talk about USBValve at the SCC Insomnihack conference which has a wealth of information on how it fares against some known malware attacks, discussions on some of its shortcomings and potential avenues for improvement.

Thanks to [watchdog] for the tip!

Continue reading “Sleuth Untrusted USB Communication With USBValve”

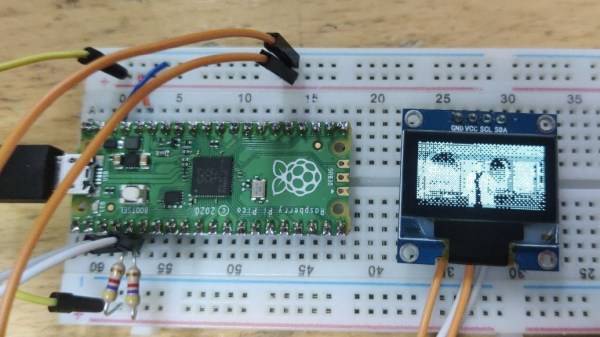
A Pi Pico plugged into a breadboard, with an I2C OLED display connected to it

Need An USB-I2C Adapter? Use Your Pico!

Given its abundance and simplicity, the RP2040 has no doubt become a favourite for USB peripheral building – in particular, USB-connected tools for electronics experiments. Today, we see one more addition to our Pico-based tool arsenal – a USB-I2C adapter firmware for RP2040 by [Renze Nicolai]. This is a reimplementation of the ATTiny-based I2C-Tiny-USB project and complies to the same protocol – thus, it’s compatible with the i2c-tiny-usb driver that’s been in the Linux kernel for ages. Just drag&drop the .uf2, run a script on your Linux system, and you will get a /dev/i2c-X device you can work with from userspace code, or attach other kernel drivers to.

The software will work with any RP2040 devboard – just connect your I2C devices to the defined pins and you’ll have them show up in i2cdetect output on your Linux workstation. As a demo, [Renze] has written a userspace Python driver for one of these SSD1306 128×64 OLEDs, and gives us a commandline that has the driver accept output of an ffmpeg command capturing your main display’s contents, duplicating your screen on the OLED – in a similar fashion that we’ve seen with the “HDMI” I2C-driven display a few months back. Everything you might need is available on the GitHub page, including usage instructions and examples, and the few scripts you can use if you want to add an udev rule or change the I2C clock frequency.

Just to name a few purposes, you can use a Pi Pico as a tool for SWD, JTAG, CAN, a logic analyser with both digital and analog channels, or even as a small EMP-driven chip glitching tool. The now-omnipresent $3 Pi Pico boards, it seems, are a serious contender to fondly remembered hacker tools of the past, such as the legendary BusPirate.

Continue reading “Need An USB-I2C Adapter? Use Your Pico!”

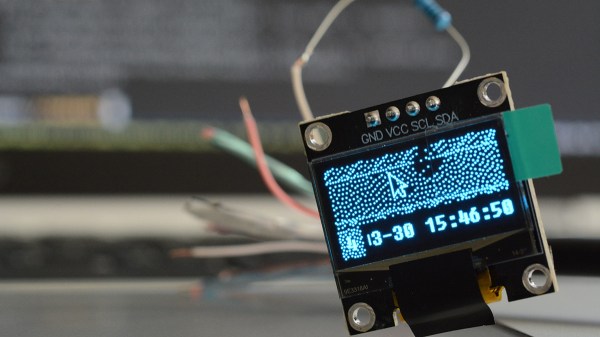
An 128x64 OLED display with a weird image on it, showing a mouse cursor, date and time in the bottom right corner, and a whole lot of presumably dithered dots

Making Your Own Technically-HDMI OLED Monitor

One day, [mitxela] got bored and decided to build his own HDMI monitor – the unconventional way. HDMI has a few high-speed differential pairs, but it also has an I2C interface used for detecting the monitor’s resolution and issuing commands like brightness control. In fact, I2C is the backbone for a lot of side channels like these – it’s also one of our preferred interfaces for connecting to cool sensors, and in this case, an OLED display!

[mitxela] describes his journey from start to end, with all the pitfalls and detours. Going through the pinout with a broken hence sacrificial HDMI cable in hand, he figured out how to probe the I2C lines with Linux command-line tools and used those to verify that the display was recognized on the HDMI-exposed I2C bus. Then, he turned to Python and wrote a short library for the display using the smbus bindings – and, after stumbling upon an FPS limitation caused by SMBus standard restrictions, rewrote his code to directly talk to the I2C device node, raising FPS from 2 to 5-10.

From there, question arose – what’s the best software route to take? He tried making a custom X modeline on the HDMI port the display was technically attached to, but that didn’t work out. In the end, he successfully employed the Linux capability called “virtual monitors”, and found out about an interesting peculiarity – there was no mouse cursor to be seen. Turns out, they’re typically hardware-accelerated and overlaid by our GPUs, but in [mitxela]’s case, the GPU was not involved, so he added cursor support to the picture forwarding code, too.

With partial refresh, the display could be redrawn even faster, but that’s where [mitxela] decided he’s reached a satisfactory conclusion to this journey. The write-up is a great read, and if videos are more your forte, he also made a video about it all – embedded below.

We first covered the ability to get I2C from display ports 14 years ago, and every now and then, this fun under-explored opportunity has been popping up in hackers’ projects. We’ve even seen ready-to-go breakouts for getting I2C out of VGA ports quickly. And if you go a bit further, with your I2C hacking skills, you can even strip HDCP!

We thank [sellicott] and [leo60228] for sharing this with us!

Continue reading “Making Your Own Technically-HDMI OLED Monitor”

A Year-Long Experiment In OLED Burn-In

If you need to add a small display to your project, you’re not going to do much better than a tiny OLED display. These tiny display are black and white, usually found in resolutions of 128×64 or some other divisible-by-two value, they’re driven over I2C, the libraries are readily available, and they’re cheap. You can’t do much better for displaying a few numbers and text than an I2C OLED. There’s a problem, though: OLEDs burn out, or burn in, depending on how you define it. What’s the lifetime of these OLEDs? That’s exactly what [Electronics In Focus] is testing (YouTube, in Russian, so click the closed captioning button).

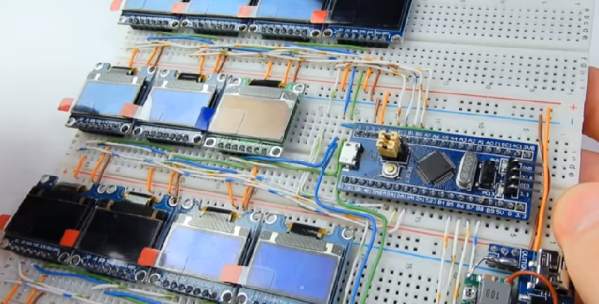
The experimental setup for this is eleven OLED displays with 128×64 pixels with an SSD1306 controller, all driven by an STM32 over I2C. Everything’s on a breadboard, and the actual display is sixteen blocks, each lit one after another with a one-second display in between. This is to test gradually increasing levels of burnout, and from a surface-level analysis, this is a pretty good way to see if OLED pixels burn out.

After 378 days of testing, this test was stopped after there were no failed displays. This comes with a caveat: after a year of endurance testing, there were a few burnt out pixels. correlating with how often these pixels were on. The solution to this problem would be to occasionally ‘jiggle’ the displayed text around the screen, turn the display off when no one is looking at it, or alternatively write a screen saver for OLEDs. That last bit has already been done, and here are the flying toasters to prove it. This is an interesting experiment, and although that weird project you’re working on probably won’t ping an OLED for a year of continuous operation, it’s still something to think about. Video below.

Continue reading “A Year-Long Experiment In OLED Burn-In”