Cheap Camera Gives Clay-Pigeon’s-Eye View Of Trap Shooting

Speaking from experience, it’s always fun to build something with the specific intention of destroying it. Childhood sessions spending hours building boats from scrap wood only to take them to a nearby creek to bombard them with rocks — we disrespectfully called this game “Pearl Harbor” — confirms this. As does the slightly more grown-up pursuit of building this one-time-use clay pigeon camera.

The backstory on this build, which dates all the way back to 2017, is that [Thomas] was invited to a birthday bash at the local shooting range for a round of trap shooting. For the uninitiated, trap is a sport that involves launching a clay disc (known as a pigeon) into the air as a moving target and shooting it down with a shotgun. It’s a lot of fun, but [Thomas] was looking for a way to make it even more fun.

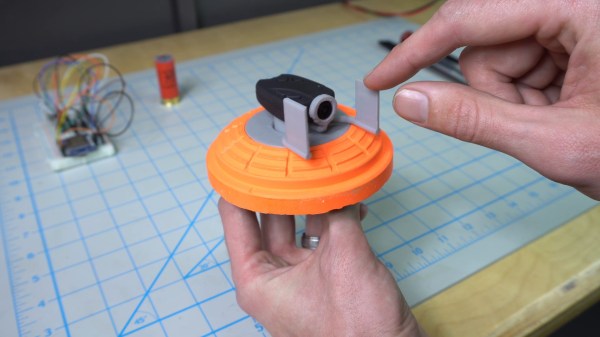
After toying with the idea of buying a cheap drone for aerial target practice, he settled on the idea of making a clay pigeon camera. After procuring a cheap keychain camera, he designed a simple wind vane mount for the camera, to keep it pointed in one direction rather than spinning with the pigeon. The wind vane was 3D printed and attached to the pigeon with a skate bearing, and the rig was ready for the range. The snuff film below tells the whole tale; the camera performed admirably and the wind vane did a good job of steadying the camera for all of about five seconds, until the inevitable and dramatic demise of the pigeon.

Watching this makes us feel like we need more projects designed for intentional destruction. Safety first, of course, but we’d be keen to see what everyone comes up with.

Continue reading “Cheap Camera Gives Clay-Pigeon’s-Eye View Of Trap Shooting”

Giant Spinning POV Christmas Tree

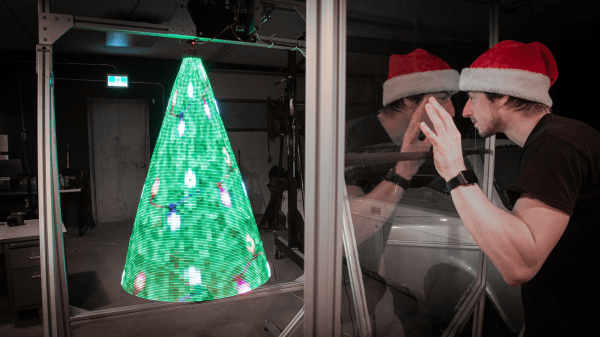
Spinning Holographic POV Christmas Tree Of Death

[Sean Hodgins] really harnessed the holiday spirit to create his very own Giant Spinning Holographic Christmas Tree (of Death). It’s a three-dimensional persistence-of-vision (POV) masterpiece, but as a collection of rapidly spinning metal elements, it’s potentially quite dangerous as well. As [Sean] demonstrates, the system can display other images and animations well beyond the realm of mere holiday trees.

Initial experiments focused on refining the mechanical structure, bearings, and motor. A 1/2 horsepower A.C. motor was selected and then the dimensions of the tree were “trimmed” to optimize a triangular frame that could be rotated at the necessary POV speed by the beefy motor.  A six-wire electrical slip ring allows power and control signaling to be coupled to the tree through its spinning central shaft.

The RGB elements are SK9888 LEDs also know as DotStar LEDs. DotStar LEDs are series-chainable, individually-addressable RGB LEDs similar to NeoPixels. However, with around 50 times the pulse width modulation (PWM) rate, DotStars are more suitable for POV applications than NeoPixels.  The LED chain is driven by a Raspberry Pi 4 single board computer using a clever system for storing image frames.

If deadly rotational velocity is not your cup of tea, consider this slower spinning RGB Christmas tree featuring a DIY slip ring. Or for more POV, may we suggest this minimalist persistence-of-vision display requiring only a few LEDs and an ATtiny CPU.

Continue reading “Spinning Holographic POV Christmas Tree Of Death”

Tidy POV Display Using The ESP32

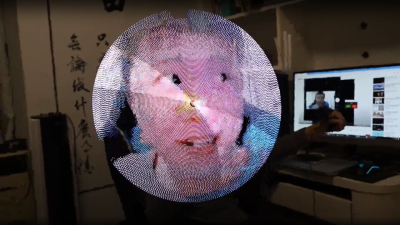
Chinese Youtuber [corebb] presents the second version of his POV display. The earlier version used 5050-sized SMT addressable LEDs, which didn’t give great resolution, so he rev’d the design to use a much higher number (160 to be exact) of APA102 LEDs. These are 2mm on the side, making them a little more difficult to handle, so after some initial solder paste wobbles, he decided to use a contract assembly house to do the tricky bit for him. This failed as they didn’t ‘understand’ the part and placed them the wrong way around! Not to be deterred, he had another go with a modified solder stencil, and eventually got the full strip to light up correctly.

Based on an ESP32 (using the Arduino stack) and SDCard for control, and a LiPo cell charged wirelessly, the build is rather tidy. A couple of hall effect switches are mounted at the start of each of the two arms, presumably lining

Real-time video streaming? Check!

up with a magnet on the case somewhere, although this isn’t clear. The schematic and PCB appear to have been designed with JLCEDA, which is a repackaging of EasyEDA. We can see the attraction with the heavy integration of this with the JLC and LCSC services. It appears that he even managed to get streamed video working — showing a live video from a webcam — which is quite an undertaking to pull off when you think how much processing needs to happen in real-time. As he alludes to in the video, trying to increase the resolution beyond this point is not viable with the processing capability of the ESP32.

A resin-printed case finishes off the build, with a screw-thread mount added to the rear, to allow typical camera mounts to be used to hold the thing down. A smart move we think.

We love POV displays around here, this spherical POV display is especially fabulous, but you don’t need fancy hardware if you have a handy ceiling fan and a bit of protoboard spare.

Continue reading “Tidy POV Display Using The ESP32”

$1 POV Display Goes Round And Round

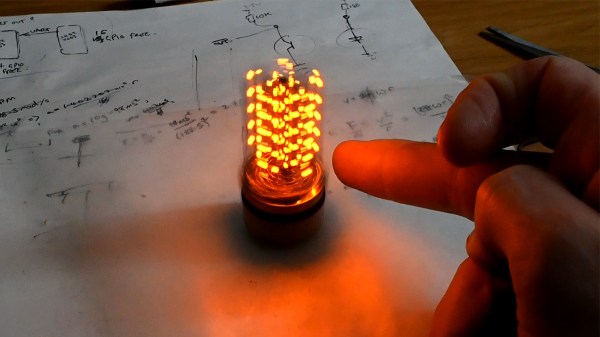
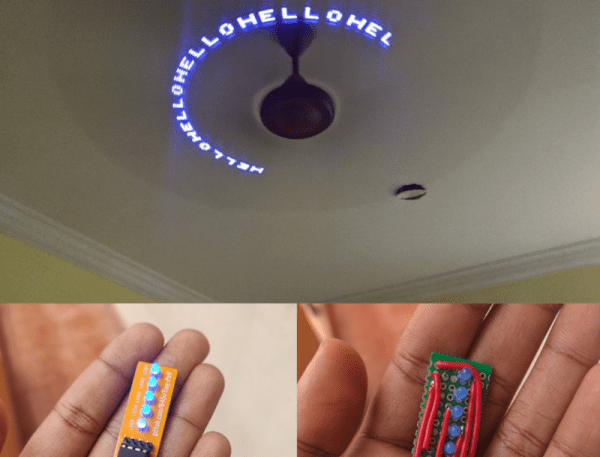
You don’t need much to do a persistence of vision display. A few LEDs and a processor is all it really takes. [B45i] made a simple PC board with five LEDs and an ATtiny CPU. There’s a battery and it connects to a fan to spin around.

While the project is pretty simple, we liked two aspects of it. First, he provides very detailed explanations about how to use an Arduino to program the Tiny using the Arduino IDE.

Continue reading “$1 POV Display Goes Round And Round”

3D Zoetrope Uses Illusion To Double The Frames

Although film and animation have come quite a long way, there’s still something magical about that grandaddy of them all, the zoetrope. Thanks to persistence of vision, our eyes are fooled into seeing movement where there is none, only carefully laid-out still pictures strobing under the right lighting.

After four months of research, CAD, prototyping, and programming, [Harrison McIntyre] has built a 3D zoetrope that brings a gif to glorious physical life (video, embedded below). All the image pieces are printed and move under a fancy backlight that [Harrison] borrowed from work. It works essentially the same as a 2D zoetrope, as long as you get the spacing juuuuust right. 360° divided by 20 frames comes out to 18° per frame. So a motor spins the disk around, and every 18°, the light pulses for one millisecond and then turns off until the next frame is in position.

The really interesting thing is that there are actually more than 20 frames at play here. If you follow a single character through the loop, it takes 46 frames to complete the animation thanks to something 3D zoetrope pioneer [Kevin Holmes] dubbed ‘animation multiplexing‘, which in [Harrison]’s example, is easily explained as a relay race in which all runners run their section at the same time, creating the illusion of constant motion.

There’s more than one way to use a 3D printer to create a zoetrope, and we doubt we would have ever thought of this one that squashes four dimensions into three.

Continue reading “3D Zoetrope Uses Illusion To Double The Frames”

Wiggling Screen And DLP Power This Volumetric POV Display

It seems like the world is ready for a true 3D display. We’ve seen them in sci-fi for decades now, with the ability to view a scene from any angle and inspect it up close. They’ve remained elusive, but that might just be changing thanks to this open-source persistence-of-vision volumetric display.

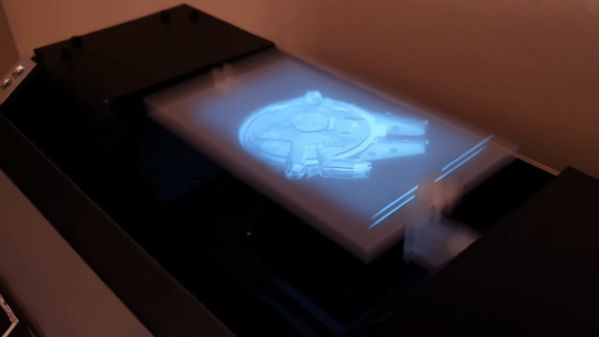
If the VVD, as it has been named by its creator [Madaeon], looks somewhat familiar, perhaps it’s because editor-in-chief [Mike Szczys] ran into it back in 2019 at Maker Faire Rome. It looks like it has progressed quite a bit since then, but the basic idea is still the same. A thin, flexible membrane, which is stretched across a frame, is attached to articulated arms. The membrane can move up and down rapidly, fast enough that a 1,000-fps high-speed camera is needed to see it move. That allows you to see the magic in action; a digital light processor (DLP) module projects slices of a 3D image onto the sheet, sending the correct image out for each vertical position of the membrane. Carefully coordinating the images creates the POV illusion of a solid image floating in space, which can be observed from any angle, requires no special glasses, and can even be viewed by groups.

With displays like this, we’re used to issuing the caveat that “it no doubt looks better in person”, but we have to say in the GIFs and videos included the VVD looks pretty darn good. We think this is a natural for inclusion in the 2021 Hackaday Prize, and we’re pleased to see that it made it to the semi-finals of the “Rethink Displays” round.

Big Spinning Disk Makes A Small Color Video Display

Believe it or not, the Mickey Mouse clip used for this demonstration is actually in the public domain.

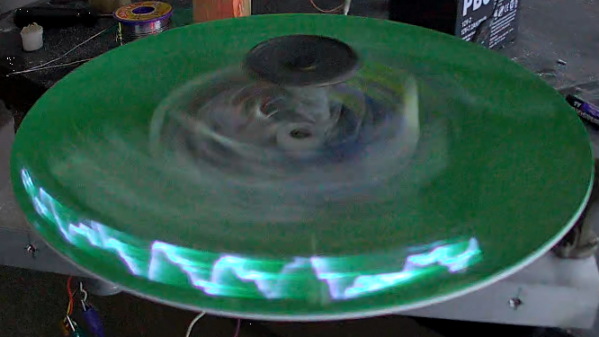
The earliest televisions used a spinning disk technology called the Nipkow disk, which is exactly what [Science ‘n’ Stuff] recreated with their Arduino-based mechanical color television (video link, also embedded below.) The device reads video and audio from an SD card, and displays the video using a precisely-timed RGB LED visible through a perforated spinning disk. The persistence of vision effect results in a video that is small, relative to the size of the disk, but perfectly watchable. A twist is that the video is in color!

A Nipkow disk is a fairly simple and electromechanical device that relies on timing; something a modern microcontroller and RGB LED is perfectly capable of delivering. In this device, the holes in the disk create 32 vertical scanlines with 96 “pixels” making up each of those lines. Spinning disk technology was always limited to being monochromatic, but in this implementation, each “pixel” is given its own unique color by adjusting the RGB LED accordingly.

The first video shows off the device and demonstrates it working; note that it may look like there are multiple little screens, but the center one can be thought of as the “true” display with the others essentially being artifacts due to light leakage. If you’re interested in the nuts and bolts of exactly how a Nipkow disk works, then the second video is what you’ll be more interested in, because it goes through all the details of exactly how everything functions.

Another neat thing about Nipkow disks is that image acquisition is really not much more complex than image display.

[via Arduino Blog]

Continue reading “Big Spinning Disk Makes A Small Color Video Display”