Mixed Mode Bench PSU Delivers High Performance

If you have an electronics bench, it follows that you will need some form of bench power supply. While many make do with fixed-voltage supplies it’s safe to say that the most useful bench power supplies have variable voltage and a variable current limiter. These are available in a range of sizes and qualities, and can be had from the usual online suppliers starting with a surprisingly small outlay.

There is however a problem with inexpensive bench power supplies. They are invariably switch-mode designs, and their output will often be noisy. Expensive linear supplies provide a much more noise-free output, but do so at the expense of excessive heat loss when regulating a high voltage drop.

One solution is a mixed-mode design, in which a switch-mode supply does the hard work of reducing the voltage most of the way, and a linear regulator drops the last couple of volts to provide a noise-free output. [Andrei] shows us his design for just such a mixed-mode supply, and it’s one you can have a go at building yourself.

His primary supply is an off-the-shelf switcher that turns mains AC into 24 V DC. This then feeds an LTC1624 buck converter that brings the voltage down to about 1.2 V above the final output voltage, this is in turn fed to a parallel pair of LT3081 linear regulators that deliver the final noise-free output. There is an INA260 for voltage and current measurement, and an Arduino with LCD display as a user interface. His prototype has been nicely constructed using a four-layer PCB, though he suggests it could be made on stripboard with the appropriate SMD adaptors. The cardboard chassis he’s used looks slightly alarming though.

We’ve covered numerous bench power supplies here over the years here at Hackaday. If it is an author’s favourite you are seeking though, take a look at the 723.

USB Charger Fooled Into Variable Voltage Source

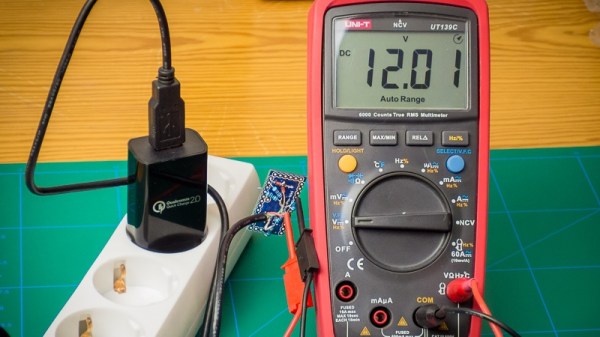
USB chargers are everywhere and it is the responsibility of every hacker to use this commonly available device to its peak potential. [Septillion] and [Hugatry] have come up with a hack to manipulate a USB charger into becoming a variable voltage source. Their project QC2Control works with chargers that employ Quick Charge 2.0 technology which includes wall warts as well as power banks.

Qualcomm’s Quick Charge is designed to deliver up to 24 watts over a micro USB connector so as to reduce the charging time of compatible devices. It requires both the charger as well as the end device to have compatible power management chips so that they may negotiate voltage limiting cycles.

In their project, [Septillion] and [Hugatry] use a 3.3 V Arduino Pro Mini to talk to the charger in question through a small circuit consisting of a few resistors and diodes. The QC2.0 device outputs voltages of 5 V, 9 V and 12 V when it sees predefined voltage levels transmitted over the D+ and D- lines, set by Arduino and voltage dividers. The code provides function calls to simplify the control of the power supply. The video below shows the hack in action.

Quick Charge has been around for a while and you can dig into the details of the inner workings as well as the design of a compatible power supply from reference designs for the TPS61088 (PDF). The patent (PDF) for the Quick Charge technology has a lot more detail for the curious.

Similar techniques have been used in the past and will prove useful for someone looking for a configurable power supply on the move. This is one for the MacGyver fans.

Continue reading “USB Charger Fooled Into Variable Voltage Source”

Current Sink Keeps The Smoke In

One of the most versatile tools on anyone’s work bench, at least as far as electrical projects are concerned, is a power supply. Often we build our own, but after we’ve cobbled together some banana jacks with a computer’s PSU or dead-bug soldered a LM317 voltage regulator to a wall wart, how will that power supply perform? Since it’s not desirable to use a power supply that’ll let the smoke out of everything it powers (or itself, for that matter) a constant current sink, or load, can help determine the operating limits of the power supply.

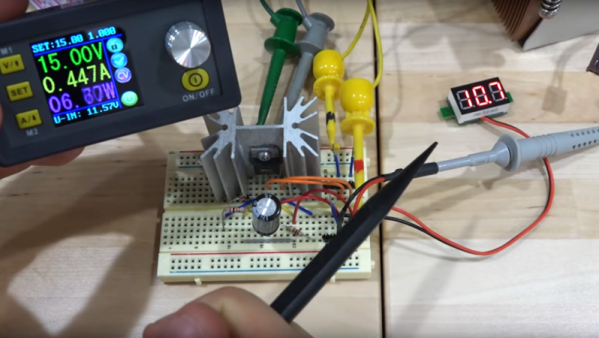
[electrobob] built this particular current sink from parts he had lying around. The theory of a constant current sink is relatively straightforward so it’s easily possible to build one from parts out of the junk drawer, provided you can find a few transistors, fuses, an op amp, and some heat sinks. The full set of schematics that [electrobob] designed can be found on his main project page. He’s also gone a step further with this build as well, since he shorted out his first prototype and destroyed some of the transistors. But, using a few extra transistors in his design also improves the safety and performance of the load, so it’s a win-win.

This constant current load also has the added feature of being able to interface with a waveform generator (an Analog Discovery, specifically) and as a result can connect and disconnect the load quickly. If you aren’t in need of an industrial-grade constant current sink and you have some spare parts lying around, this would be a great one to have around the work bench.

A Tiny Bench Power Supply

One of the more popular projects for beginners in electronics is a power supply. Yes, you can always go to Amazon and buy a nice power supply, but unfortunately, we haven’t set up our Amazon affiliate links yet. Instead, we’ll have to go with the next best thing and check out [Tron900]’s mini bench power supply build. It’s extremely capable and cute as a button.

The design goals for this project were to build a small and compact unit using mostly salvaged and recycled components, with all through-hole circuitry. The best guide you’ll ever find for a DIY power supply is one of [Dave Jones]’ earlier video series going over the construction of an adjustable power supply based on an LT3080. [Tron] didn’t have this regulator on hand and wanted to base his design around an op-amp instead. After rummaging through his parts, he found what he was looking for: a TIP3055 power transistor, a neat enclosure that could double as a heatsink and an AD680 voltage reference.

The design of this power supply was simulated in SIMETRIX, and after a few revisions [Tron] had a circuit that worked reasonably well. The circuit was populated on a piece of perfboard, a fantastic front panel was constructed, and one of those ubiquitous volt/ammeter panels added.

This is just a one-off project, but the results are fantastic. This is a very small, very capable power supply that does everything [Tron] needs. It’s accurate enough, at least when measured with a fancy benchtop HP meter, and looks adorable. What more could you want in a benchtop power supply?

The Shocking Truth About Transformerless Power Supplies

Transformerless power supplies are showing up a lot here on Hackaday, especially in inexpensive products where the cost of a transformer would add significantly to the BOM. But transformerless power supplies are a double-edged sword. That title? Not clickbait. Poking around in a transformerless-powered device can turn your oscilloscope into a smoking pile or get you electrocuted if you don’t understand them and take proper safety precautions.

But this isn’t a scare piece. Transformerless designs are great in their proper place, and you’re probably going to encounter one someday because they’re in everything from LED lightbulbs to IoT WiFi switches. We’re going to look at how they work, and how to design and work on them safely, because you never know when you might want to hack on one.

Here’s the punchline: transformerless power supplies are safely useable only in situations where the entire device can be enclosed and nobody can accidentally come in contact with any part of it. That means no physical electrical connections in or out — RF and IR are fair game. And when you work with one, you have to know that any part of the circuit can be at mains voltage. Now read on to see why!

Continue reading “The Shocking Truth About Transformerless Power Supplies”

Boost Converter Functionality At Rock-Bottom Prices

Linear voltage regulators are pretty easy to throw into a project if something in it needs a specific voltage that’s lower than the supply. If it needs a higher voltage, it’s almost just as easy to grab a boost converter of some sort to satisfy the power requirements. But if you’re on a mission to save some money for a large production run, or you just like the challenge of building something as simply as possible, there are ways of getting voltages greater than the supply voltage without using anything as non-minimalistic as a boost converter. [Josh] shows us exactly how this can be done using a circuit known as a charge pump to drive a blue LED.

One of the cool things about AVR microcontrollers is that they can run easily on a coin cell battery and source enough current to drive LEDs directly from the output pins. Obviously enough, if the LED voltage is greater than the voltage of the power supply, this won’t work. That is, unless you have a spare diode and capacitor around to build a charge pump.

The negative charge pump works by charging up a capacitor that is connected to an AVR pin, with the other side between the LED and a garden-variety diode to ground. That results in a roughly (VCC – 0.7) volt difference across the capacitor’s plates. When the AVR pin goes low, the other side of the capacitor goes negative by this same amount, and this makes the voltage across the LED high enough to light up. Not only is this simpler than a boost converter, but it doesn’t need any bulky inductors to work properly.

Will this work for any load? Am I going to start any fires by overdriving the LED? Luckily, [josh] answers all of these questions and more on the project page, and goes into some detail on the circuit theory as well. Granted, the charge pump doesn’t have the fine control over the power supply that you can get out of a buck or boost converter (or any switch-mode power supply). But it does have good bang-for-the-buck.

Converting An Easy Bake Oven To USB

[Jason] converted an Easy Bake Oven to USB. If you have to ask why you’ll never know.

Easy Bake Ovens have changed a lot since you burnt down your house by installing a 100 Watt light bulb inside one. Now, Easy Bake Ovens are [bigclive] material. It’s a piece of nichrome wire connected through a switch across mains power. Part of the nichrome wire is a resistor divider used to power a light. This light assembly is just a LED, some resistors, and a diode wired anti-parallel to the LED.

This is a device designed for 120 V, but [Jason] wanted it to run on USB-C. While there are USB-C chargers that will supply enough power for an Easy Bake Oven, the voltage is limited to 20V. Rather than step up the USB-C voltage, [Jason] added some nichrome wires to divide it into six equal segments, then wired all the segments in parallel. This lowers the voltage by one sixth and increases the current by a factor of six. Good enough.

The power supply used for this hack is the official Apple 87W deal, with a USB-C breakout board (available on Tindie, buy some stuff on Tindie. Superliminial advertising) an Arduino Uno connected to the I2C pins. A few bits of code later, and [Jason] had a lot of power coming over a USB cable.

With the Easy Bake Oven fully converted, [Jason] whipped up a batch of cookie mix. After about 15 minutes the cookies crisped up and started to look almost appetizing.

While the result is weird — who on Earth would ever want a USB-powered Easy Bake Oven — this is honestly a fantastic test of [Jason]’s USB-C PHY breakout board. What better way to test a USB-C than a big resistive load, and what better resistive load is there than an Easy Bake Oven? It’s brilliant and hilarious at the same time.