Air Rocket Launch Pad UI Entertains Eager Kids

Last spring [Mike] built a foam rocket launchpad which was a hit with the kids in his neighborhood. But the launch system was merely a couple of buttons so the early enthusiasm quickly wore off. He went back to the drawing board to make improvements and really hit the jackpot!

The original launch system had one button for building up air pressure with a second big red button of doom for launching the rocket. The problem was a complete lack of user feedback; all the kids could do is guess how long they needed to hold the button to achieve the highest launch. This revision adds flashing LEDs to hold the attention of the wee ones but to also function as a gauge for the new pressure control system. The visually fascinating control board also includes a removable key to prevent accidental launches.

The particulars of this are as you’d expect: it’s a bunch of plumbing to manage the air pressure, an Arduino to control it all, and additional electronics in between to make them work together.

We’re especially impressed by the leap in features and quality from the first version to this one. It’s a testament to the power of quick proofs-of-concept before committing to a more involved build. Great work [Mike]!

We’ve seen rocket launchers for adults and some neat mission control panels but [Mike’s] kid friendly launch controller really is out of this world (sorry, couldn’t resist). You’ll find a video demo of this launcher after the break.

Continue reading “Air Rocket Launch Pad UI Entertains Eager Kids”

How To Rescue Your Quadcopter From A Tree

Whether it’s a new rocket, your latest quadcopter, or [Charlie Brown]’s kite, it always seems like there’s a tree waiting to catch and eat airborne projects. Sometimes you get lucky and find a way to climb up the tree to retrieve your wayward build, but most times you’re reduced to looking for rocks or sticks to fling up there in an attempt to shake it loose. But if you want to improve your chances of getting your stuff back, [U.S. Water Rockets] has a build for a retrieval tool made mostly from scrap bin parts that will help.

All you need is some PVC tubing, an old fishing reel and line, some latex surgical tubing, and a few dowels for projectiles. You can tell everything about the build from the BOM and stills, but the video after the break gives detailed instructions and shows it in action. Adding some fins to the dart or even substituting a cheap arrow from the sporting goods department of your favorite retailer might help with your aim. Even without fletching, the accuracy of the launcher is pretty good, and the range isn’t half bad either. Once the fishing line is over the branch that ate your quad it can be used to haul up successively stouter ropes, and pretty soon you’ll be shaking the tree like a boss.

Even if getting stuff out of trees isn’t on your immediate to-do list, this little hack could be put to other uses. Hams will use it to loft antennas up into trees, and tag-line placement for tree removal could be simplified with this tool. But if you still find yourself needing to retrieve stuff, you might want to be proactive and make your aerial robot tree-proof. That still won’t eliminate the need for drone-on-drone rooftop rescues.

Continue reading “How To Rescue Your Quadcopter From A Tree”

Thar Be Beer In These Walls

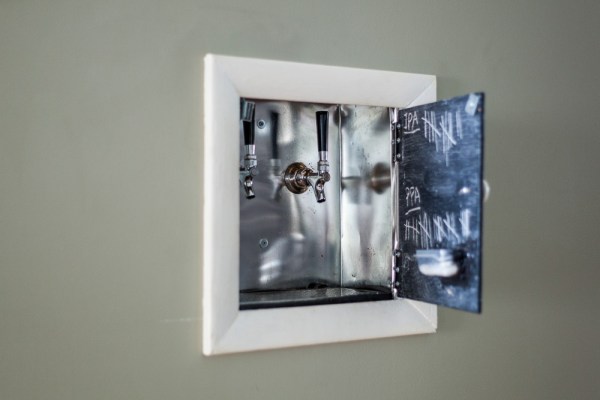
When you need a cold one and walking downstairs to your twin-keg refrigerator just won’t do, it’s time to break out the tools to deliver that frothy goodness where it’s needed. And so began [DaveLondres’] inspiring tale of piping beer through the walls of his home.

Now we know what you’re thinking… that beer is going to get mighty warm sitting in long lines from the fridge up to the ground floor. [Dave] thought about that too and designed a double-pipe system to overcome the issue. A run of PVC pipe for each keg connect the in-wall taps to holes drilled in the side of a second-hand fridge. An ingenious branching job yields an extra port for each run which was fitted with computer case fans to keep the cold air circulating. Plastic tubing is snaked inside of the PVC to carry the beer.

Rounding out the craftsmanship on this one is the inclusion of a plumbed drain to whisk away the drippings. If you’re not going to have a beautifully adorned chest-freezer-gone-kegerator in your livingroom this is the best alternative we’ve seen.

[via reddit]

Wireless Water Level Sensor From PVC Pipe

[Bob] was having trouble keeping up with his water troughs. He had to constantly check them to make sure they weren’t empty, and he always found that the water level was lower than he thought. He decided it was time to build his own solution to this problem. What he ended up with was a water level sensor made from PVC pipe and a few other components.

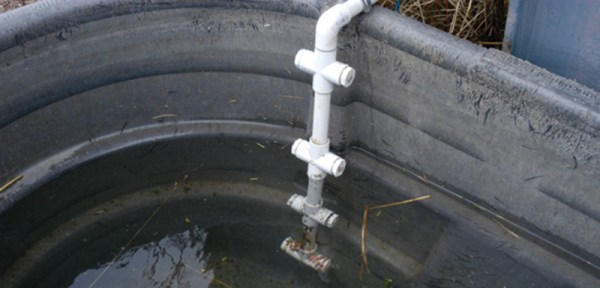
The physical assembly is pretty simple. The whole structure is made from 1/2″ PVC pipe and fittings and is broken into four nearly identical sensor modules. The sensors have an electrode on either side. The electrodes are made from PVC end caps, sanded down flat at the tip. A hole is then drilled through the cap to accommodate a small machine screw. The screw threads are coated in joint compound before the screw is driven into the hole, creating its own threads. These caps are placed onto small sections of PVC pipe, which in turn connect to a four-way PVC cross connector. 

On the inside of the electrode cap, two washers are placed onto the screw. A stranded wire is placed between the washers and then clamped in place with a nut. All of the modules are connected together with a few inches of pipe. [Bob] measured this out so it would fit appropriately into his trough, but the measurements can easily be altered to fit just about any size container. The wires all route up through the pipe. The PVC pipe is cemented together to keep the water out. The joint compound prevents any leaks at the electrodes.

A piece of CAT 5 cable connects the electrodes to the electronics inside of the waterproof controller box. The electronics are simple. It’s just a simple piece of perfboard with an XBee and a few transistors. The XBee can detect the water level by testing for a closed circuit between the two electrodes of any sensor module. The water acts as a sort of switch that closes the circuit. When the water gets too low, the circuit opens and [Bob] knows that the water level has lowered. The XBee is connected to a directional 2.4GHz antenna to ensure the signal reaches the laptop several acres away. Continue reading “Wireless Water Level Sensor From PVC Pipe”

LeanPipe

Building Things With Lean Pipe

Sometimes you just want to build something quickly and easily. Maybe you just need a basic structure for your actual project, or perhaps you want to be able to easily modify the design. Maybe you don’t have access to many fancy tools to build a solid, lightweight structure. Another possibility is that you want to be able to break down your structure and move it at a later date. In cases like these, you might want to consider using lean pipe.

Lean pipe is kind of like K’NEX for adults. It’s made up of metal pipe and specialized fittings. If you’ve ever worked with PVC pipe before then this may sound familiar. The difference is lean pipe is stronger and designed specifically for building sturdy structures. The fixtures designed for use with lean pipe are much easier to work with than PVC pipe. With PVC pipe, it seems like you never have the exact right fitting and you have to build your own adapters, quickly increasing the cost of the design.

A typical lean pipe fitting will either slide over the end of a section of pipe, or wrap around it somewhere in the middle. An adjustment screw can then be tightened to clamp the fitting in place around the sections of pipe. The video below does a good job demonstrating the different possibilities with fittings. The primary issue with this material is that you might not be able to find it at your local hardware store. Luckily, a quick Internet search will turn up a number of online purchasing options.

So what can you build with this stuff? Cody has been building himself computer desks with an industrial look. He first starts out with the frame design. This is the part that’s made from the lean pipe. Once the frame is completed he just needs to work on the wood surfaces. All he really needs to do is cut the wood to shape and then finish it to look nice. It then lays in place and can be bolted down for extra security. Continue reading “Building Things With Lean Pipe”

Transformer Inductive Coupling Simulation Is SFW

[James] has a friend who teaches at the local community college. When this friend asked him to build a transformer coupling simulation, he was more than happy to oblige. Fortunately for us, he also made a video that explains what is happening while  showing the output on a ‘scope.

For the simulation, [James] built primary and secondary coils using PVC pipe. The primary coil consists of 11 turns of 14AWG stranded wire with 4V running through it applied. The first secondary he demonstrates is similarly built, but has 13 turns. As you’ll see, the first coil induces ~1.5V in the second coil. [James] first couples it with the two windings going the same way, which results in the two 2Mhz waveforms being in phase with each other. When he inserts the secondary the other way, its waveform is out of phase with the primary’s.

His second secondary has the same diameter PVC core, but was wound with ~60 turns of much thinner wire—28AWG bell wire to be exact. This match-up induces 10V on the secondary coil from the 4V he put on the primary. [James]’ demonstration includes a brief Lissajous pattern near the end. If you don’t know enough about those, here’s a good demonstration of the basics coupled with an explanation of the mechanics behind them.

Continue reading “Transformer Inductive Coupling Simulation Is SFW”

Homemade Bazooka Has Earned Its Stripes

Many of us dream of launching rockets from our shoulders, but [John] here actually did something about it.

This bazooka build started with a 6″ diameter PVC pipe. He mounted a length of 80/20 T-slotted aluminum extrusion to the pipe through a couple of wood blocks. [John] installed rail buttons on some Estes Alpha rockets which slide along nicely inside the T-slot. He welded a PVC cleanout fitting and plug to one end for easy access and gave her a nice paint job.

The ignition is simple: an irresistible red push button is wired to a 9V battery and a pair of alligator clips. [John] loads up a rocket, puts the gators on the wires of an igniter, pushes said button, and Bob’s your uncle. All he needs now is a pair of gun boats. Video of the build and some demonstrations we don’t necessarily recommend are after the jump.

Continue reading “Homemade Bazooka Has Earned Its Stripes”