As the world grapples with the issue of climate change, there’s a huge pressure to move transport away from carbon-based fuels across the board. Whether it’s turning to electric cars for commuting or improving the efficiency of the trucking industry, there’s much work to be done.
It’s a drop in the ocean in comparison, but the world of motorsports has not escaped attention when it comes to cleaning up its act. As a result, many motorsports are beginning to explore the use of alternative fuels in order to reduce their impact on the environment.
We’ve spoken a lot about building race cars here at Hackaday, but what does it actually look like to go out and do it? The boys from [Bad Obsession Motorsport] dived into that very question with their Bargain Racement series last year.
The series follows the duo as they build a Citroen C1 into a competitive race car to take on the City Car Cup, an entry-level racing series focused on keeping the field competitive and the racing close.
Even at this level, there’s plenty to do to prep the car for competition. The rollcage needs to be installed, seats changed out for race-spec gear, and plenty of wiring to do as well. [Nik] and [Richard] have plenty of experience in the field of motorsport, and shine a great light on how to do the job, and do it right.
All in all, building the car cost £5995 pounds, starting from a used £850 Citroen C1. However, actually going racing costs more than that. Between race suits and boots, a helmet, club memberships and race entry fees, it cost a full £8273 to get to the first race. It’s steep, though much of those costs are upfront. Keep the car off the walls and year on year, you only need to keep paying for entry fees, memberships and consumables like fuel and tires.
It’s a great look at everything from building a race car, to testing and then actually competing as well. It serves as an excellent real-world example of what we talk about in our series on how to get into cars, which just recently touched on prepping a car for endurance competition. Video after the break.
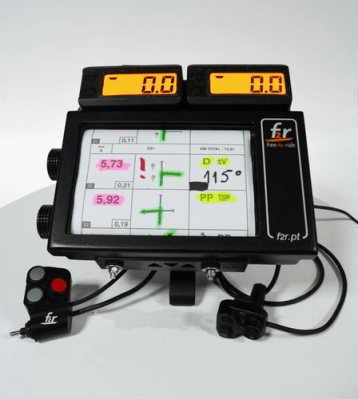
Motorcycle rally racing is a high-speed, exciting, off-road motorsport that involves zipping across all types of terrain on two wheels. While riding, it’s extremely important for riders to know what’s coming up next — turns, straightaways, stream crossings, the list goes on. Generally, this is handled by a roadbook — a paper scroll that has diagrams of each turn or course checkpoint, along with the distances between them and any other pertinent information. Of course, this needs to be paired with a readout that tells you how far you’ve traveled since the last waypoint so you’re not just guessing. This readout usually takes the form of a rally computer, a device that can display speed, distance traveled, and course heading (and some of the fancier ones have even more data available).
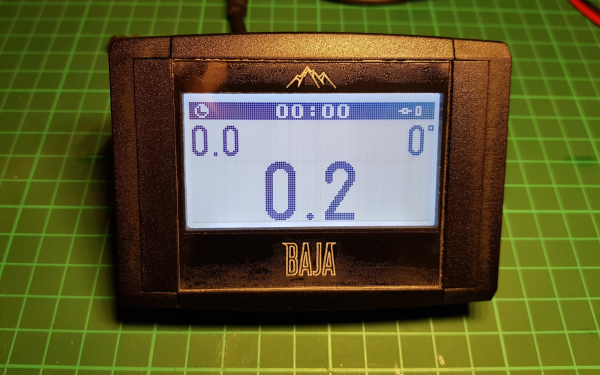
Frustrated with the lackluster interface and high cost associated with most rally computers on the market, [Matias Godoy] designed his own back in 2017, and was quick to realize he had a potential product. After several iterations he brought his idea to market with a small initial run, which sold out in a few hours!
[Matias]’s project, the Open Rally Computer (formerly the Baja Pro) packages neatly in a CNC-machined case and features a nice high-visibility LCD display, a built-in GPS receiver, and an ergonomic handlebar-mounted remote. The data is crunched by an ESP32 microcontroller, which also allows for WiFi-enabled OTA updates. The end result is a beautiful and useful device that was clearly designed with great care. Love the idea but not a rally racer? If street bikes are more your thing then fear not because there’s an open source digital dashboard out there for you too.
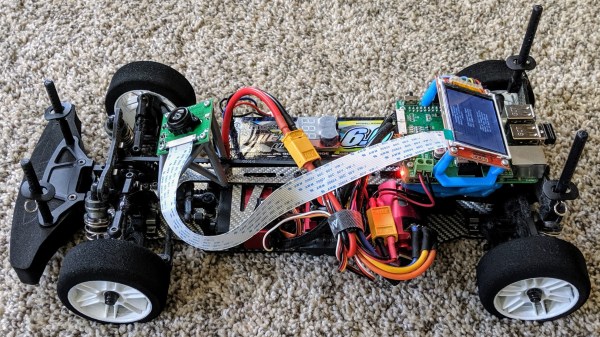
[Andy]’s robot is an autonomous RC car, and he shares the localization algorithm he developed to help the car keep track of itself while it zips crazily around an indoor racetrack. Since a robot like this is perfectly capable of driving faster than it can sense, his localization method is the secret to pouring on additional speed without worrying about the car losing itself.
To pull this off, [Andy] uses a camera with a fisheye lens aimed up towards the ceiling, and the video is processed on a Raspberry Pi 3. His implementation is slick enough that it only takes about 1 millisecond to do a localization update, netting a precision on the order of a few centimeters. It’s sort of like a fast indoor GPS, using math to infer position based on the movement of ceiling lights.
To be useful for racing, this localization method needs to be combined with a map of the racetrack itself, which [Andy] cleverly builds by manually driving the car around the track while building the localization data. Once that is in place, the car has all it needs to autonomously zip around.
Interested in the nitty-gritty details? You’re in luck, because all of the math behind [Andy]’s algorithm is explained on the project page linked above, and the GitHub repository for [Andy]’s autonomous car has all the implementation details.
The system is location-dependent, but it works so well that [Andy] considers track localization a solved problem. Watch the system in action in the two videos embedded below.
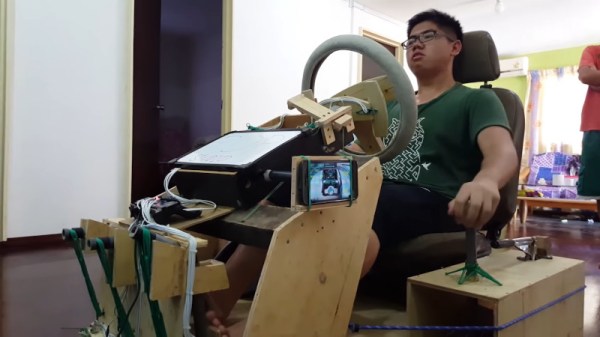
If you desire a sim gaming rig, there are off-the-shelf options up and down the market that stretch as high as your budget can afford. Some choose to eschew this route, however and build their own from scratch. Few people go quite so far as [Popicasa POPStuDio], however.
The first version of the rig is about as hacked as you can possibly get, and it’s a joy to see it built from scrap. The wheel itself and the pedals are all built out of old PVC pipe, with a bunch of old wood screwed together for the frame. A cheap USB gamepad serves to handle input to the PC for the pedals and H-shifter. The H-shifter uses simple power switches, repurposed in an ingenious way to sense gear position. The knob itself is cast out of what appears to be hot glue. Steering is done by connecting the wheel to a flexible shaft that tips a smartphone back and forth, using its internal accelerometers and gyros to sense rotation. It’s not clear how this is tied into the PC running Project CARS, but it’s impressive nonetheless.
Version 2 of the build takes things up a notch, using an Arduino Leonardo to handle steering and pedal functions as a Human Interface Device. There’s also force feedback, via a hefty motor attached to the steering shaft via a belt drive. This version implements an H-shifter as well as paddle shifters too for a more modern experience.
Both builds are unique in the modern era for eschewing CNC or 3D printed parts. It’s all done by hand, taking days of effort, and using only basic tools. It’s refreshing to see such a complex build done with nothing but simple materials and sheer commitment. We’re sure [Popicasa POPStuDio] enjoys the rig, and we can’t wait to see where it goes next. Perhaps the next iteration will even feature a motion platform, perhaps built out of old forklift parts? Only time will tell. Video after the break.
A few decades ago you might have been satisfied with a crude wireframe flight simulator or driving a race car with the WASD keys. Today, gamers expect more realism, and [600,000 milliliters] is no different. At first, he upgraded his race car driving chair and put on VR goggles. But watching the world whiz by in VR is you can’t feel the wind on your face. Armed with a 3D printer, some software, and some repurposed PC fans, he can now feel the real wind in virtual reality. You can see the build in the video, below.
The electronics are relatively straightforward and there is already software available. The key, though, is the giant 3D printed ducts that direct the airflow. These are big prints, so probably not for some printers, but printers are getting bigger every day. The fan parts are from Thingiverse, but the enclosures are custom and you can download them from the blog post.
Looking to give himself a competitive edge, racer [Douglas Hedges] wanted to come up with a system that could give him real-time feedback on how his current performance compared to his previous fastest lap time. Armed with a Raspberry Pi and some Python libraries, he set out to add a simple telemetry system to his car. But as is often the case with these kind of projects, things just started snowballing from there.
At the most basic level, his system uses GPS position and speed information to light up a strip of RGB LEDs on the dashboard: green means he’s going faster than the previous best lap, and red means he isn’t. Any interface more complex than that would just be a distraction while he focuses on the track. But that doesn’t mean the Raspberry Pi can’t collect data for future review after the race is over.
With the basic functionality in place, [Douglas] turned his attention to collecting engine performance data. It turned out the car already had some pre-existing equipment for collecting metrics such as the air-fuel ratio and RPM, which he was able to connect to the Raspberry Pi thanks to its use of a well documented protocol. On top of that he added a Labjack U3 data acquisition system which let him pull in additional information like throttle position and coolant temperature. Grafana is used to visualize all of this data after the race, though it sounds like he’s also considering adding a cellular data connection vehicle data can be streamed out in real-time.