In retrospect, it was only a matter of time before someone turned a bunch of Raspberry Pis into a supercomputer.
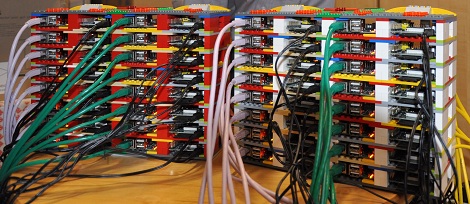
The Raspi supercomputer is the result of a project headed up by University of Southampton professor [Simon Cox]. Included in the team are a gaggle of grad students and [Simon]’s 6-year-old son who graciously provided the material, design, and logistics for the custom LEGO case.
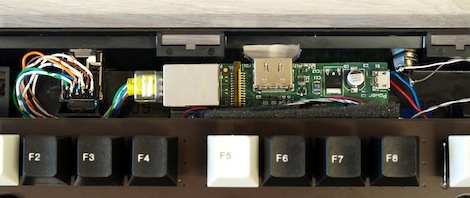
The Iridris-Pi supercomputer, as the team calls their creation, consists of 64 Raspberry Pis, all configured for parallel processing using a lightweight version of MPI. [Simon] was kind enough to put up an excellent guide for turning two (or more) Raspberry Pis into a supercomputer.
The machine has a full 1 TB of disk space provided by a 16 GB SD card in each node. Although the press release doesn’t go over the computational capabilities of the Iridris-Pi, the entire system can be powered from a single 13 A supply.
If you’re wondering what it would take to get a Raspberry Pi supercomputer into the TOP500 list of supercomputers, a bit of back-of-the-envelope computation given the Raspi’s performance and the fact the 500th fastest computer can crank out about 60 TeraFLOPS/s, we’ll estimate about 1.4 Million Raspis would be needed. At least it’s a start.