Cablecam Is An Exercise In System Integration

Drones have become the standard for moving aerial camera platforms, but another option that sees use in the professional world are cable cameras. As an exercise in integrating mechanics, electronics, and software, [maxipalay] created his own Cablecam.

Cablecam is build around a pair of machined wood plates, with some pulleys and motor reduction gearing between them. A brushless hobby motor moves the platform along the rope/cable, driven a drone ESC. Since the ESC doesn’t have a reverse function, [maxipalay] used four relays controlled by an Arduino to swap around the connections of two of the motor wires to reverse direction. The main onboard controller is a Raspberry Pi, connected to a camera module mounted on a two-axis gimbal for stabilization. A GPS module was also added for positioning information on long cables.

The base station is built around an Nvidia Jetson Nano connected to a 7″ screen mounted in a plastic case. Video, telemetry and control signals are communicated using the open-source Wifibroadcast protocol. This uses off-the-shelf WiFi hardware in connectionless mode to broadcast UDP packets, and avoids the lengthy WiFi reconnection process every time a connection drops out. The motion of Cablecam can be controlled manually using a potentiometer on the control station, or use the machine vision capabilities of the Jetson to automatically track and follow people.

We’ve seen several cable robots over the years, including a solar-powered sensor platform that resembles a sloth.

Raspberry Pi Crammed Into Old Film Camera

If you wanted an expensive film camera when you were a kid, you are in luck. Used film SLRs are super cheap now that everyone wants digital cameras. Of course, in reality, you want a digital camera, too. So do what [befinitiv] did. Make a film cartridge out of a Raspberry Pi that can convert your camera to digital. (Video, embedded below.)

In theory, this sounds like a genius idea. The practical aspect isn’t perfect, though. For one thing, the small image sensor used means that the camera is zoomed in quite a bit. Also, the shutter button isn’t integrated, so the shutter is open all the time. You may think that doesn’t matter, but don’t forget that the way an SLR works means if the shutter is open, there’s no viewfinder.

Continue reading “Raspberry Pi Crammed Into Old Film Camera”

Cloud-Based Atari Gaming

While the Google Stadia may be the latest and greatest in the realm of cloud gaming, there are plenty of other ways to experience this new style of gameplay, especially if you’re willing to go a little retro. This project, for example, takes the Atari 2600 into the cloud for a nearly-complete gaming experience that is fully hosted in a server, including the video rendering.

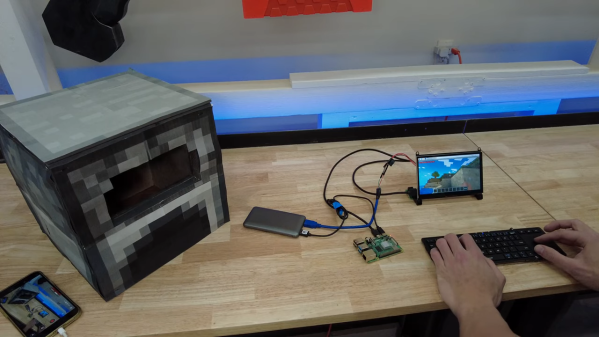
[Michael Kohn] created this project mostly as a way to get more familiar with Kubernetes, a piece of open-source software which helps automate and deploy container-based applications. The setup runs on two Raspberry Pi 4s which can be accessed by pointing a browser at the correct IP address on his network, or by connecting to them via VNC. From there, the emulator runs a specific game called Space Revenge, chosen for its memory requirements and its lack of encumbrance of copyrights. There are some limitations in that the emulator he’s using doesn’t implement all of the Atari controls, and that the sound isn’t available through the remote desktop setup, but it’s impressive nonetheless

[Michael] also glosses over this part, but the Atari emulator was written by him “as quickly as possible” so he could focus on the Kubernetes setup. This is impressive in its own right, and of course he goes beyond this to show exactly how to set up the cloud-based system on his GitHub page as well. He also thinks there’s potential for a system like this to run an NES setup as well. If you’re looking for something a little more modern, though, it is possible to set up a cloud-based gaming system with a Nintendo Switch as well.

Continue reading “Cloud-Based Atari Gaming”

Create Large Scale Domino Art With A Robot

Creating large domino art displays is a long and nerve-racking process, where bumping a single domino can mean starting from scratch. To automate the process of creating these displays, a team consisting of [Mark Rober], [John Luke], [Josh], and [Alex Baucom] built the Dominator, a robot capable of laying 100 000 dominos just over 24 hours. Video after the break.

[Mark Rober] had been toying with the idea for a few years, and the project finally for off the ground after [Mark] mentioned it in a talk he gave at the 2019 Bay Area Maker Faire. To pull it off, the team created an entire domino laying system, including an automated loading station, a precision indoor positioning system, and the robot itself. The robot is built around a frame of aluminum extrusions, riding on three omnidirectional wheels driven by precision servo motors. A large tray mounted to the front of the robot can hold and release 300 dominos at a time. The primary controller is a Raspberry Pi 4, which receives positioning information from a Marvelmind indoor positioning system and a downward-facing IR camera that looks for reflective markers on the floor. The loading system uses a conveyor system to feed the different colored dominos to an industrial Kuka robot that drops them down a grid of tubes that can hold multiple layers at once.

Continue reading “Create Large Scale Domino Art With A Robot”

Smart Mirror Talks To 3D Printers

As time goes by, it’s only getting easier to make a magic mirror. You know, a mirror connected to the internet that shows information like news, weather, or whatever you want, right there on top of your stunning visage. In [Forsyth Creations]’ case, that data includes 3D printer activity on the network — something that’s way more relevant to daily life than say, headlines about Kim Jong Un’s weight loss progress. The build video is embedded below.

Thanks to projects like [MichMich]’s MagicMirror, everything is done with modules, including really useful things such as OctoMirror that let you keep an eye on your 3D printer(s) using OctoPrint.

The electronics are pretty simple here — [Forsyth Creations] used the guts of an old monitor for the display and a Raspberry Pi to serve up the modules as a web page. The only tricky part is power, because the LCD is going to need so much more voltage than the Pi and the absolutely necessary LEDs around the edge, but a couple of buck converters do the trick.

After stripping the monitor of all of its unnecessary plastic, [Forsyth Creations] cut rear and front frames to support the electronics. That isn’t a piece of mirror glass, it’s actually one-way acrylic which is lighter and somewhat cheaper. [Forsyth Creations] designed and printed some corner support brackets that double as leveling screw holders to get the acrylic panel dialed in just right, and you can get these for yourself from GitHub. We think this would be a good early woodworking project or something for a long weekend. [Forsyth Creations] built this in three days on an apartment balcony using a minimum of tools.

We especially admire that once it was done, he hung it up with a French cleat. Those are so useful.

Continue reading “Smart Mirror Talks To 3D Printers”

Analog Camera Goes Digital

The digital camera revolution swept through the world in the early 2000s, and aside from some unique situations and a handful of artists still using film, almost everyone has switched over to digital since then. Unfortunately that means that there’s a lot of high quality film cameras in the world that are gathering dust, but with a few pieces of equipment it’s possible to convert them to digital and get some more use out of them.

[befinitiv]’s latest project handles this conversion by swapping in a Raspberry Pi Zero where the film cartridge would otherwise be inserted into the camera. The Pi is attached to a 3D-printed case which mimics the shape of the film, and also houses a Pi camera right in front of the location where the film would be exposed. By removing the Pi camera’s lens, this new setup is able to take advantage of the analog camera’s optics instead and is able to capture images of relatively decent quality.

There are some perks of using this setup as well, namely that video can be broadcast to this phone over a wireless connection to a computer via the Raspberry Pi. It’s a pretty interesting build with excellent results for a remarkably low price tag, and it would be pretty straightforward to interface the camera’s shutter and other control dials into the Raspberry Pi to further replicate the action of an old film camera. And, if you enjoy [befinitiv]’s projects of bringing old tech into the modern world, be sure to check out his 80s-era DOS laptop which is able to run a modern Linux installation.

Continue reading “Analog Camera Goes Digital”

Hands On With The Raspberry Pi POE+ HAT

There’s a lot happening in the world of Pi. Just when we thought the Raspberry Pi Foundation were going to take a break, they announced a new PoE+ HAT (Hardware Attached on Top) for the Pi B3+ and Pi 4, and just as soon as preorders opened up I placed my order.

Now I know what you’re thinking, don’t we already have PoE HATs for the Pis that support it? Well yes, the Pi PoE HAT was released back in 2018, and while there were some problems with it, those issues got cleared up through a recall and minor redesign. Since then, we’ve all happily used those HATs to provide up to 2.5 amps at 5 volts to the Pi, with the caveat that the USB ports are limited to a combined 1.2 amps of current.

PoE vs PoE+
$20 for either of them. Choose wisely.

The Raspberry Pi 4 came along, and suddenly the board itself can pull over 7 watts at load. Combined with 6 watts of power for a hungry USB device or two, and we’ve exceeded the nominal 12.5 watt power budget. As a result, a handful of users that were trying to use the Pi 4 with POE were hitting power issues when powering something like dual SSD drives over USB. The obvious solution is to make the PoE HAT provide more power, but the original HAT was already at the limit of 802.3af PoE could provide, with a maximum power output of 12.95 watts.

The solution the Raspberry Pi Foundation came up with was to produce a new product, the PoE+ HAT, and sell it along side the older HAT for the same $20. The common name for 802.3at is “PoE+”, which was designed specifically for higher power devices, maxing out at 30 watts. The PoE+ HAT is officially rated to output 20 watts of power, 5 volts at 4 amps. These are the output stats, so the efficiency numbers don’t count against your power budget, and neither does the built-in fan.

Continue reading “Hands On With The Raspberry Pi POE+ HAT”