Usagi Electric’s Paper Tape Reader Is Ready To Hop With The Tube Computer

After previously working out a suitable approach to create a period-correct paper tape reader for his tube-based, MC14500B processor-inspired computer, [David Lovett] over at the Usagi Electric farm is back with a video on how he made a working tape reader.
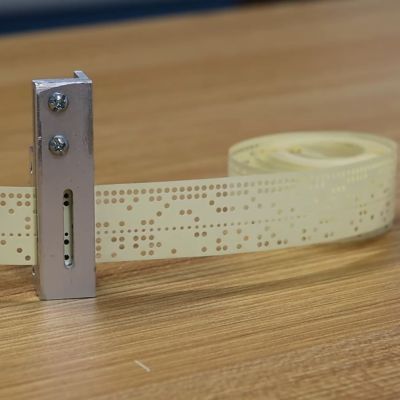
The assembled paper tape reader as seen from the front with tape inserted. (Credit: David Lovett, Usage Electric, YouTube)

The tape reader’s purpose is to feed data into the tube-based computer, which for this computer system with its lack of storage memory means that the instructions are fed into the system directly, with the tape also providing the clock signal with a constant row of holes in the tape.

Starting the tape reader build, [David] opted to mill the structural part out of aluminum, which is where a lot of machining relearning takes place. Ultimately he got the parts machined to the paper design specs, with v-grooves for the photodiodes to fit into and a piece to clamp them down. On top of this is placed a part with holes that line up with the photodiodes.

Another alignment piece is added to hold the tape down on the reader while letting light through onto the tape via a slot. After a test assembly [David] was dismayed that due to tolerance issues he cracked two photodiodes within the v-groove clamp, which was a hard lesson with these expensive (and rare) photodiodes.

Although tolerances were somewhat off, [David] is confident that this aluminum machined reader will work once he has it mounted up. Feeding the tape is a problem that is still to be solved.  [David] is looking for ideas and suggestions for a good approach within the limitations that he’s working with. At the video’s end, he mentions learning FreeCAD and 3D printing parts in the future.  That would probably not be period-correct in this situation, but might be something he could get away with for some applications within the retrocomputing space.

We covered the first video and the thought process behind picking small (1.8 mm diameter) photodiodes as a period-correct tape hole sensor for a 1950s-era computing system, like the 1950s Bendix G-15 that [David] is currently restoring.

Continue reading “Usagi Electric’s Paper Tape Reader Is Ready To Hop With The Tube Computer”

This Expedient Microfiche Reader Illuminates Retro Datasheets

You have to be of a certain vintage to remember doing research on microfilm and microfiche. Before the age of mass digitization of public records, periodicals, and other obscure bits of history, dead-tree records were optically condensed onto fine-grain film, either in roll form or as flat sheets, which were later enlarged and displayed on a specialized reader. This greatly reduced the storage space needed for documents, but it ended up being a technological dead-end once the computer age rolled around.

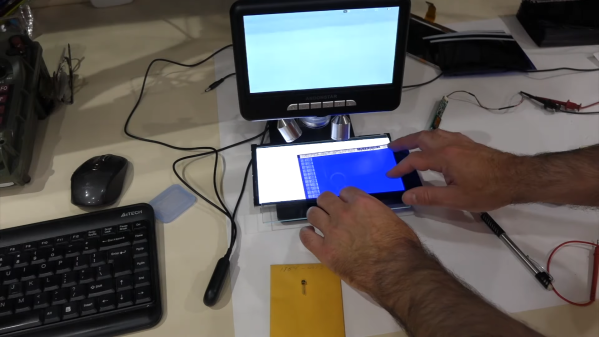
This was the problem [CuriousMarc] recently bumped into — a treasure trove of Hewlett-Packard component information on microfiche, but no reader for the diminutive datasheets. So naturally, he built his own microfiche reader. In a stroke of good luck, he had been gifted a low-cost digital microscope that seemed perfect for the job. The scope, with an HD camera and 5″ LCD screen, was geared more toward reflective than transmissive use, though, so [Marc] had trouble getting a decent picture of the microfiches, even with a white paper backing.

Version 2.0 used a cast-off backlight, harvested from a defunct DVD player screen, as a sort of light box for the stage of the microscope. It was just about the perfect size for the microfiches, and the microscope was able to blow up the tiny characters as well as any dedicated microfiche reader could, at a fraction of the price. Check out the video below for details on the build, as well as what [Marc] learned from the data sheets about his jackpot of HP parts.

With the wealth of data stored on microforms, we’re surprised that we haven’t seen any readers like this before. We have talked about microscopic wartime mail, though.

Continue reading “This Expedient Microfiche Reader Illuminates Retro Datasheets”

Clock Is Not Readable By Humans

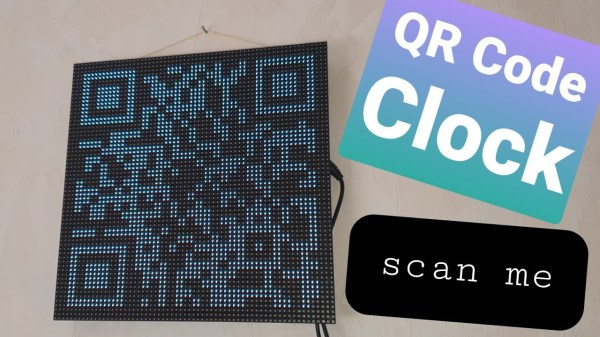
Not every build needs to be immediately useful or revolutionary. Plenty of builds are just for fun, for education, or even purposefully useless but still challenging. This clock, for example, might fit into all three categories. It’s a clock that displays time through a QR code, making it completely inscrutable unless you have a device which likely has its own readable clock on it already.

The QR Code clock comes to us from [Aaron] and is based on the now-ubiquitous ESP32 WiFi chip. The ESP32 is connected to a 64×64 LED matrix which is updated every second with a code for the current time. With single-second resolution that means that even with a method for reading a QR code by hand, like you sometimes can with barcodes, there’s no way to read it without a smartphone since it changes so rapidly.

Of course [Aaron] recognizes the flaw in his design in his video in which he notes tongue-in-cheek that with this clock you would never have to look at a smartphone again, since the clock is right there on the wall. We appreciate the humor and also that [Aaron] has made all of his source code available in case you would like to use this as an example project for using QR codes for more useful purposes. For now, though, we’ll just forward you along to some other useless machines.

Thanks to [willmore] for the tip!

Continue reading “Clock Is Not Readable By Humans”

An Open Hardware Sega Genesis Cartridge Dumper

You might be wondering why anyone would build device to dump Sega Genesis and Mega Drive cartridges. Perhaps they want to play their well-worn copy of The Lost Vikings on their phone, or they want to keep their QVC Limited Edition Maximum Carnage box set in near mint condition. Maybe. But we’re betting that [tonyp7] was just looking for a challenge, and as an added bonus, the world gets another cool open hardware gadget in the process. Sounds like a good deal to us.

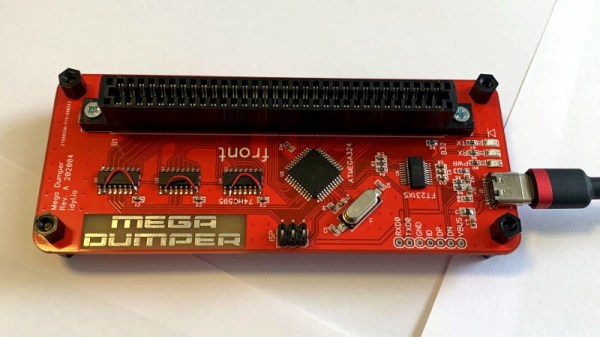
Based on the ATmega324PB, the GenDumper can take those dusty old Sega cartridges and back them up to an image file on your computer. Right now the hardware depends on a Windows program, but according to the documentation, [tonyp7] is working on a platform-agnostic Python script so everyone can play along. What you do with the image file after you’ve dumped it is your business, but presumably loading it up in an emulator would be the next step.

Considering how easy it is to find ROMs for these old games online, do you actually need a GenDumper of your own? Probably not. But it’s still an interesting piece of hardware, and if you look close enough, you just might learn a thing or two from the design. For example, [tonyp7] shows how a relatively easy to work with 12 pin USB-C connector can be used on your USB 2.0 projects to embrace the new physical connector without diving into a full USB 3.0 implementation. The keen-eyed reader might also note there’s a lesson to be learned about finalizing the name of your project before sending off your PCBs for manufacturing.

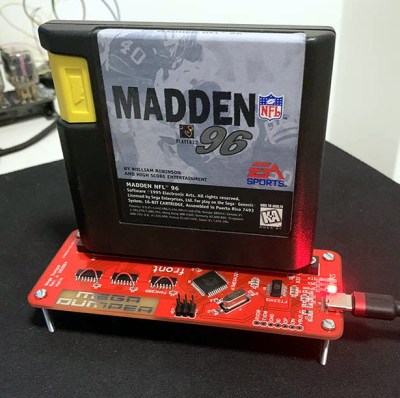
A perusal of the archive uncovered a similar project from 2012 that, believe it or not, was also tested on a copy of Madden 96. Whether that means the game is so beloved that hackers want to make sure its preserved for future generations, or so despised that they are secretly hoping the magic smoke leaks out during testing, we can’t say.

E-Book Reader Gets Page Turn Buttons, Is None The Wiser

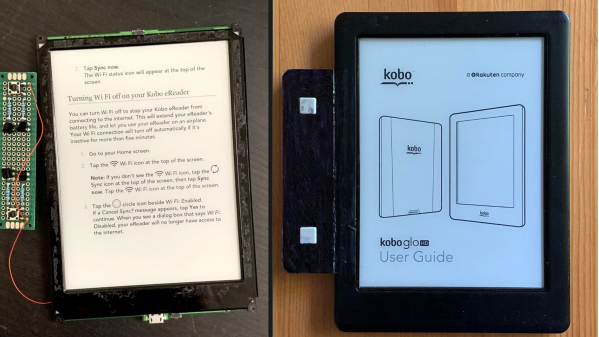
Most e-book readers don’t have physical page turn buttons. Why? They just don’t. Virtual page turns are accomplished with a tap at a screen edge. Determined to reduce the awkwardness of one-handed use, [Sagar Vaze] modified a Kobo e-reader with two physical page turn buttons as a weekend project.

[Sagar] points out that since the underlying OS of the Kobo device is Linux, it is possible to fake touches to the screen (and therefore trigger page turns) by recording then replaying the appropriate input event. However, there was a more direct solution available to those willing to tamper slightly with the hardware. Touch sensing on the screen is done via an infrared break-beam system. Along two edges of the screen are IR emitters, and opposite the emitters are receivers. Broadly speaking, when a fingertip touches the display a minimum of two IR beams are broken, and the physical location of the fingertip can therefore be determined by analyzing exactly how the IR pattern has been changed.

To spoof page turns, [Sagar] briefly shorts two IR emitters: one on each axis. The sudden winking out of the IR is interpreted by the device as a crisp tap, and the device obediently turns the page. The only hitch is that both IR emitters must be shorted at the same time. If one is shorted before the other, the device ignores it. Double-pole switches would probably do the trick, but with the part bin coming up empty in that respect, [Sagar] instead used a few transistors to accomplish the same thing. A 3D printed enclosure rounds out the whole mod, and a brief video is embedded below.

Continue reading “E-Book Reader Gets Page Turn Buttons, Is None The Wiser”

Reading Out An EPROM – With DIP Switches

We’re all too spoiled nowadays with our comfortable ways to erase and write data to persistent memory, whether it’s our microcontroller’s internal flash or some external EEPROM. Admittedly, those memory technologies aren’t exactly new, but they stem from a time when their predecessors had to bathe under ultraviolet light in order to make space for something new. [Taylor Schweizer] recently came across some of these quartz-window decorated chips, and was curious to find out what is stored in them. Inspired by the BIOS reverse engineering scene in Halt and Catch Fire, he ended up building his own simple reader to display the EPROM’s content.

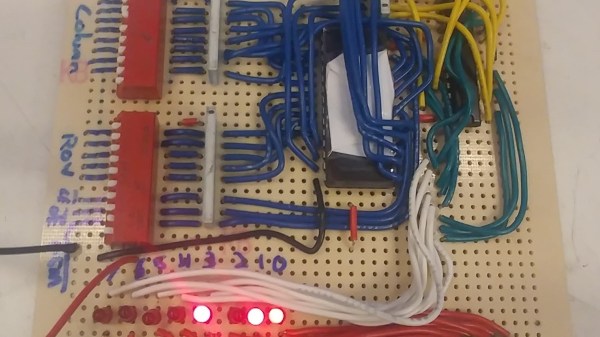
The 2732 he uses is a standard EPROM with 32kbit memory. Two pins, Chip Enable and Output Enable, serve as main control interface, while 12 address pins select the data stored in the chip’s internal 4K x 8 arrangement, to output it on the 8 data output pins. You could of course hook up the EPROM to a microcontroller and send what you read via serial line, but [Taylor] opted for a more hands-on approach that lets him read out the data in a manual way. He simply uses a bank of DIP switches to set the address and control pins, and added a row of LEDs as display.

As you can see from the short demonstration in the video after the break, reading out the entire EPROM would be a rather tedious task this way. If you do have more serious intentions to read out the content, you could have a look at one of those microcontroller based solutions sending data via serial line after all.

Continue reading “Reading Out An EPROM – With DIP Switches”

Arduino Into NAND Reader

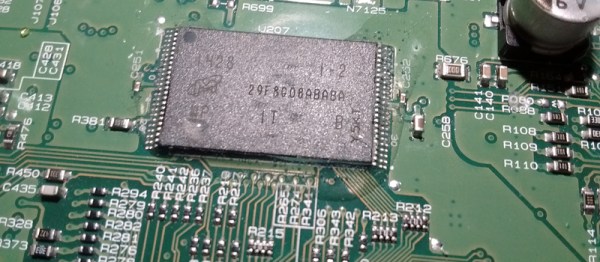
[James Tate] is starting up a project to make a “Super Reverse-Engineering Tool”. First on his list? A simple NAND flash reader, for exactly the same reason that Willie Sutton robbed banks: because that’s where the binaries are.

As it stands, [James]’s first version of this tool is probably not what you want to use if you’re dumping a lot of NAND flash modules. His Arduino code reads the NAND using the notoriously slow digital_read() and digital_write() commands and then dumps it over the serial port at 115,200 baud. We’re not sure which is the binding constraint, but neither of these methods are built for speed.

Instead, the code is built for hackability. It’s pretty modular, and if you’ve got a NAND flash that needs other low-level bit twiddling to give up its data, you should be able to get something up and working quickly, start it running, and then go have a coffee for a few days. When you come back, the data will be dumped and you will have only invested a few minutes of human time in the project.

With TSOP breakout boards selling for cheap, all that prevents you from reading out the sweet memory contents of a random device is a few bucks and some patience. If you haven’t ever done so, pull something out of your junk bin and give it a shot! If you’re feeling DIY, or need to read a flash in place, check out this crazy solder-on hack. Or if you can spring for an FTDI FT2233H breakout board, you can read a NAND flash fast using essentially the same techniques as those presented here.