Lego Microscope Does Research

We’ve seen a lot of practical machines built using Lego. Why not? The bricks are cheap and plentiful, so if they can get the job done, who cares if they look like a child’s toy? Apparently, not [Yuksel Temiz]. He’s an engineer for IBM whose job involves taking pictures of microscopic fluidic circuits. When he wasn’t satisfied with the high-power $10,000 microscopes he had, he built his own. Using Lego. How are the pictures? Good enough to appear in many scientific journals.

Clearly, the microscope doesn’t just contain Lego, but it still came in at under $300. According to an interview from Futurism, the target devices are reflective which makes photographing them straight-on difficult. After experimenting with cameras on tripods, [Yuksel] decided he could build his own specialized device. You can see a video of the devices in question and some of the photographs below.

Continue reading “Lego Microscope Does Research”

Turn Folds Into Flowers, But Not With Origami

It is said that you’re not a sysadmin if you haven’t warmed up a sandwich on server. OK, it’s not widely said; we made it up, and only said it once, coincidentally enough after heating up a sandwich on a server. But we stand by the central thesis: never let a good source of excess thermal energy go to waste.

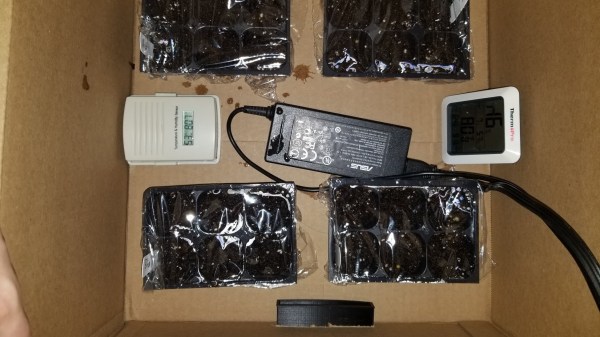
[Joseph Marlin] is in the same camp, but it’s not lunch that he’s warming up. Instead, he’s using the heat generated by his Folding@Home rig to sprout seeds for beautiful tropical flowers. A native of South Africa Strelitzia reginae, better known as the striking blue and orange Bird of Paradise flower, prefers a temperature of at least 80° F (27° C) for the two months its seeds take to sprout. With all the extra CPU cycles on a spare laptop churning out warm air, [Joseph] rigged an incubator of sorts from a cardboard box. A 3D-printed scoop snaps over the fan output on the laptop and funnels warm air into the grow chamber. This keeps the interior temperature about 15 degrees above ambient, which should be good enough for the seeds to sprout. He says that elaborations for future versions could include an Arduino and a servo-controlled shutter to regulate the temperature, which seems like a good idea.

The Bird of Paradise is a spectacular flower, but if growing beautiful things isn’t your style, such a rig could easily sprout tomatoes or peppers or get onions off to a good start. No matter what you grow, you’ll need to basics of spinning up a Folding@Home rig, which is something we can help with, of course.

Given Enough Time, Even A Circle Can Get Complicated

With the weather getting a little nicer, [Michael] thought that running some plant hangers off on his CNC router would be a simple stay-at-home project. After all, you just need to cut a couple circles out of a sheet of plywood…right?

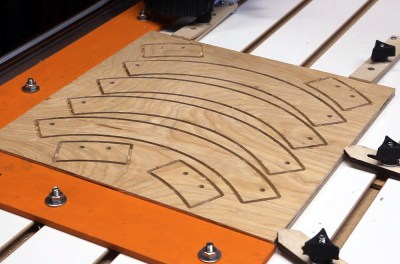
Sure, but [Michael] realized that simply cutting out a ring wasn’t a very efficient approach. Unless you happen to need progressively smaller plant hangers, or maybe a new set of drink coasters, the center disc ends up being wasted material. That might not have been a big deal a few months ago, but when a trip to the Home Depot for more plywood could literally be hazardous to your health, that kind of inefficiency just won’t do.

He reasoned it would be better to break the ring down into sections, which could easily be nested so they fit neatly on a square plywood panel. Of course, now those sections need to be connected to each other in a way that’s strong enough for the ring to hold up the weight of the plant.

So that means extra pieces need to be cut out to serve as braces, and you’ll need to screw it all together, so better add some nuts and bolts to the BOM. You’ll probably want some eye bolts as well, but in a pinch you could just weld washers to the heads of screws like [Michael] did once he ran out of the good stuff.

Some would argue that the time [Michael] spent coming up with this revised design is more valuable than the wood he avoided wasting, which might be true if he was on the job and getting paid hourly. But when it’s a personal project, and quarantine has made sourcing materials difficult, we think it’s a fantastic example of working with what you’ve got on hand.

The Clickiest Keyboard Ever

No matter how clicky your keyboard is, nothing compares to the sensory experience of using a typewriter. The sounds that a typewriter makes, from the deep clunk of hitting the spacebar to the staccato of keys striking paper to the ratchety kerchunk of returning the carriage, are a delight compared to the sterile, soulless clicks of even the noisiest computer keyboard. Oh, and the bell — who doesn’t love the bell?

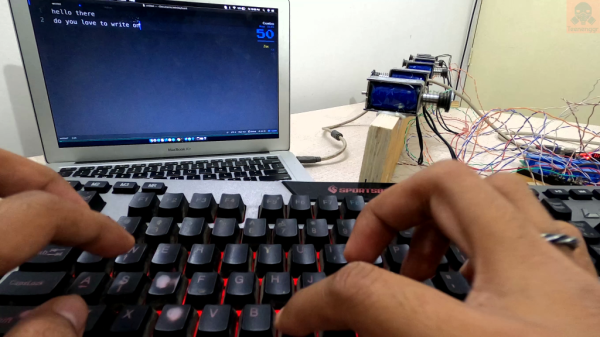
Unwilling to miss out on the feel of real typing, [Jatin Patel] whipped up this solenoid-powered typewriter simulator. The first version had the core functionality, with a line of six solenoids mounted to a strip of wood. The coils are connected to an Arduino through a relay board; a Python program running on his PC reads every keypress and tells the Arduino which solenoid to fire. Each one sounds different somehow, perhaps due to its position on the board, or maybe due to differences in mounting methods. Whatever the cause, the effect is a realistic variability in the sounds, just like a real typewriter.

Version two, shown in the video below, ups the simulation with a motor that moves the solenoid rack one step with each keypress, to simulate the moving carriage of a typewriter. The last solenoid rings a bell when it’s time to return the carriage, which is done with a combination wrench as a handle. Weird hex, but OK.

Can’t get enough typewriter action? We understand; check out this typewriter-cum-USB keyboard, the tweeting typewriter, or this manual typewriter that pulls some strings.

Continue reading “The Clickiest Keyboard Ever”

Quarantine Clock Answers The Important Question

For many people, these last few weeks have been quite an adjustment. When the normal routine of work or school is suddenly removed, it’s not unusual for your internal clock to get knocked out of alignment. It might have started with struggling to figure out if it was time for lunch or dinner, but now it’s gotten to the point that even the days are starting to blur together. If it takes more than a few seconds for you to remember whether or not it’s a weekday, [whosdadog] has come up with something that might help you get back on track.

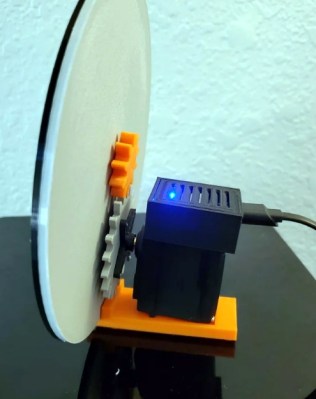
Rather than showing the time of day, this 3D printed clock tells you where you are in the current week. Each day at midnight, the hand will advance to the center of the next day. If you wanted, a slight reworking of the gearing and servo arrangement on the rear of the device could allow it to sweep smoothly through each day. That would give you an idea of your progress through each 24 hour period, but then again, if you don’t even know if it’s morning or night you might be too far gone for this build anyway.

The clock’s servo is driven by a Wemos D1 Mini ESP8266 development board, which naturally means it has access to WiFi and can set itself to the current time (or at least, day) with NTP. All you’ve got to do is put your network information into the Sketch before flashing it to the ESP, and you’re good to go.

Naturally this project is a bit tongue-in-cheek, but we do think the design has practical applications. With a new face and some tweaked code, it could be an easy way to show all sorts of data that doesn’t require a high degree of granularity. Our very own [Elliot Williams] recently built a display to help his young son understand his new at-home schedule which operates on a similar principle.

NASA’s Plan For Sustained Lunar Exploration

The Apollo program proved that humans could land on the Moon and do useful work, but due to logistical and technical limitations, individual missions were kept short. For the $28 billion ($283 billion adjusted) spent on the entire program, astronauts only clocked in around 16 days total on the lunar surface. For comparison, the International Space Station has cost an estimated $150 billion to build, and has remained continuously occupied since November 2000. Apollo was an incredible technical achievement, but not a particularly cost-effective way to explore our nearest celestial neighbor.

Leveraging lessons learned from the Apollo program, modern technology, and cooperation with international and commercial partners, NASA has recently published their plans to establish a sustained presence on the Moon within the next decade. The Artemis program, named for the twin sister of Apollo, won’t just be a series of one-off missions. Fully realized, it would consist not only of a permanent outpost where astronauts will work and live on the surface of the Moon for months at a time, but a space station in lunar orbit that provides logistical support and offers a proving ground for the deep-space technologies that will eventually be required for a human mission to Mars.

It’s an ambitious program on a short timeline, but NASA believes it reflects the incredible technological strides that have been made since humans last left the relative safety of low Earth orbit. Operating the International Space Station for 20 years has given the countries involved practical experience in assembling and maintaining a large orbital complex, and decades of robotic missions have honed the technology required for precision powered landings. By combining all of the knowledge gained since the end of Apollo, the Artemis program hopes to finally establish a continuous human presence on and around the Moon.

Continue reading “NASA’s Plan For Sustained Lunar Exploration”

The ABCs Of Adding QMK To A WASD Keyboard

[Oleg] is a software engineer who appreciates a good keyboard, especially since coming over to the dark side of mechanical keebs. It’s true what they say — once you go clack, you never go back.

Anyway, before going full nerd with an ortholinear split ergo keyboard, [Oleg] had a nice little WASD with many upsides. Because the ErgoDox is oh so customizable, his use of the WASD had fallen by the wayside.

That’s because the ErgoDox can run QMK firmware, which allows the user to customize every key they see and add layers of functionality. Many people have converted all kinds of old keebs over to QMK by swapping out the native controller for a Teensy, and [Oleg] was sure it would work for the WASD.

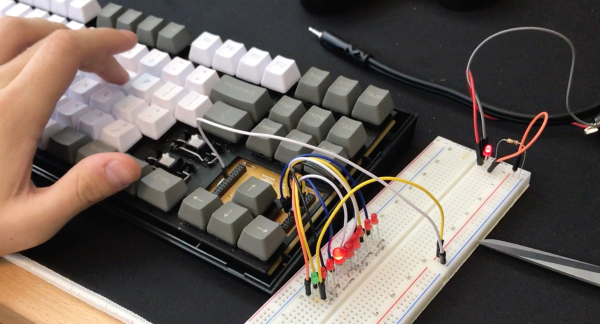
[Oleg] got under the hood and found that the controller sits on a little removable board around the arrow keys and talks to the main PCB through two sets of double-row header pins. After some careful probing with a ‘scope, the controller board revealed its secrets and [Oleg] was able to set up a testing scheme to reverse engineer the keyboard matrix by connecting each row to an LED, and all the columns to ground. With next to no room for the Teensy, [Oleg] ended up strapping it to the back of the switch PCB and wiring it quite beautifully to the header pins.

With Teensy and QMK, it’s easy to make a keyboard any way you want, even if you’re all thumbs.