Easy Parabolic Mirror From A Trash Can Lid

Parabolic reflectors for solar applications are nice stuff, and making your own is a great project in itself. One of the easiest ways we have seen is that of [GREENPOWERSCIENCE], who uses nothing more than a trash can lid, mylar film, and tape. You need a way to make a partial vacuum though.

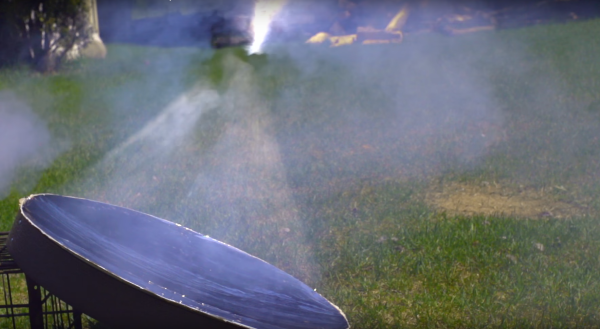
The idea is so simple that it´s almost like cheating. Cut a circle of mylar slightly larger than the lid, and tape it all around, taking care of stretching the mylar in the process. After you´re done with this, you end up with a nice flat mirror. Here´s where the vacuum is needed to force the film into parabolic shape. Extract the air from a little hole in the lid that was previously drilled, and tape it to prevent the loss of the vacuum. The atmospheric pressure on the mylar film will take care of the job, and magically you get a nearly-parabolic reflector ready for work.

In this other video, you can see the reflector in action burning stuff. One obvious problem with this technique is the loss of the vacuum after some time, about an hour according to the author. Here´s another way to make a more durable mirror also with mylar as the reflecting element, however the quality of the resulting mirror is not as good.


Pressure-formed Parabolic Mirror From A Mylar Blanket

Parabolic reflectors are pretty handy devices. Whether you’re building a microwave antenna or a long-distance directional microphone, suitable commercial dishes aren’t that hard to come by. But a big, shiny mirror for your solar death-ray needs is another matter, which is where this pressure-formed space blanket mirror might come in handy.

Pressure-forming was a great choice for [NighthawkInLight]’s mirror. We’ve covered pressure-formed plastic domes before, and this process is similar. A sheet of PVC with a recessed air fitting forms the platen. The metallized Mylar space blanket, stretched across a wooden frame to pull out the wrinkles and folds, is applied to a circle of epoxy on the platen. After curing, a few puffs with a bicycle tire pump forms the curve and stretches the film even smoother. [NighthawkInLight]’s first attempt at supporting the film with spray foam insulation was a bust, but the later attempt with fiberglass mesh worked great. A little edge support for the resulting shiny taco shell and the mirror was capable of the required degree of destructive potential.

We doubt this process can be optimized enough to produce astronomy-grade mirrors for visible light, but it still has a lot of potential applications. Maybe a fiberglass radio astronomy dish could be pressure-formed directly with a rig like this?

Wifi Antenna

Simple Directional WiFi Antenna

Back in 2007, [Stathack] rented an apartment in Thailand. This particular apartment didn’t include any Internet access. It turned out that getting a good connection would cost upwards of $100 per month, and also required a Thai identification card. Not wanting to be locked into a 12-month contract, [Stathack] decided to build himself a directional WiFi antenna to get free WiFi from a shop down the street.

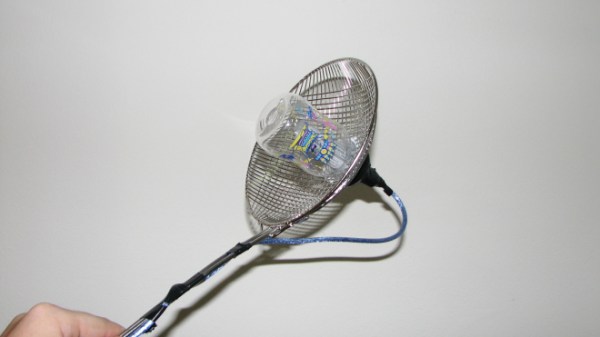
The three main components of this build are a USB WiFi dongle, a baby bottle, and a parabolic Asian mesh wire spoon. The spoon is used as a reflector. The parabolic shape means that it will reflect radio signals to a specific focal point. The goal is to get the USB dongle as close to the focal point as possible. [Stathack] did a little bit of math and used a Cartesian equation to figure out the optimal location.

Once the location was determined, [Stathack] cut a hole in the mesh just big enough for the nipple of the small baby bottle. The USB dongle is housed inside of the bottle for weatherproofing. A hole is cut in the nipple for a USB cable. Everything is held together with electrical tape as needed.

[Stathack] leaves this antenna on his balcony aiming down the street. He was glad to find that he is easily able to pick up the WiFi signal from the shop down the street. He was also surprised to see that he can pick up signals from a high-rise building over 1km away. Not bad for an antenna made from a spoon and a baby bottle; plus it looks less threatening than some of the cantenna builds we’ve seen.

Papercraft Flash Reflector

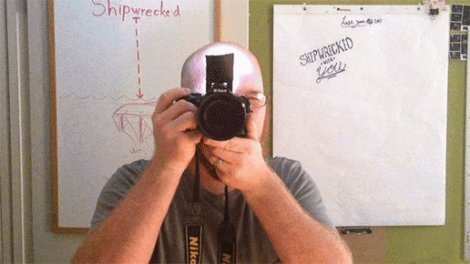
We never use the flash on our point-and-shoot. It has a way of washing out every image we take. But [Joey] has a different solution to the problem. He shows us how to make a papercraft flash reflector that will still light up your subject without washing out everything in the foreground.

[Joey] is perfectly aware that at first glance it would seem you need to have a reflective forehead for this to work. But the reflector is actually set up to aim the flash toward the ceiling. Since most ceilings are white this will reflect the light back into the room, dispersing it at the same time. His write-up includes a link to a PDF of the pattern. After cutting it out, one side is coated in black electrical tape, the other is left white to reflect the light. The design includes a tab that slides into the hot shoe of his Nikon DSLR to position it in front of the pop-up flash.

FabLab Helps The Developing World Set Up Long-distance Wireless Ethernet

The wooden frame seen above hosts a parabolic reflector making up one side of a wireless network link. This is a Fab Lab project called FabFi which uses common networking hardware to setup long-distance wireless Ethernet connections. It’s a bit hard to tell in the image above, but the reflector focuses radio waves on the antennae of a router we’re quite familiar with, the Linksys WRT54G. It’s held upside-down in an enclosure meant to protect it from the elements. The node above manages to complete a connection spanning 2.41 miles!

One of the core values of the project is to develop hardware that is easy to build with limited resources, then to make that knowledge freely available. Anyone who has the ability to download and print out the 2D design file can build a reflector for themselves. As we’ve seen in other projects, paper stencils and hand tools can handle this job with no need for a laser-cutter (which was used for the prototype). WRT54G routers are inexpensive and the project uses the open source firmware OpenWRT. They can be run from 12VDC power which means a car battery works when mains power is not an option. The system has been running in Afghanistan for two years and hardware failure is still in the low single-digits.

[Thanks das_coach]