Printing Circuitry On A RepRap

Over on the RepRap blog, [Rhys] has been experimenting with molten metal to build circuits with the RepRap.

Last June, [Rhys] found a neat alloy made of Tin, Bismuth, and a little bit of Indium that melts at around 130° C, and has just the right properties to be extruded with a standard RepRap setup. The results were encouraging, but the molten metal quickly dissolved the brass and aluminum nozzles [Rhys] was pushing liquid metal through.

The solution to this problem was solved by anodizing the heck out of a RepRap nozzle to make a hard, protective oxide layer. Already [Rhys] has logged hundreds of hours squirting molten metal out of his RepRap with no signs of any damage to the nozzle.

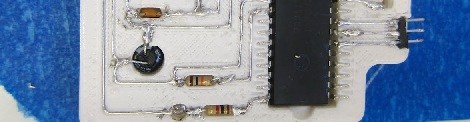
Since [Rhys] figured out how to print in metal, he whipped up an extremely minimal Sanguino board. You can see this RepRapped PCB running a LED blink program after the break. Now to work on the RepRap pick and place…
Continue reading “Printing Circuitry On A RepRap”

Mixing Colors On The Reprap

3d printing has come huge strides in ability to construct detailed objects. Unfortunately, color is still a considerable limitation. Here, some people at the Reprap blog are having fun coming up with an extruder head that actually mixes two colors as it deposits them. Don’t confuse this with the dual head that Makerbot is touting that allows you to switch colors on the fly, this is a single head that actually has a cavity where the material is melted, then stirred to create a combination of the two. It is an interesting method of overcoming a limited supply of colors.

Having this extra stirring chamber means that there would be a small amount of material wasted any time that you wanted to make a change to the color, as it would have to be purged. There are some interesting thoughts in their comments on how to use this extra material most efficiently.

Solidoodle, A $500 3d Printer

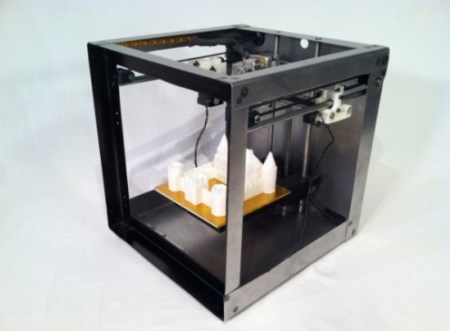
3D printers are very popular right now. We’ve seen them go from an interesting project to multiple commercial entities. Makerbot seems to be the poster child for the commercial side of things, at least they were. Their former COO [Samuel Cervantes] is now in charge of a new company called Solidoodle. Their main product is a complete 3d printing kit for $499. You supply power and a computer.

The Solidoodle is capable of building things 6″x6″x6″. The quality seems to be comparable to most of the others we’ve seen. They tout a .1mm layer thickness in HD mode (makerbot shows .2-.3mm). Not bad considering it is less than 1/3 the price of the makerbot replicator with a single extruder. The video after the shows it in action, as well as both with the optional case and door and without.

Printing Point-to-point Circuits On A 3D Printer

[CarryTheWhat] put up an Instructable on his endeavours in printing circuit boards for solder free electronics. He managed to print a flashlight where the only non-printed parts are a pair of batteries and a couple of LEDs.

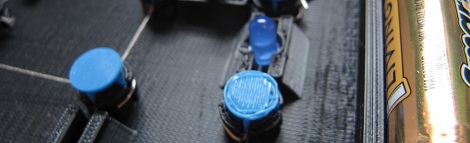
The circuit is a weird mix of point to point and Manhattan style circuit construction; after modeling a printed plastic plate, [CarryTheWhat] added a few custom component holders to hold LEDs, batteries, and other tiny electronic bits.

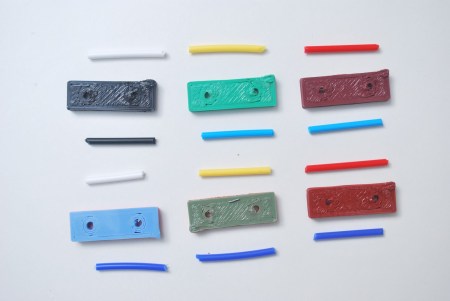
To deliver power to each electronic bit, the components are tied off on blue pegs. These pegs are attached to each other by conductive thread much like wirewrap circuit construction.

Right now, the circuits are extremely simple, but they really remind us of a few vintage ham radio rigs. While this method is most likely too complex to print 3D printer electronics (a much desired and elusive goal), it’s very possible to replicate some of the simpler projects we see on Hackaday.

[CarryTheWhat] put the models and files up on GitHub if you’d like to try out a build of your own.

Printing Custom Whistles For Everyone At Your RepRap Conference

When [Josef Prusa] speaks at a conference extolling the virtues of 3D printing, he likes to give out printed objects to show off the possibilities home-brew fabrication. A favorite of [Prusa] are whistles – they’re functional and show off exactly what a 3D printer can do. Printing out hundreds of whistles is a job for a factory and not a printer, so [Prusa] decided to customize each whistle with the initials of a conference attendee.

When [Prusa] was asked to attend the INFOTRENDY conference in Bratislava, he had a small audience (only 150 people) and a list of all the attendees a week before hand. It was the perfect scenario to whip up a Python script to generate the models for a whistle with the initials of each attendee emblazoned on the side.

The WhistleGen code is up on [Prusa]’s GitHub ready to print out custom whistles for your next conference. While the capabilities of WhistleGen are limited to just two letters of text, we’re sure someone will figure out a way to automate the generation custom conference badges very shortly.

See the example he sent us after the break.

Continue reading “Printing Custom Whistles For Everyone At Your RepRap Conference”

Automated Bed Leveling With Our 3D Printer

Anyone with a RepRap or other 3D printer knows how much of a pain leveling the bed is. To get a good quality print, the bed – the surface the printer prints on – must be exactingly level, and may the engineering gods help you if your surface has the slightest bump in it. [Atntias] is developing a solution to this problem: an auto leveling platform that shouldn’t require any parts at all if you already have a metal bed.

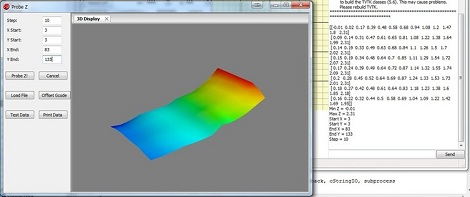
The idea is incredibly simple: Just ground your metal bed, and apply a small voltage to the tip of your hot end. [Atntias]’ code (available on GitHub) probes the surface of the bed and shoots out a 3D mesh of your current bed profile. This can be used as a GCode offset, so the bottom of your print is always directly on the top of the bed.

Although the utility of leveling a bed down to the micron level is of questionable utility for 3D printers, it’s vitally important if you want to mill a PCB on your printer. [Atntias] says his idea is currently being implemented into the Marlin firmware, so it looks like another firmware update is in our future.

Thanks go to [technodream] for sending this one in. Check out the video after the break to see the bed leveling process in action.

Continue reading “Automated Bed Leveling With Our 3D Printer”

Print In Chocolate, Sugar, And Clay With A Universal Paste Extruder

With a glut of Easter candy acquired over the last week, you might be thinking what to do with mountains of chocolate and other sugary delights. How about sending them through a 3D printer with [RichRap]’s universal paste extruder?

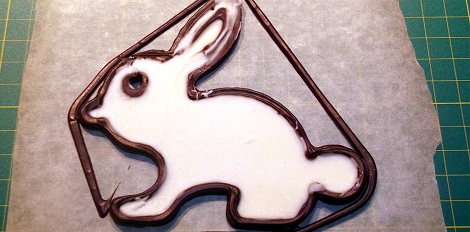
[RichRap]’s extruder uses a common 10cc syringes slowly squeezed by an off-the-shelf stepper motor. Chocolate wasn’t the only goal for this build;  [RichRap] also tested out cake icing, corn chip dough, muffin and sponge cake batter with his new toy. The most interesting paste in our humble opinion is porcelain ceramic clay. [RichRap] was able to make some very nice 3D printed greenware, but we’ll withhold our judgement until the ceramic parts are fired later this week.

After the break you can check out the introduction video for the Universal Paste Extruder, as well as a quick glimpse of [RichRap]’s very cool porcelain clay prints. We’re very interested in the ceramics printed with this extruder, if only for printing reprap parts that will be exposed to plastic-melting temperatures.  Of course, all the files to build your own paste extruder are up on Thingiverse.

Tip ‘o the hat to [Josef Prusa] for sending this one in.

Continue reading “Print In Chocolate, Sugar, And Clay With A Universal Paste Extruder”