Hackaday Links: March 3, 2014

hackaday-links-chain

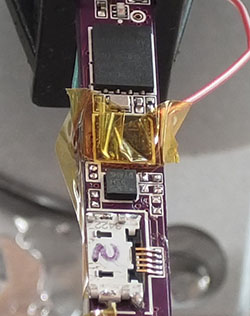
If you’re playing along with Twitch Plays Pokemon, you might as well do it the right way: with the smallest Game Boy ever, the Game Boy Micro. [Anton] needed a battery replacement for this awesome, discontinued, and still inexplicably expensive console and found one in a rechargeable 9V Lithium battery. You get two replacement cells out of each 9V battery, and a bit more capacity as well.

Every garden needs garden lights, right? What does every garden light need? A robot, of course. These quadruped “Toro-bots” react to passersby by brightening the light or moving out of the way. It’s supposed to be for a garden that takes care of itself, but we’re struggling to figure out how lights will do that.

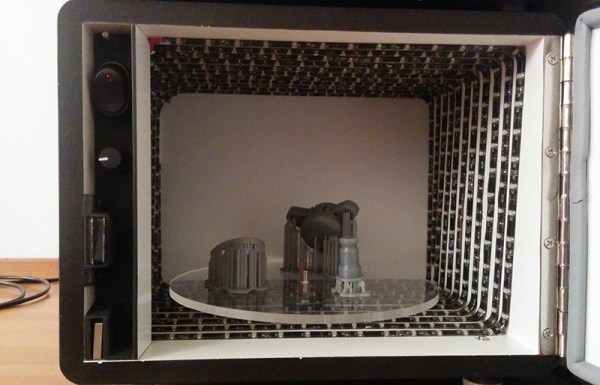
Flexiable 3D prints are all the rage and now resin 3D printers are joining the fray. The folks at Maker Juice have introduced SubFlex, a flexible UV-curing resin. The usual resins, while very strong, are rock solid. The new SubFlex flexible resins are very bendable in thin sections and in thicker pieces something like hard rubber. We’re thinking custom tank treads.

Remember this post where car thieves were using a mysterious black box to unlock cars? Looks like those black boxes have moved from LA to Chicago, and there’s still no idea how they work.

Have a Google Glass? Can you get us on the list? [Noé] and [Pedro] made a 3D printed Google Glass adapter for those of us with four eyes.

Fabricate Your Own 7-Segment Displays

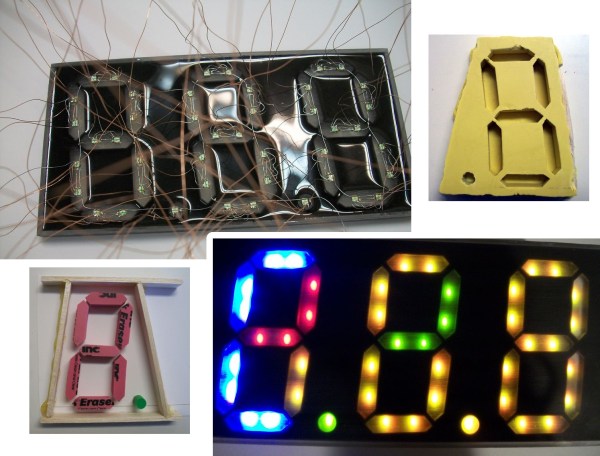
We see more and more projects that use custom molds and casting materials. The latest is this custom seven segment display which [Ray74] put together. The idea of making your own LED displays couldn’t be much easier than this — everything but the LEDs and wire is available at the craft store.

He started by making models of each segment out of pink erasers. The lower left image of the vignette above shows the eraser segments super glued to some poster board. The decimal is a pencil eraser, with a fence of wood to contain the molding material. Amazing Mold Putty was mixed and pressed into place resulting in the mold shown in the upper right.

From there, [Ray] cast the clear epoxy three times. Once dried the clear pieces were sanded, which will shape them up physically but also serves to diffuse the light. They were then placed inside of another mold form and an epoxy pour — this time doped with black enamel paint — finishes the 7-segment module. The final step is to glue the LEDs on the back side and wire them up.

This definitely trumps the build which Hackaday Alum [Kevin Dady] pulled off using hot glue sticks as light pipes.


Fine Furniture Kegerator Serves A Lot Of Beer; Smokes A Lot Of Cigars

diy-kegerator

This kegerator looks like a piece of fine furniture but closer examination of the build shows that it is at least partially hacked together. As with most of the multi-keg variants on the idea this starts with a chest freezer, but it doesn’t utilize a custom collar as is often the case.

After cutting the holes in the lid of the freezer for these beer towers [Lorglath] began building a wooden frame around it using pocket hole screws. Despite his efforts to keep things plumb and square, there was some… creative… shimming done when it came time to wrap it in oak veneer boards and add the trim pieces. But knowing where to hide the flaws got him through this part of the project and onto the surface finish. Look closely at the image above, all of those scraps are cigar rings. That represents a lot of smoke!

The rings were laid down in layers, with thin resin pours between each. To achieve a smooth and clear finish a heat gun was used to level the surface and pop any bubbles that made their way into the goo. The finished version has room to store eight kegs which are connected to the octet of taps above. That’s a lot of beer to brew, and a lot to drink!

3D Printering: You Want UV Resin?

printering

Just a few short months ago, 3D printing with stereolithography was an uncommon and very expensive proposition. Consumer-oriented SLA machines such as the Form1 and the B9Creator are as expensive as the upper echelons of squirting plastic printers and the community behind these machines isn’t even as diverse as the forums for the fly-by-night printers featured on Kickstarter every week.

This may be about to change with last month’s reveal of the Peachy Printer, a remarkably clever stereolithography printer that requires no special equipment, hardly any electronics, and costs $100. Even if the folks behind Peachy never ship a single unit, their clever engineering ensures that stereolithography will be a staple in the makers toolbox in the near future.

There is, of course, the problem of material. While plastic filament can be bought  just about everywhere, UV curing resin is a little harder to come by and much more expensive per kilogram or liter. Where then does the stereolithography experimenter get their hands on some of this magical material from the future?

Before we get to the article…

I’ve been writing a 3D Printing column once a week for a few months now, and I’m running out of ideas. If you have something in the 3D printer world you’d like to see covered in a little more depth than the standard Hackaday post, send in a tip. I’ll send you a few Hackaday stickers if it’s a good idea.

Continue reading “3D Printering: You Want UV Resin?”

Scratch-built Bottle Cap Coffee Table Pulses To The Music

scratch-build-bottlecap-coffe-table

This isn’t a thrift-store coffee table modified as a craft project. [Dandujmich] built it from the ground-up using framing lumber, bottle caps, plastic resin, and some electronics for bling.

The first step was to see if he had enough caps on hand for the project. It’s hard to grasp how many were used just by looking at it, but the gallery description tells us there’s about 1700 which went into the design! From there he grabbed some 2x4s and began construction. The table legs started with two end assemblies built by doweling the legs to the end cross pieces. From there he cut a rabbit on the side rails and screwed them to the leg assemblies from the inside.

The tabletop includes a frame with a recessed area deep enough to keep the caps below the surface. After spending about ten hours super gluing all of the caps in place he mixed and poured two gallons of the resin to arrive at a glass-like finish. The final touch is some custom hardware which pulses two rows of embedded LEDs to music being played in the room. The video after the break isn’t fantastic, but it gives you some idea of how that light rig works.

Continue reading “Scratch-built Bottle Cap Coffee Table Pulses To The Music”

Reproduce 3D Printed Models By Making Your Own Molds

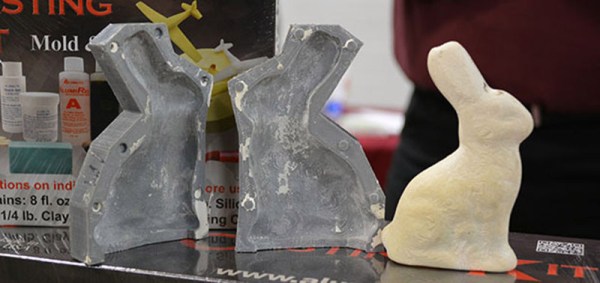
Need fifty copies of that 3D printed whirligig you’re so proud of? It might be faster to just cast copies by using the 3D printed model to make a mold. [Micah] found himself in this situation and managed to cast one copy every 10-12 minutes using the mold seen above.

With the object in hand, you need to find a container which will fit the mold without too much waste. The bottom half of the mold is then filled with modeling clay, a few uniquely shaped objects to act as keys, and the model itself. After getting a good coating of release agent the rest of the mold is filled with a silicone rubber product which is sold for mold making. This creates one half of the mold. After it cures the clay and key objects are removed, everything is sprayed with the release agent, and the other half of the mold is poured.

Now your 3D object can be copied by pouring two-part resins in the to shiny new mold.

Running Into The Form 1 Printer At Maker Faire

[youtube=http://www.youtube.com/watch?v=yxNqMg_dwJI&w=470]

The Form 1 resin printer Kickstarter met its funding goal in just about 8 hours, and after five days is on track to be the most successful Kickstarter to date. Being so successful meant we had to drop by the FormLabs booth at Maker Faire to see what the hubub is.

From the sample prints floating around the booth, the Form 1 printer has amazing resolution – a 3 inch tall statue of a Greek god had as many features as a life-sized statue.

In the video (both above the fold and after the break), [David Cranor] goes over the features and finishing process of objects made on the Form 1.

Continue reading “Running Into The Form 1 Printer At Maker Faire”