Ethernet For Hackers: Equipment Exploration

Last time, we talked about the surface-level details of Ethernet. They are fundamental to know for Ethernet hacking, but they’re also easy to pick up from bits and pieces online, or just from wiring up a few computers in your home network. Now, there’s also a bunch of equipment and standards that you will want to use with Ethernet – easy to find whether used or new, and typically as easy to work with. Let’s give you a few beacons!

Routers And Switches

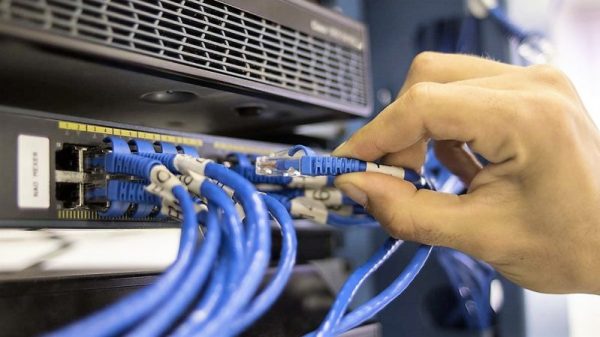
Whenever you see a box with a few Ethernet ports, it’s either referred to as a router, or a switch, sometimes people will even use the word “hub”! Fortunately, it’s simpler than it may seem. A router is a smart device, typically with an OS, that ties two or more networks together – routing packers from one network to another, and typically taking care of things like handing out local IP addresses via DHCP. A switch merely helps Ethernet devices exchange packets between each other on the same level – it’s typically nowhere near as smart as a router gets. Oftentimes, a home router will contain a switch inside, so that you can plug in multiple of your home devices at once. That’s the main difference – a switch merely transmits packets between Ethernet-connected devices, while a router is a small computer taking care of packet forwarding between networks and possibly including an Ethernet switch on the side.
Continue reading “Ethernet For Hackers: Equipment Exploration”

Ethernet For Hackers: The Very Basics

Ethernet is ubiquitous, fast, and simple. You only need two diffpairs (four wires) to establish a 100Mbit link, the hardware is everywhere, you can do Ethernet over long distances easily, and tons of the microcontrollers and SoCs support it, too. Overall, it’s a technology you will be glad to know about, and there’s hundreds of scenarios where you could use it.

If you need to establish a high-bandwidth connection between two Linux boards in your project, or maybe a Linux board and a powerful MCU, maybe make a network between microcontrollers, Ethernet’s your friend. It also scales wonderfully – there’s so much tech around Ethernet, that finding cables, connectors or ICs tends to be dead easy. Plus, the world of Ethernet is huge beyond belief. Ethernet as most of us know it is actually just the consumer-facing versions of Ethernet, and there’s a quite a few fascinating industrial and automotive Ethernet standards that flip many of our Ethernet assumptions upside down.

Now, you might be missing out on some benefits of Ethernet, or perhaps misunderstanding how Ethernet works at all. What does it mean when a microcontroller datasheet says “has Ethernet interface”? If you see five pins on an SBC and the manufacturer refers to them as “Ethernet”, what do you even do with them? Why does the Raspberry Pi 4 SoC support Ethernet but still requires an extra chip, and what even is GMII? Continue reading “Ethernet For Hackers: The Very Basics”

Pi-Cast Adds ATX Signalling To KVM

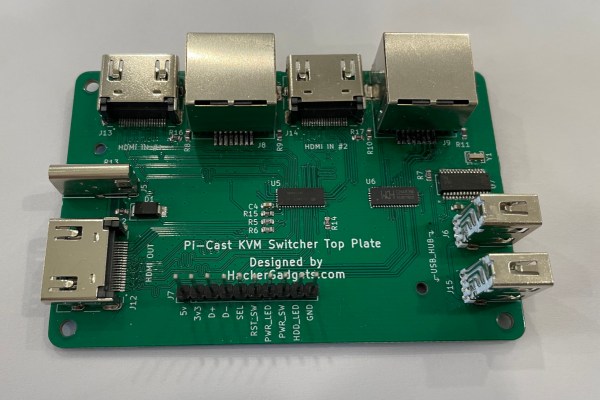
A KVM is a great tool for administering a number of different computers without cluttering one’s desk with extra peripherals, or for having to re-connect the keyboard, video, and mouse to each new machine as needed. For local administration this can save a ton of time and headache. For remote administration, though, a virtual KVM is needed, and although these solutions are pricey it’s possible to build one around a Raspberry Pi for a fraction of the cost. This one adds even more functionality by also switching the ATX signals from the motherboard and simplifying cable management to boot. Continue reading “Pi-Cast Adds ATX Signalling To KVM”

Dremel 3D20 Printer Gets Modern Overhaul

Dremel’s attempt at breaking into the 3D printer market back in 2014 was respectable, if not particularly exciting. Rather than design their own printer, their 3D20 “Idea Builder” was a lightly customized Flashforge Dreamer (itself a Makerbot Replicator clone) with a new warranty and support contract tacked on. It wasn’t necessarily the 3D printer of choice for the hacker and maker crowd, but it was a fairly solid option for folks who wanted a turn-key experience.

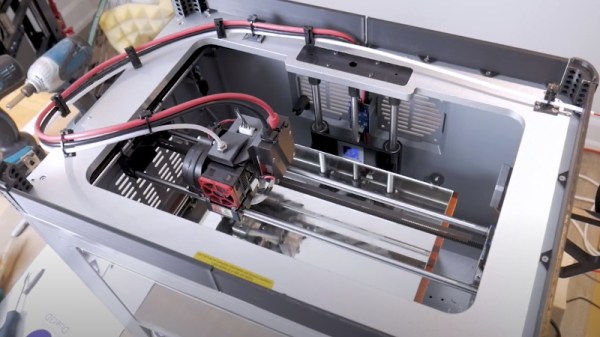
[Chris Chimienti] says he got about 1,000 hours of printing out of his 3D20 before it gave up the ghost. Given the age of the machine and its inherent limitations, he decided to use the Dremel’s carcass as the base for a very impressive custom 3D printer with all the modern bells and whistles. He kept the enclosure, rods, bearings, and the stepper motors, but pretty much everything else was tossed out. Some of the replacements are off-the-shelf parts, but it’s the custom designed elements on this build that really help set it apart.

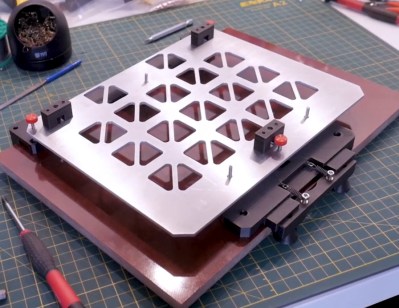
A print bed strong enough to park your car on.

Under the machine, [Chris] has installed a new power supply and a Duet 2 WiFi controller which itself is connected to the new LCD control panel on the front. There’s an external case fan to keep the electronics cool, but otherwise things look a lot neater under the hood than they did originally.

Moving upwards, he’s designed a gorgeous adjustable print bed and a new extruder assembly that cleverly uses RJ45 jacks and Ethernet cables to connect back to the control board. All told, the custom components have taken this once relatively mid-range 3D printer and turned it into something that looks like it wouldn’t be out of place on the International Space Station.

While custom 3D printer builds like this still trickle in from time to time, we’re seeing far fewer now than we did back when machines like the 3D20 hit the market. Most people are more than satisfied with commercial entry-level desktop printers, and aren’t looking for yet another project to tinker with. There’s nothing wrong with that, though we certainly wouldn’t complain if the recent interest into more advanced high-temperature filaments triggered something of a bespoke 3D printer renaissance.

Continue reading “Dremel 3D20 Printer Gets Modern Overhaul”

The Modular Connector And How It Got That Way

They adorn the ends of Cat5 network patch cables and the flat satin cables that come with all-in-one printers that we generally either toss in the scrap bin or throw away altogether. The blocky rectangular plugs, molded of clear plastic and holding gold-plated contacts, are known broadly as modular connectors. They and their socket counterparts have become ubiquitous components of the connected world over the last half-century or so, and unsurprisingly they had their start where so many other innovations began: from the need to manage the growth of the telephone network and reduce costs. Here’s how the modular connector got that way.

Continue reading “The Modular Connector And How It Got That Way”

Vacuum Gauge Display; Arduino Replaces Industrial

Arduinos! They’re a great tool that make the world of microcontrollers pretty easy, and in [cptlolalot]’s case, they also give us an alternative to buying expensive, proprietary parts. [cptlolalot] needed a gauge for an expensive vacuum pump, and rather than buying an expensive part, built a circuit around an Arduino to monitor the vacuum.

pressure-gauge-thumbThis project goes a little beyond simple Arduino programming though. A 12V to 5V power supply drives the device, which is laid out on a blank PCB. The display fits snugly over the circuit which reduces the footprint of the project, and the entire thing is housed in a custom-printed case with a custom-printed pushbutton. The device gets power and data over the RJ45 connection so no external power is needed. If you want to take a look at the code, it’s linked on [cptlolalot]’s reddit thread.
This project shows how much easier it can be to grab an Arduino off the shelf to solve a problem that would otherwise be very expensive. We’ve been seeing Arduinos in industrial applications at an increasing rate as well, which is promising not just because it’s cheap but because it’s a familiar platform that will make repairs and hacks in the future much easier for everyone.

Adding A Serial Port Through An RJ45 Connector

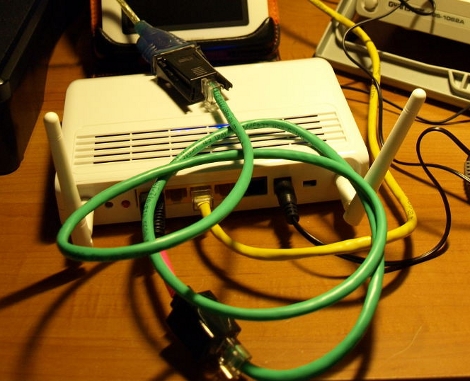
[Mike Lu] likes to add serial ports to his routers to use for debugging but he didn’t want to drill holes in his new RT-N12. After a bit of head-scratching he thought about repurposing the four unused wires on one of the RJ45 Ethernet connectors. This would allow him to interface with the necessary signals and still have the option of using that port for a network connection. The first step was to build the circuit to output the correct serial levels and connect it to the unused pins on the jack. Next, to separate serial and Ethernet on the outside of the router he build a short adapter cable.

This is an elegant solution if you’re looking for zero case modifications. But if you don’t mind a few inconspicuous holes we love the serial port used on this Dockstar.